This tutorial is a part of the 31 Days to a Handmade Christmas series.
This post contains an affiliate Link.

Sally Clarkson has taught and inspired me more than anyone else when it comes to making my home a haven for my family as well as a space for showing hospitality to friends and strangers .
The quote above is from her book, The Mission of Motherhood, (which I wholeheartedly recommend!). Later in the chapter, Sally states that she wants her home to be “the best place to be in the minds of my family.”
There are many things that we can do to make our homes beautiful, comfortable places for our loved ones. And what we do will often vary depending on our tastes, talents, and resources.
One simple thing we can do involves the times we gather around the table.
The little touches of setting the table, making pretty or seasonal centerpieces, and using linens such as table runners, table cloths, or napkins, go a long way in creating an inviting atmosphere in our homes.
When it comes to table linens, I prefer table runners because they stay clean longer– which means less laundry for me! And when you have boys who love dirt, a toddler potty training, and a baby army crawling her way through the house (are my carpets really that dirty?!), less laundry is kind of a big deal.

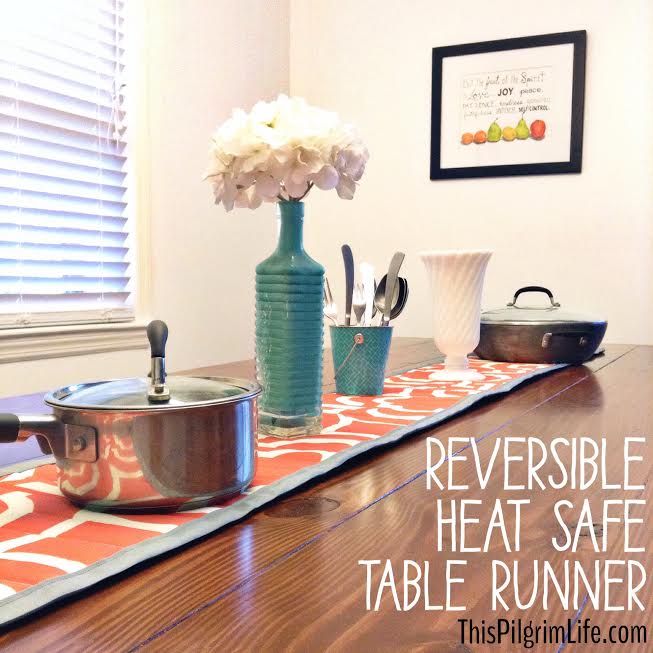
This table runner is rather special.
It is reversible. Any two-for-one is a good deal. Sometimes I make each side for a different season. Other times I like to make one side more formal and one side more fun. It’s up to you.
It is heat safe. With a layer of Insul-brite and an extra layer of padding, hot serving dishes can be placed directly on top. No worrying about remembering the hot pads or having enough trivets. The table runner will hold as many dishes as will fit on the length of the table.
And, of course, these table runners make a great gift! Personalize the colors and patterns according to the recipient’s home colors and personal style. As an extra component, wrap it up with a gift of homemade spice blends.
(Need help sewing? Check out these tips and resources for beginning sewers. And (bonus!) this project is ONLY straight lines!)
How to Make Your Own Reversible Heat Safe Table Runner
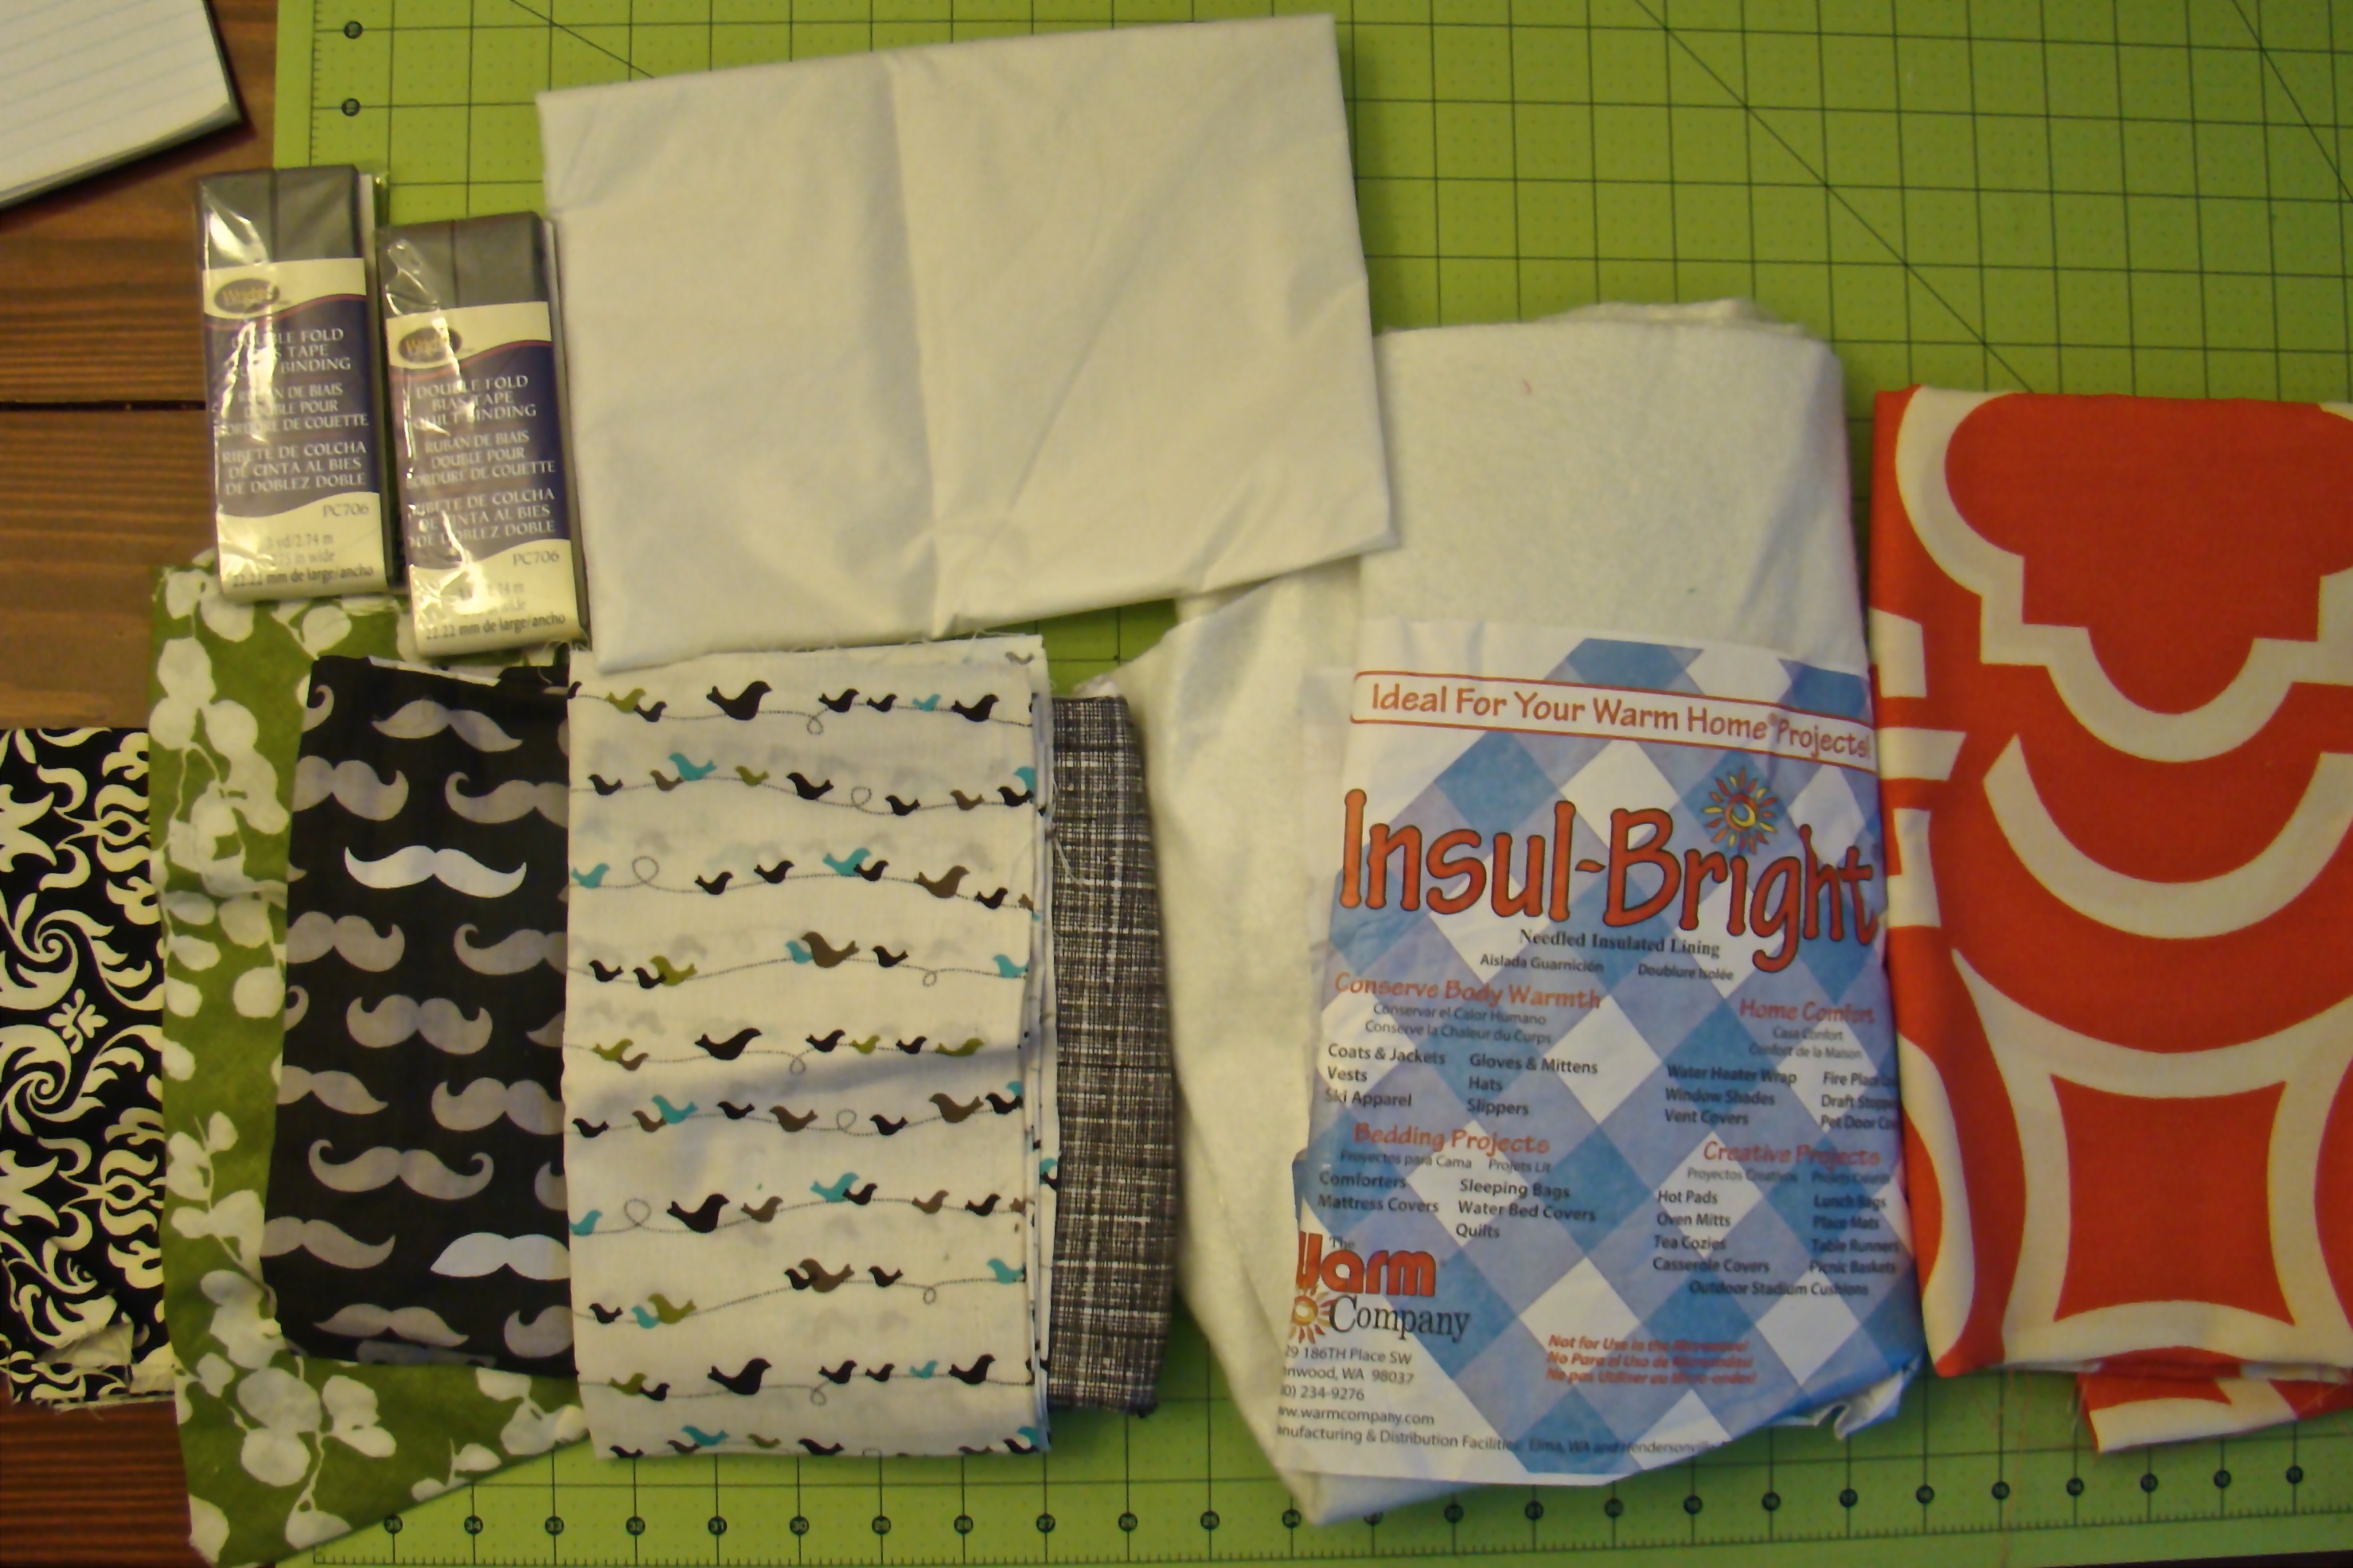
What You Need:
- Coordinating fabric for quilted side (scraps work great!)
- Home decor/heavier weight fabric for back side
- Medium-weight fusible interfacing
- Insul-bright
- Batting or flannel for additional interior padding
- 2 packages double fold bias tape (3yds each)
Instructions:
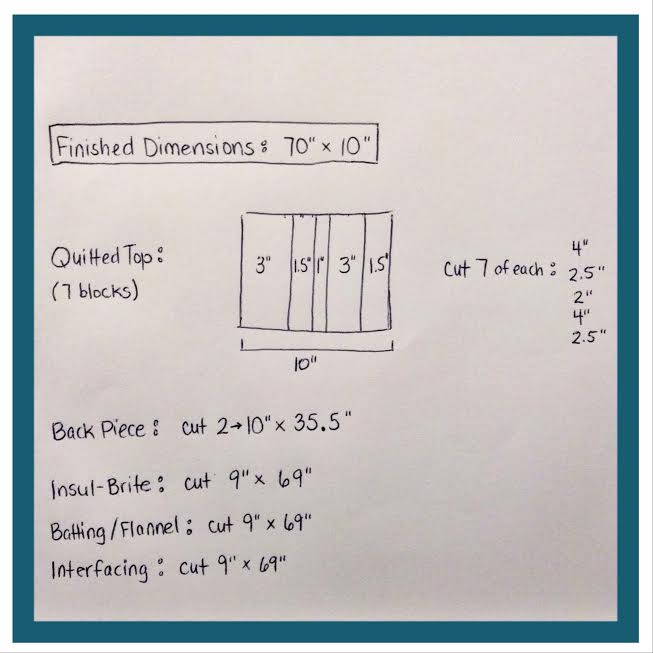
1. Cut the pieces.
- Quilted side: (cut 7 of each): 4″x10″, 2.5″x10″, 2″x10″, 4″x10″, 2.5″x10″
- Interfacing: 9″ x 69″ (Cut the pieces how you need to. I cut three pieces, 9″x23″, because that’s what I had on hand).
- Insul-bright: 9″ x 69″
- Batting/Flannel: 9″ x 69″
- Back side: Cut 2 pieces, 10″ x 35.5″
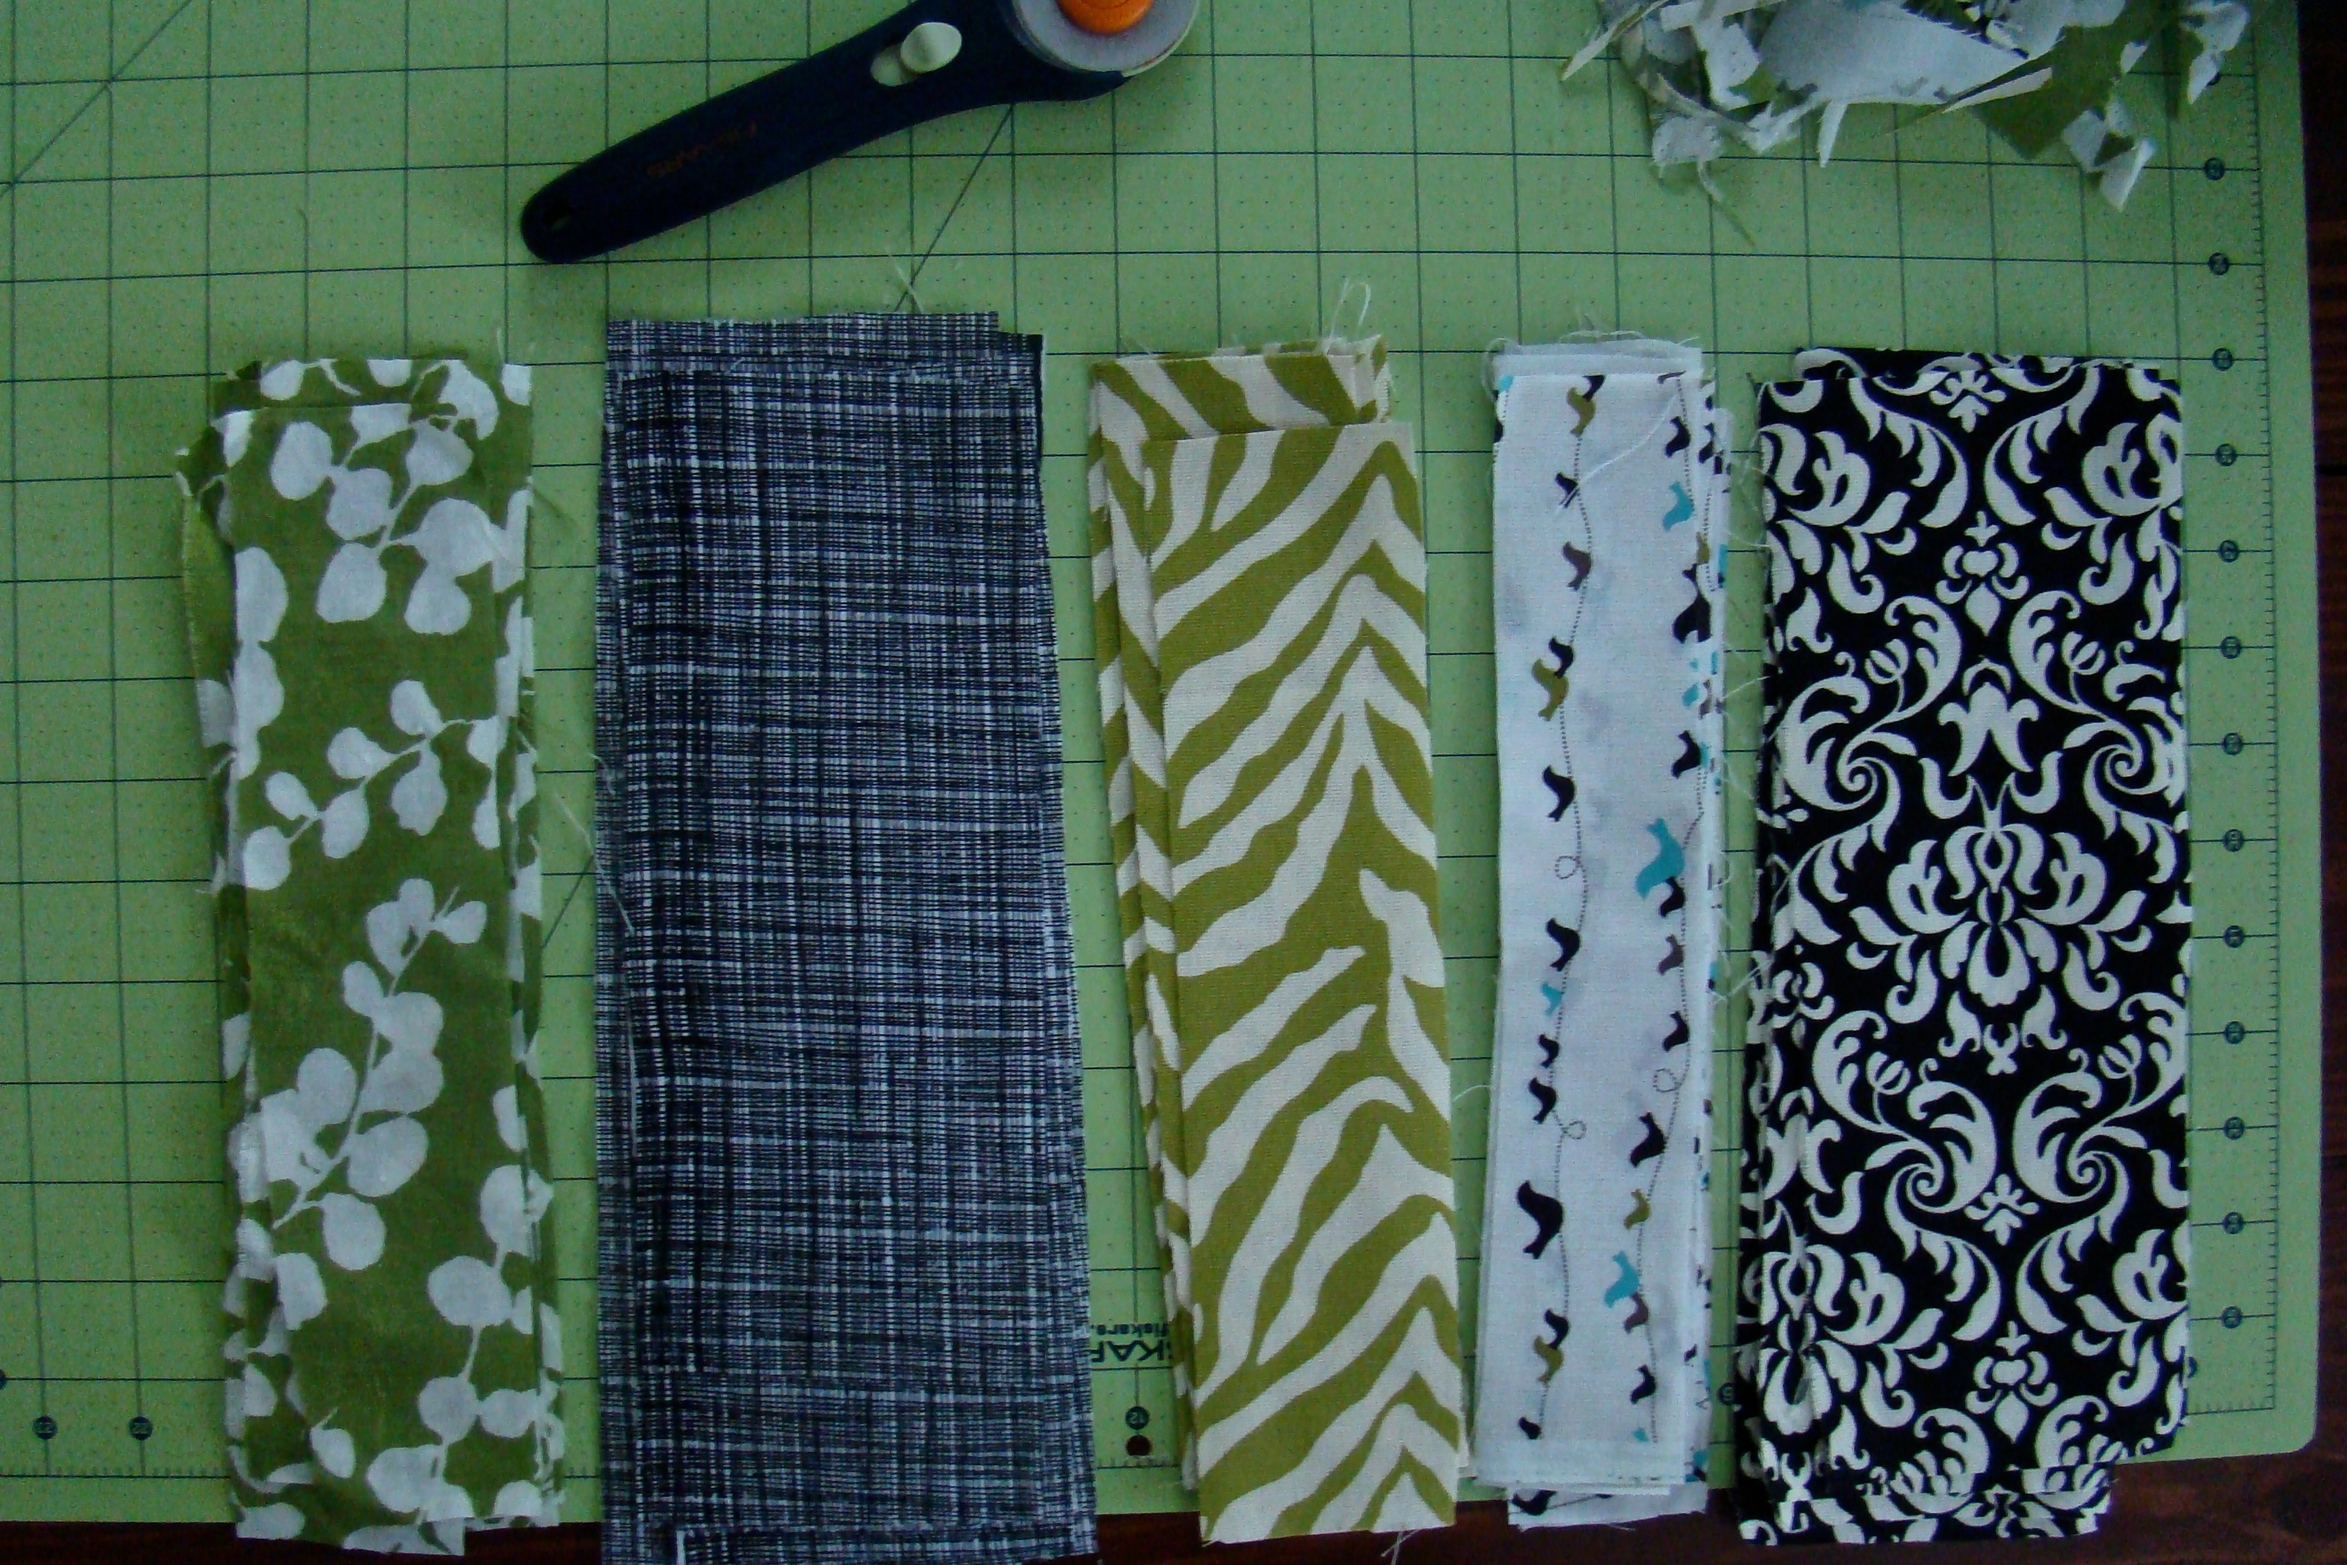
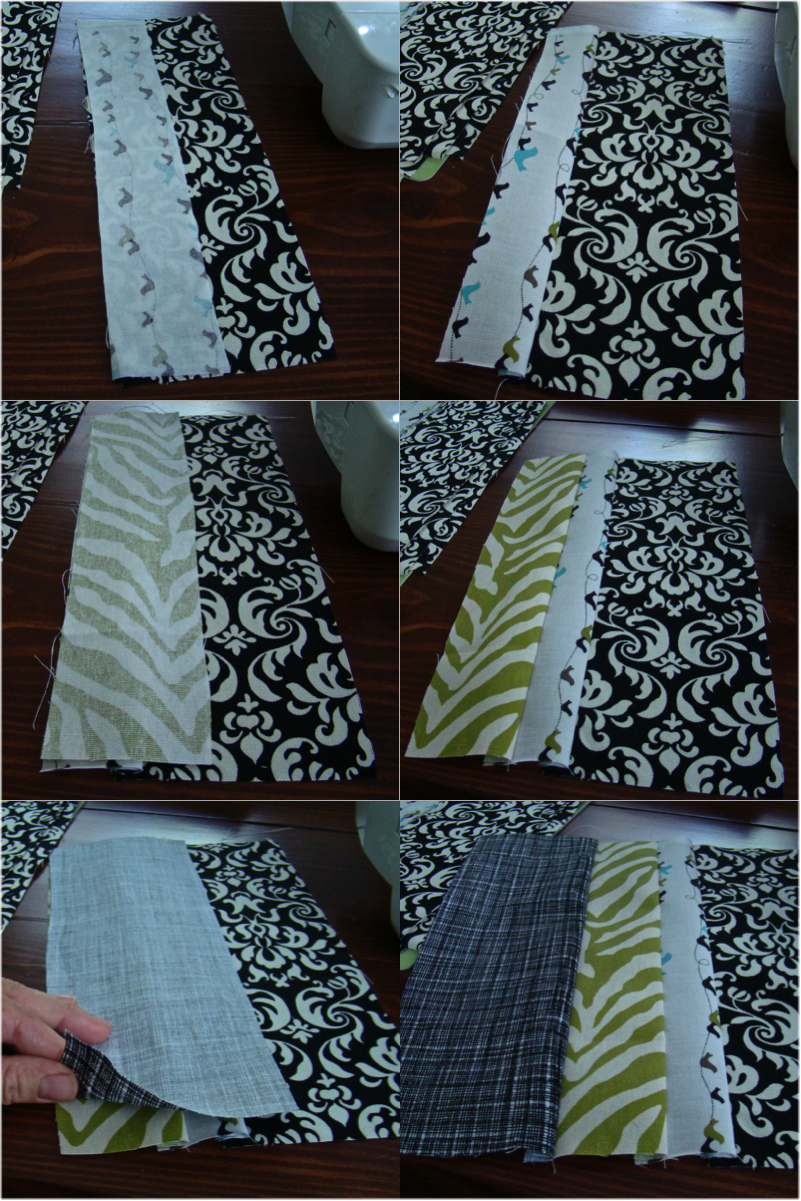
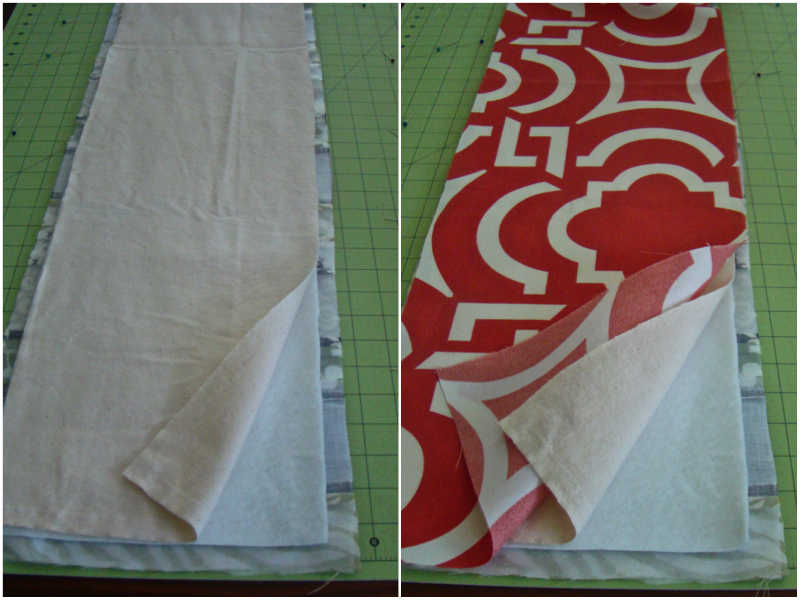
2. Sew the strips of fabrics together to make the quilted side.
Determine the pattern you want your strips to follow and then lay out the stacks of each fabric in that order. (See the second picture in step 1).
To sew the strips together, place them right side together and sew down the long edge with a half-inch seam. Open up the seam and lay the pieces out flat. Place the next piece on top, right sides together, and sew again. Continue this routine until all the pieces are sewn together. See pictures below to further illustrate the directions. Don’t worry about pressing the seams until you are finished.
Do take care to get the seams lined up straight, and check as you go to make sure that the pieces are being sewn together to form a long, straight piece. (As in, that the pieces are not beginning to angle out). If it becomes a little crooked, it can be corrected when you press the quilted pieces out, but it’s best to try and get it as straight as possible.
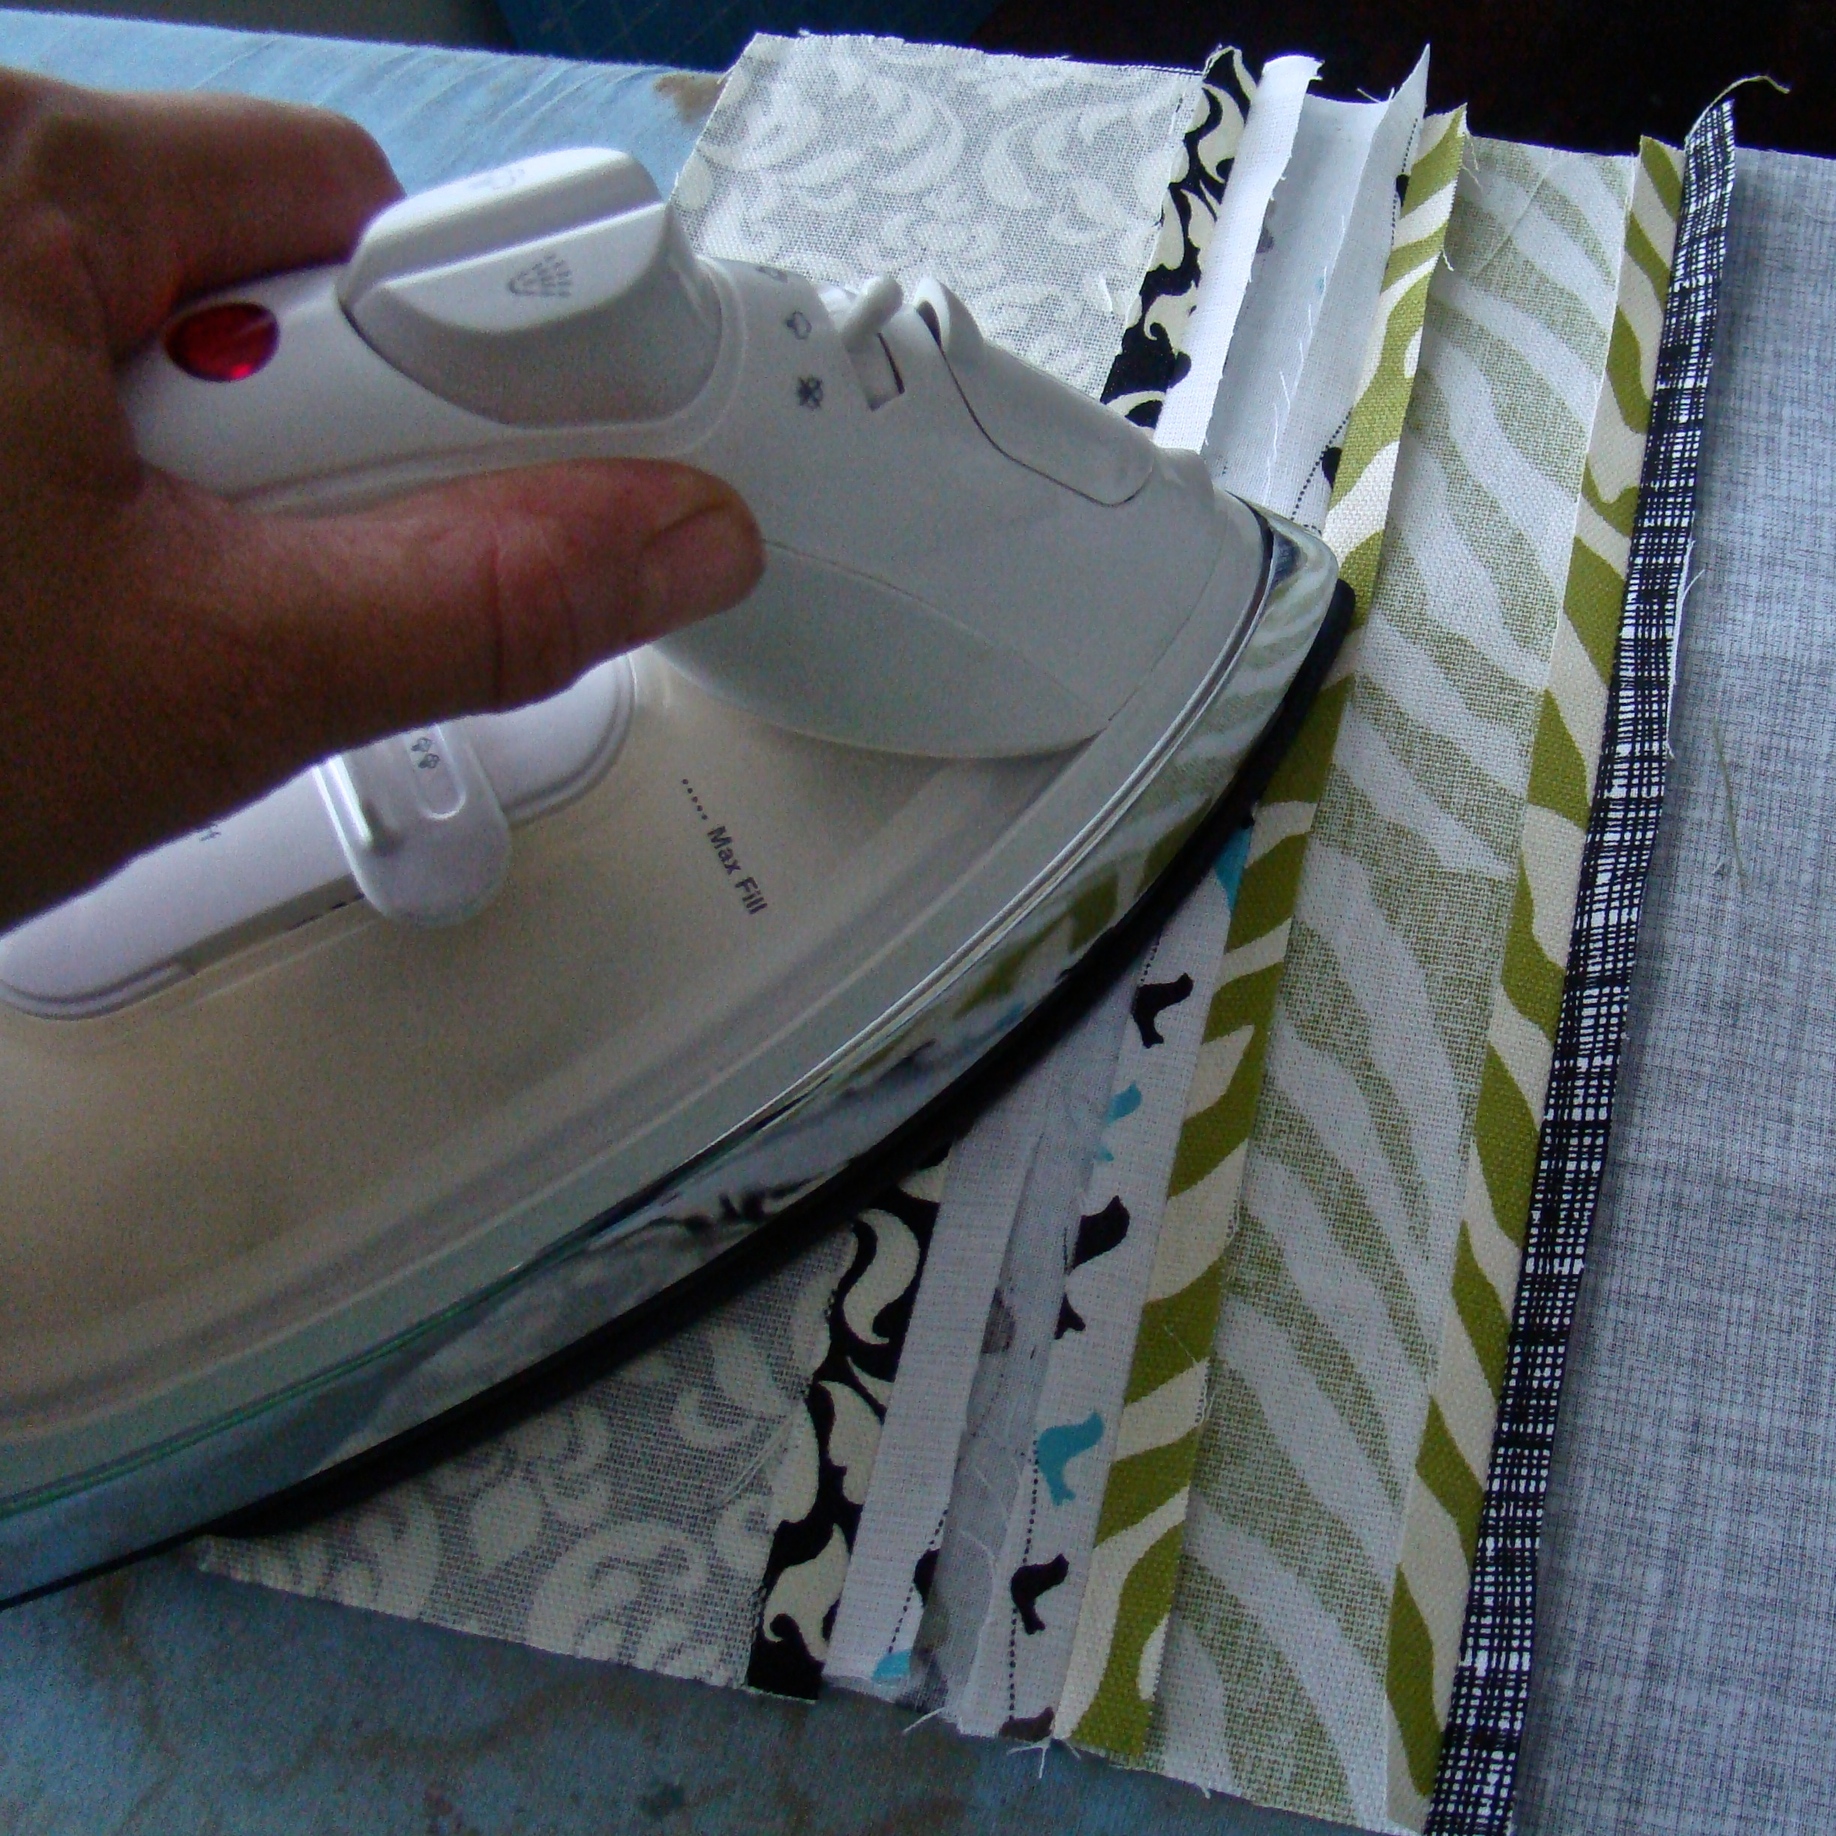
3. Press the seams open. Press the entire quilted piece.
If the quilted pieces got a little crooked, now is the time to correct that. As you press, “force” it into having a straight edge. (The seams should be perpendicular to the long edge). Flatten out any puckering as best you can. After you iron on the interfacing, and then sew all the layers together, any puckering will be much less noticeable.
4. Reinforce the quilted piece. Place the interfacing (bumpy side down) along the center of the wrong side of the quilted piece. Leave a half-inch border around the edges. Iron the interfacing to adhere it to the quilted piece. Flip over and iron the right side again.

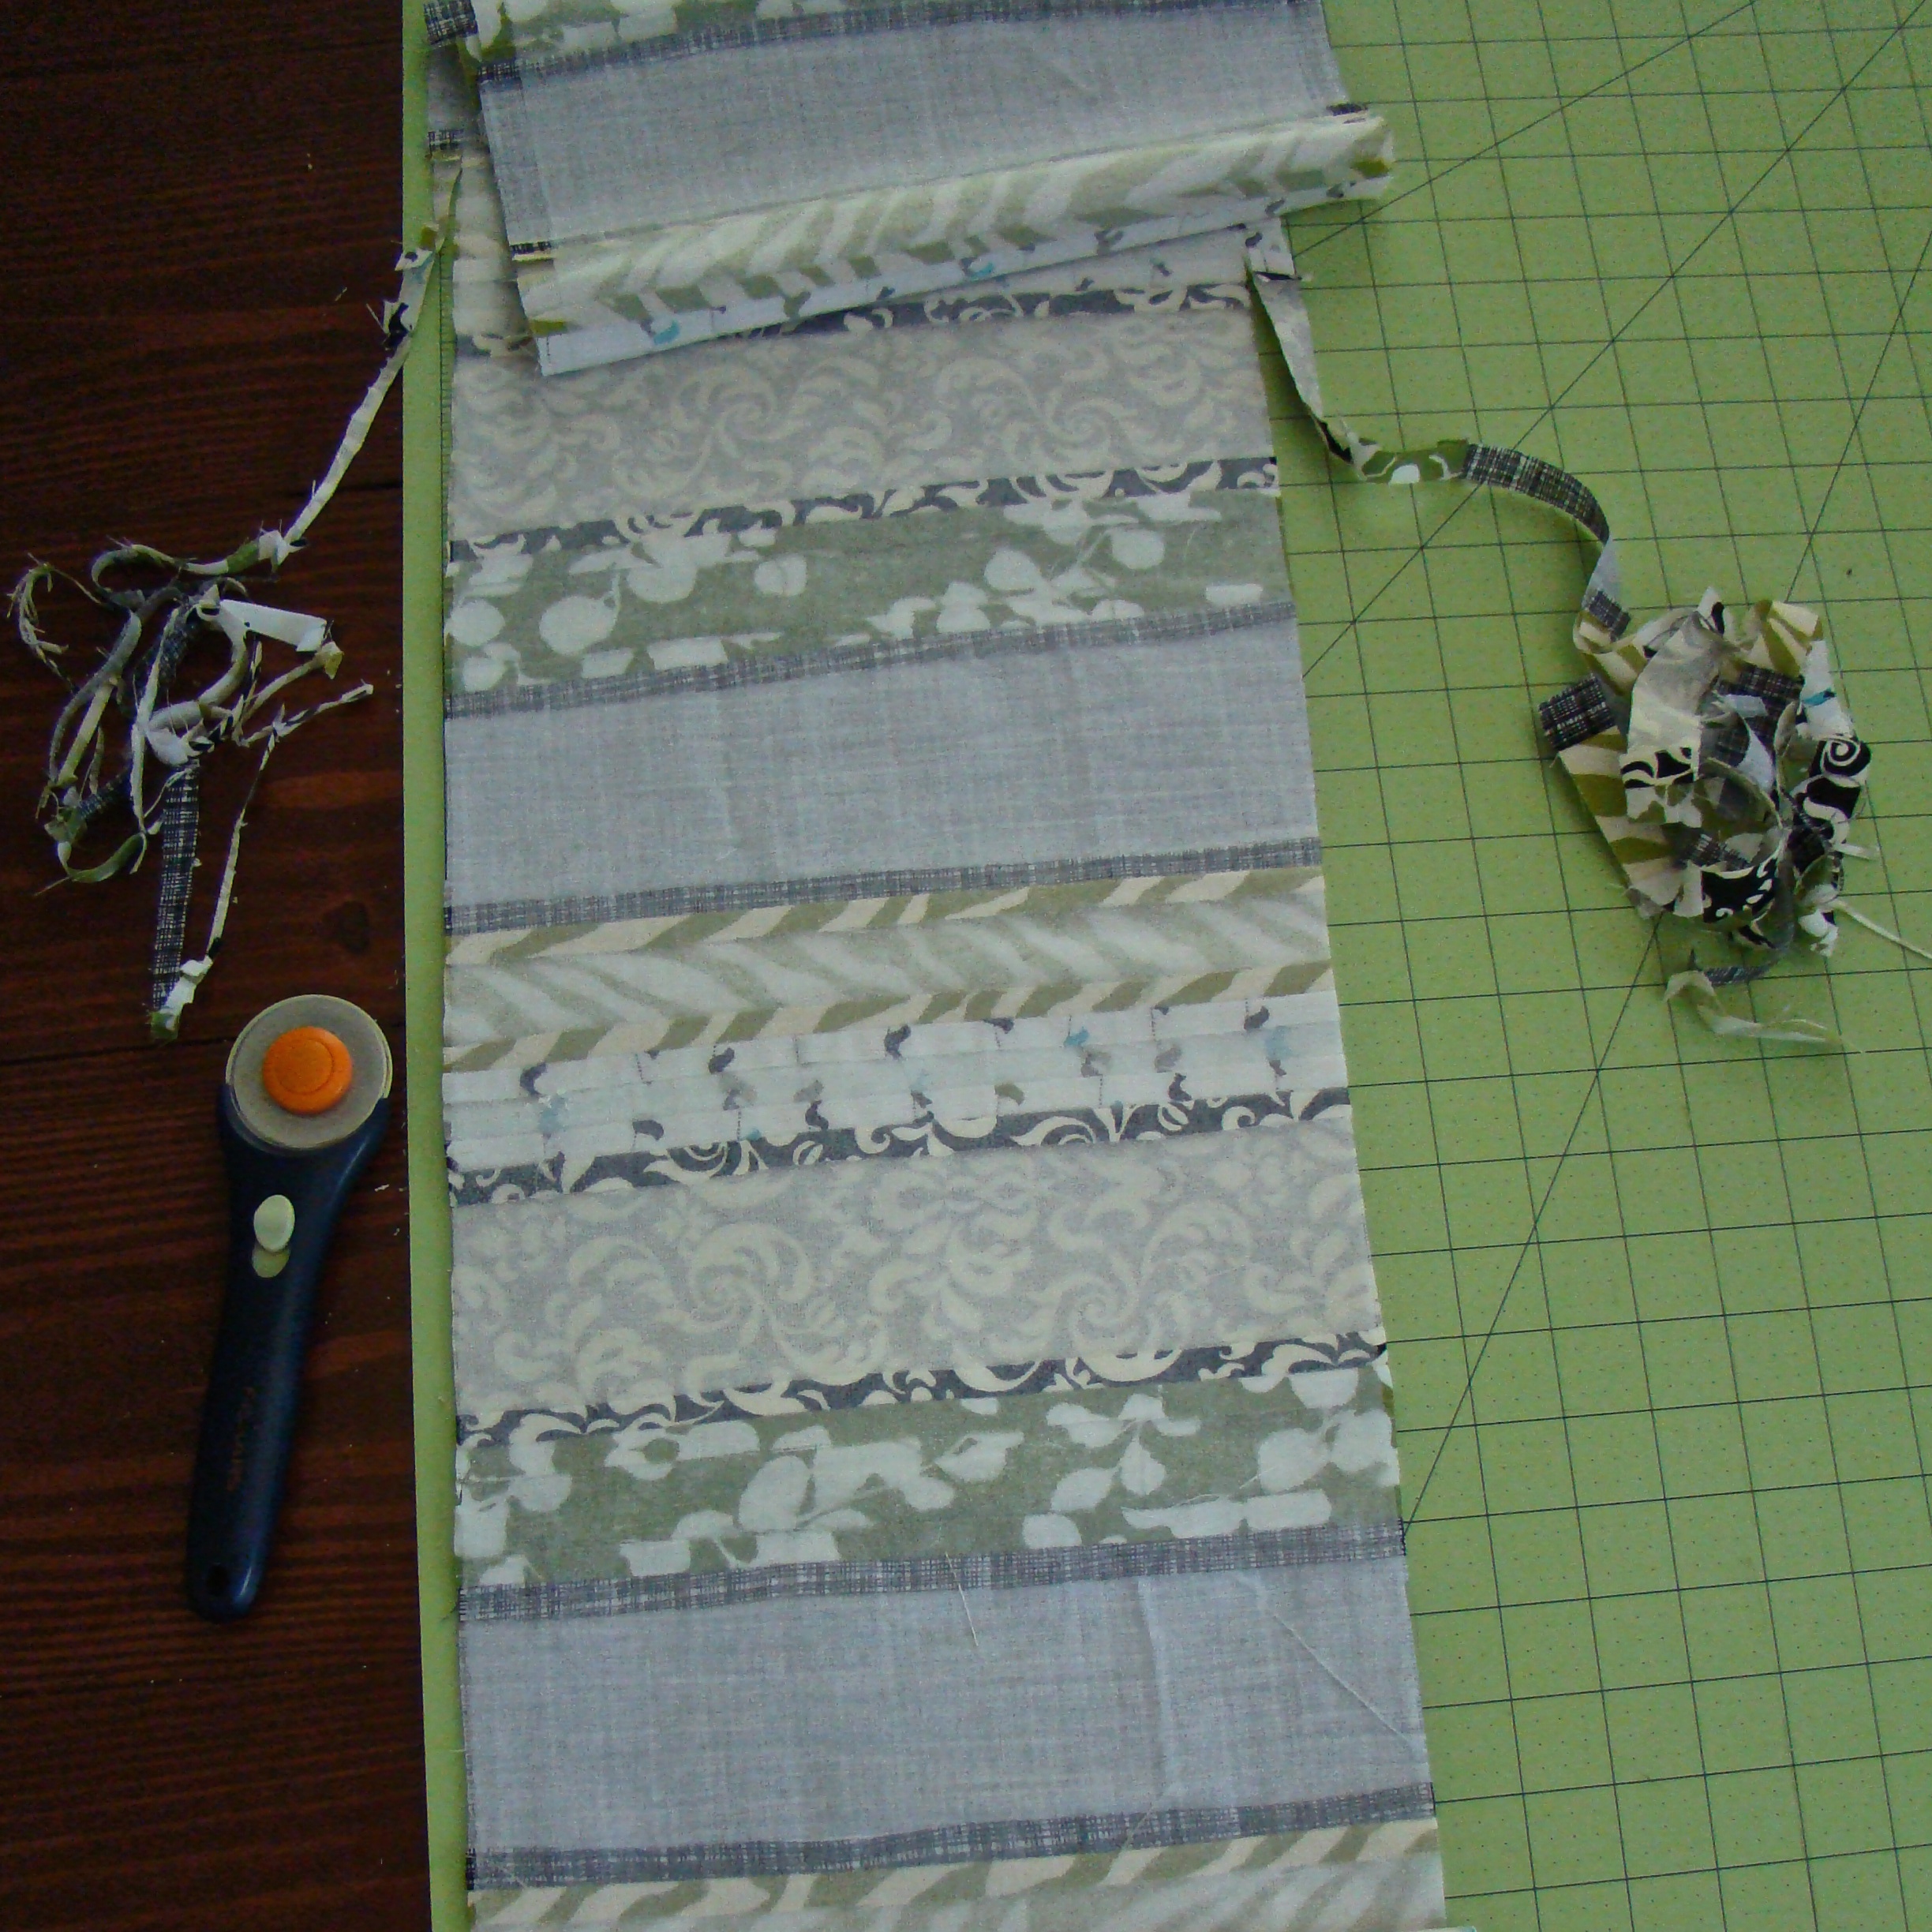
5. Trim the quilted top. After the interfacing is adhered and the top is pressed, lay the top out on a cutting board and trim the excess material down the long edges to make a long piece that is an even ten inches wide from one end to the other.
6. Make the back piece. Place the two back pieces right sides together and sew along one short side with a half-inch seam. Press the seam open.
7. Assemble the table runner.
Lay your pieces out in this order:
Quilted top (right side down), insul-brite, batting/flannel, back side (right side up).
Pin the four layers together. This will take a lot of pins but you want to be sure all the pieces stay put so that you end up with a straight table runner. (I have made my fair share of crooked table runners so I want to save you the trouble!)
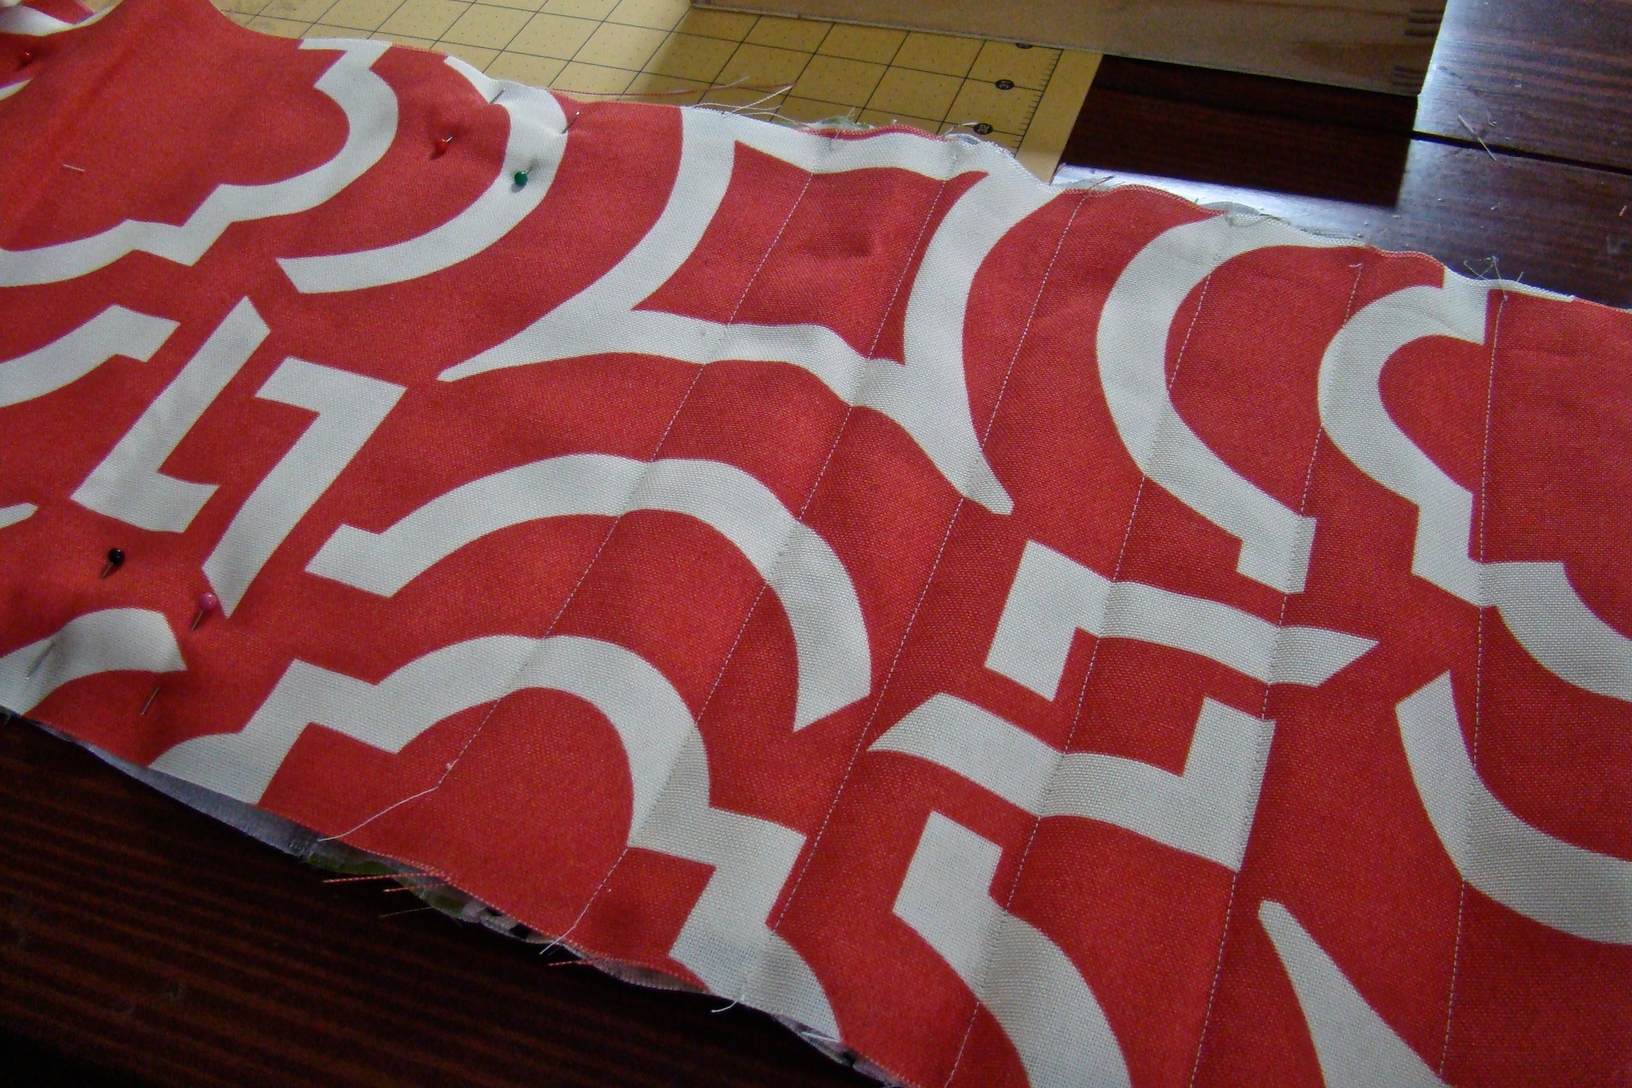
8 Sew the layers together.
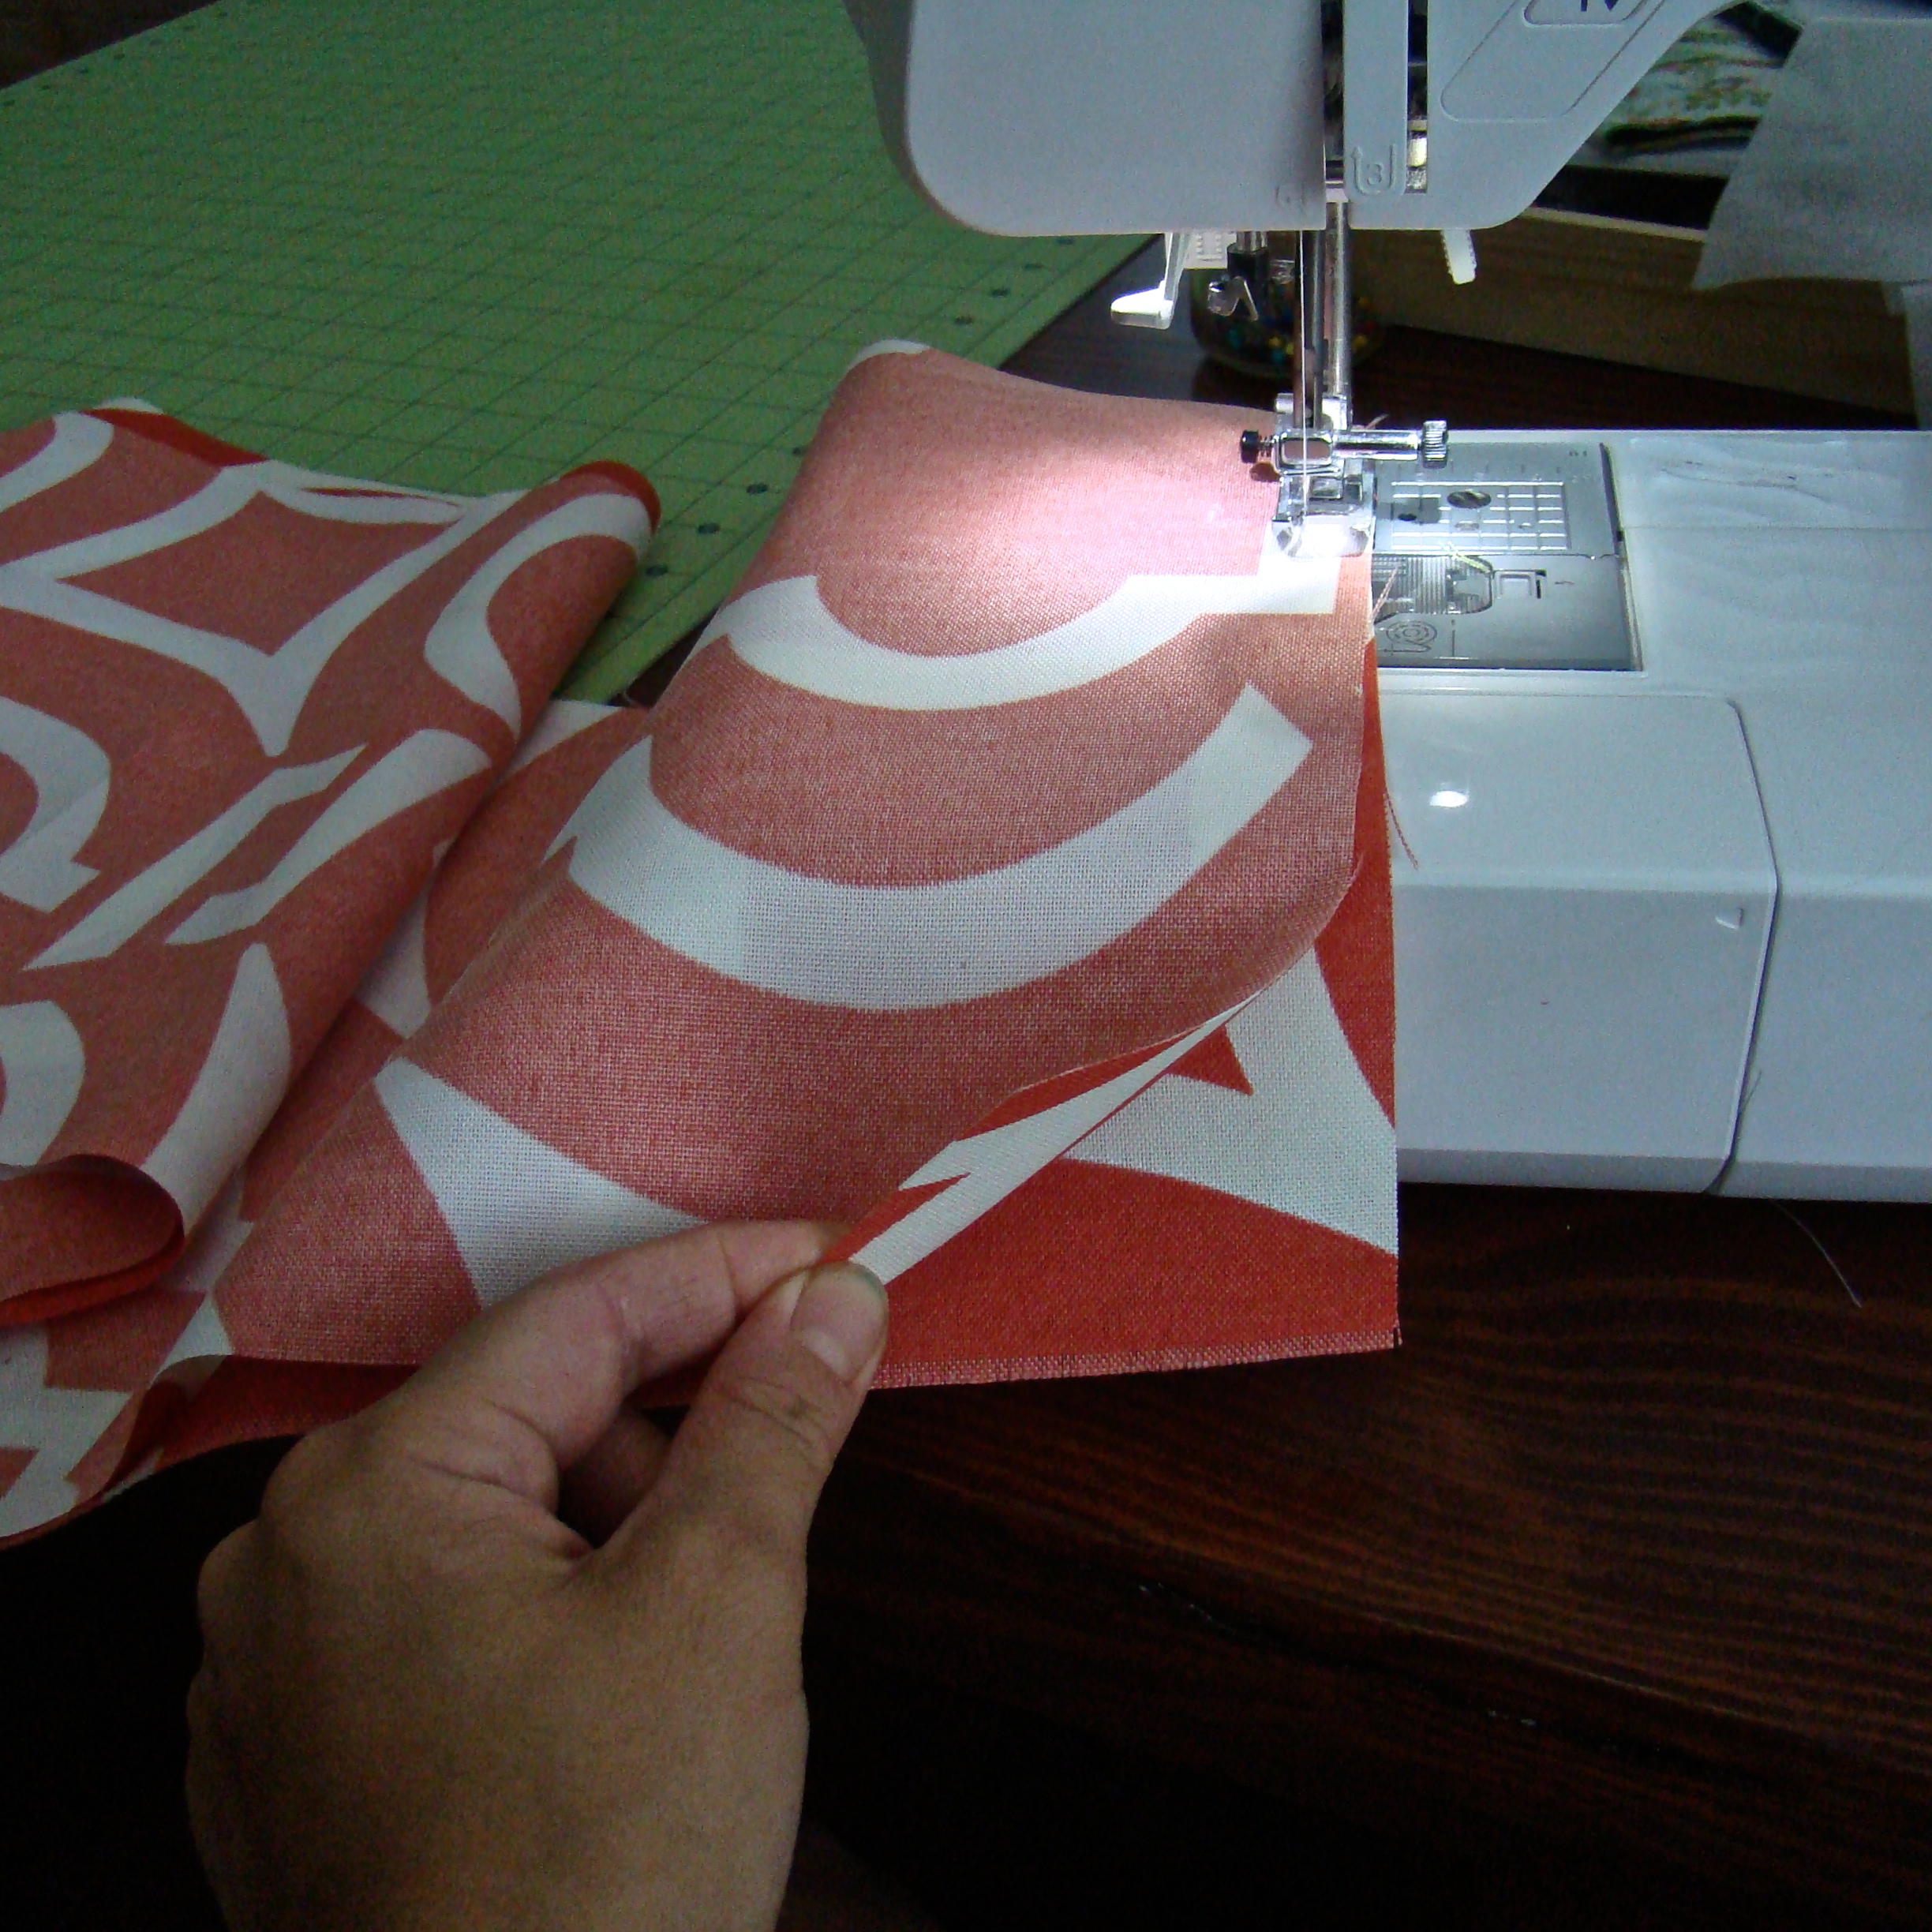
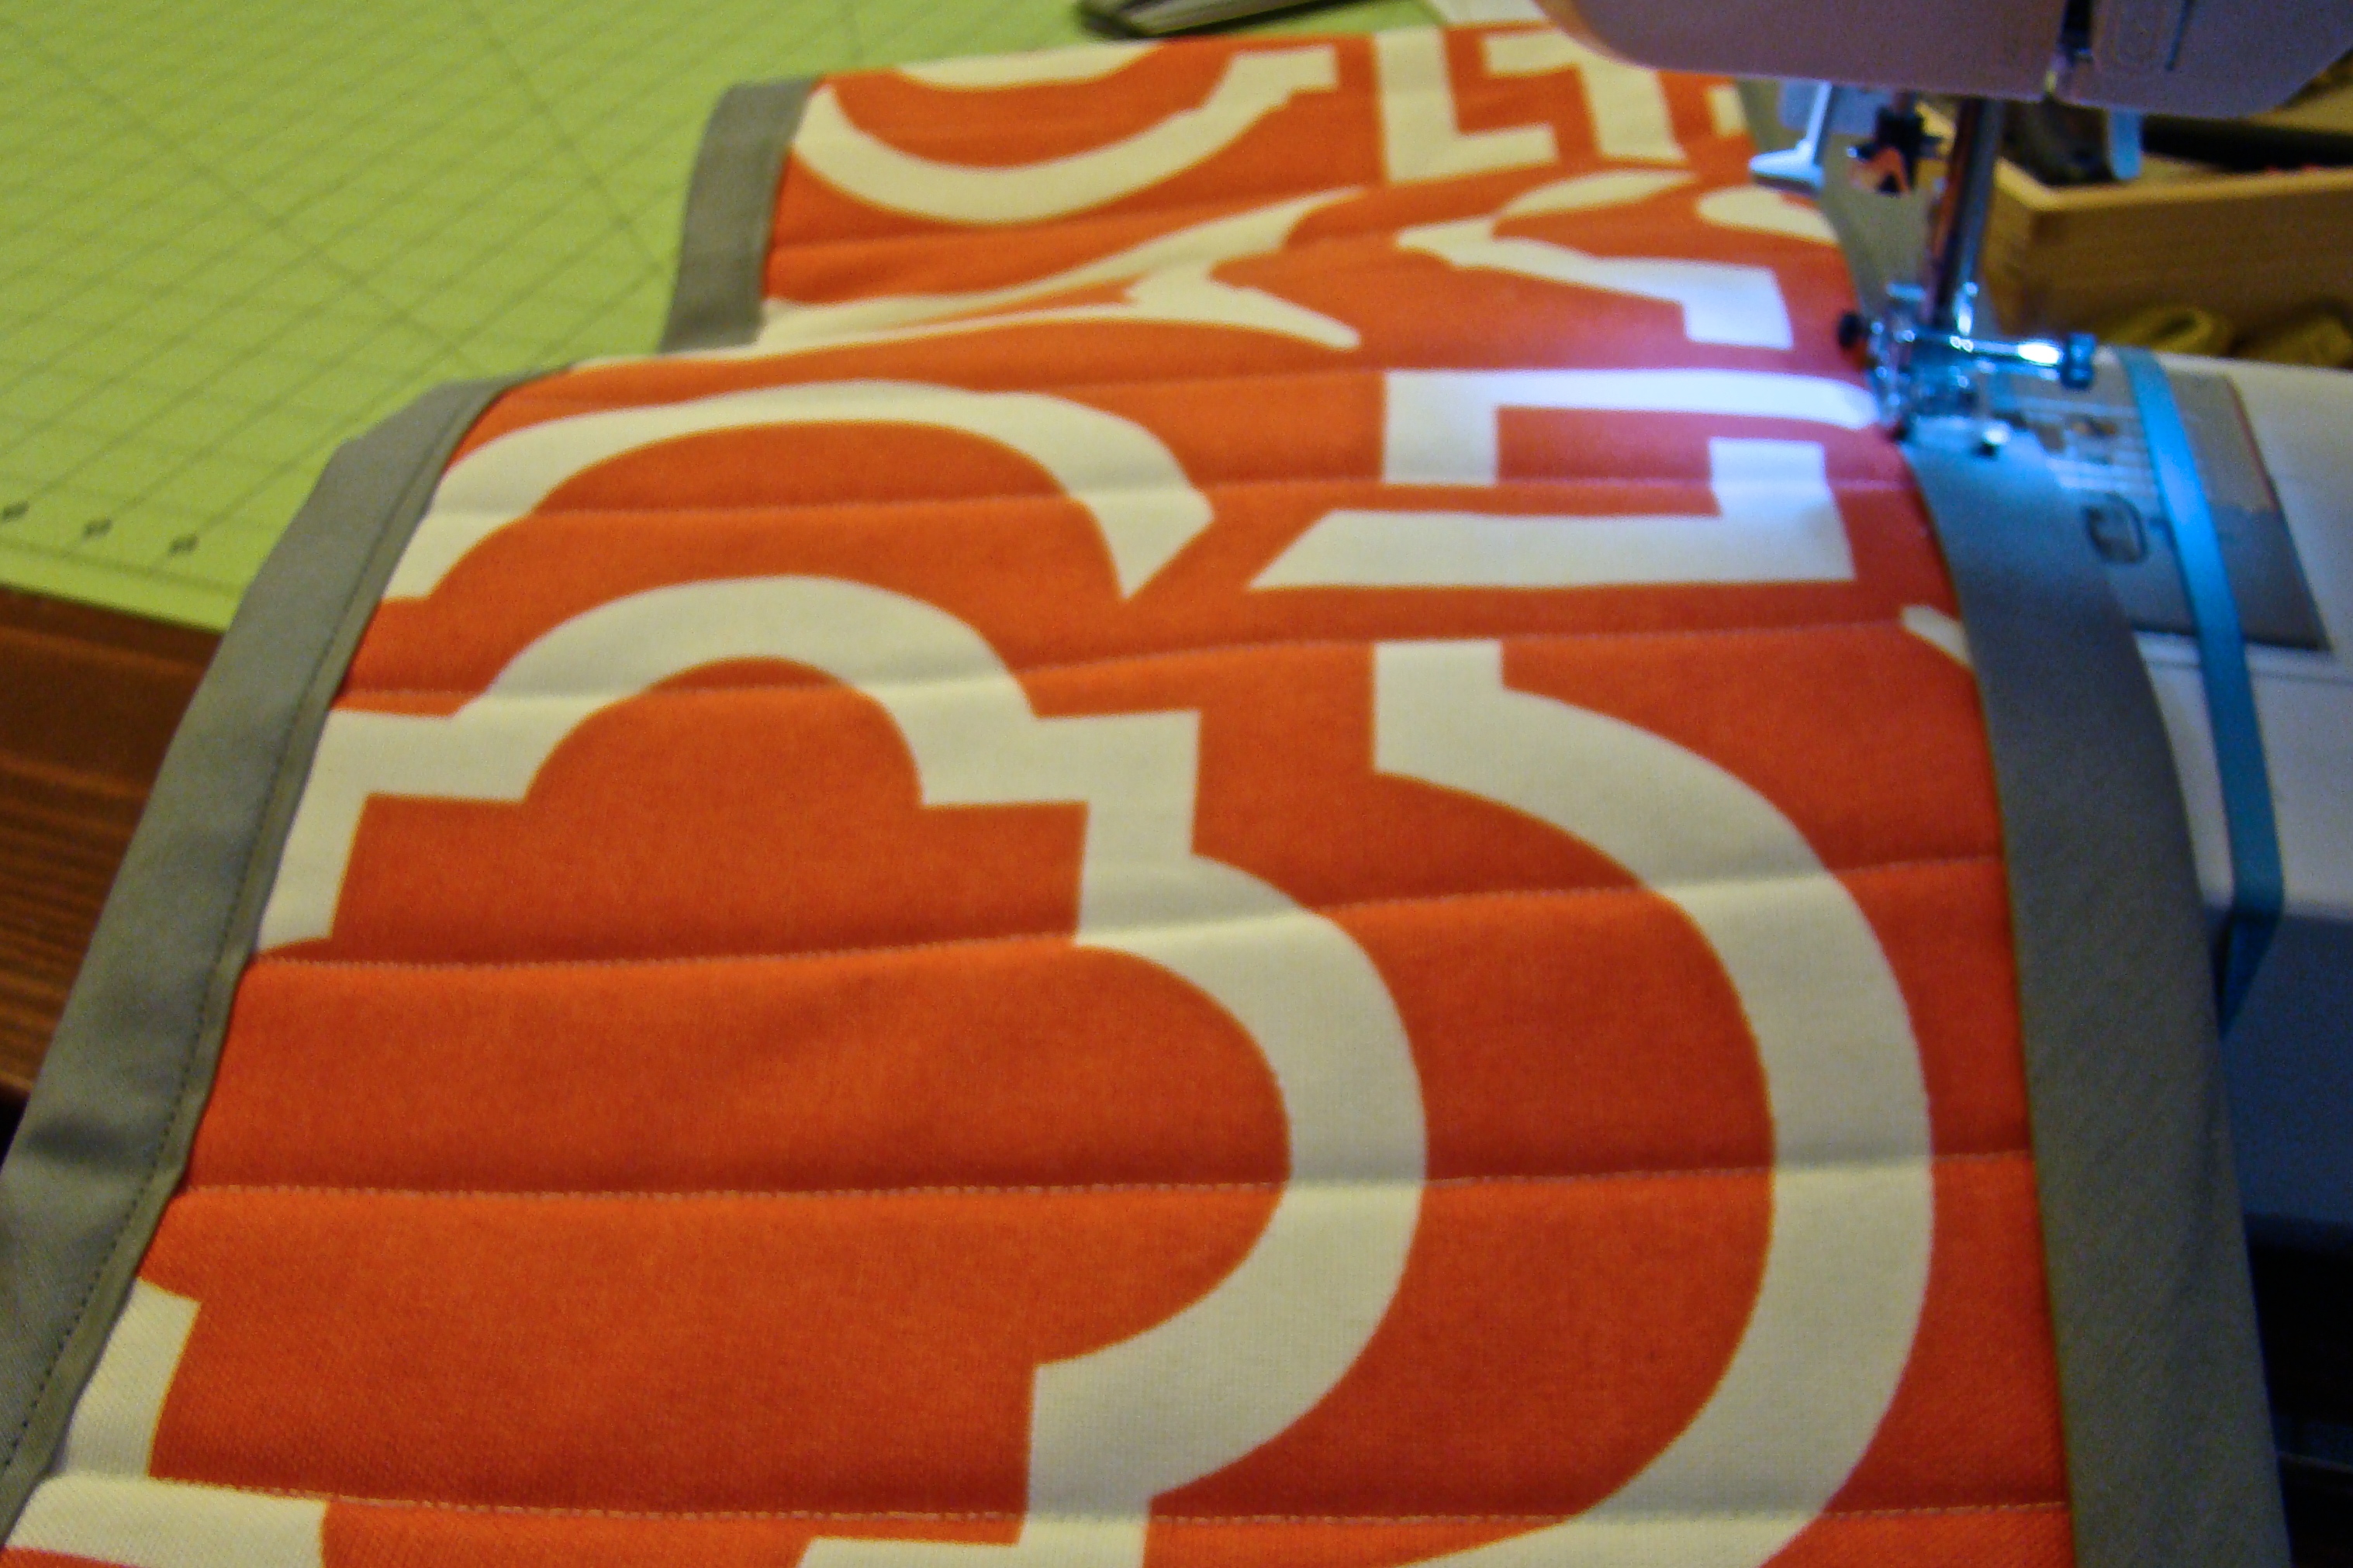
Starting at one end, sew one-and-a-half inches from the edge of one short side. Continue to sew lines one-and-a-half inches apart all the way down the table runner, removing the pins as you go.
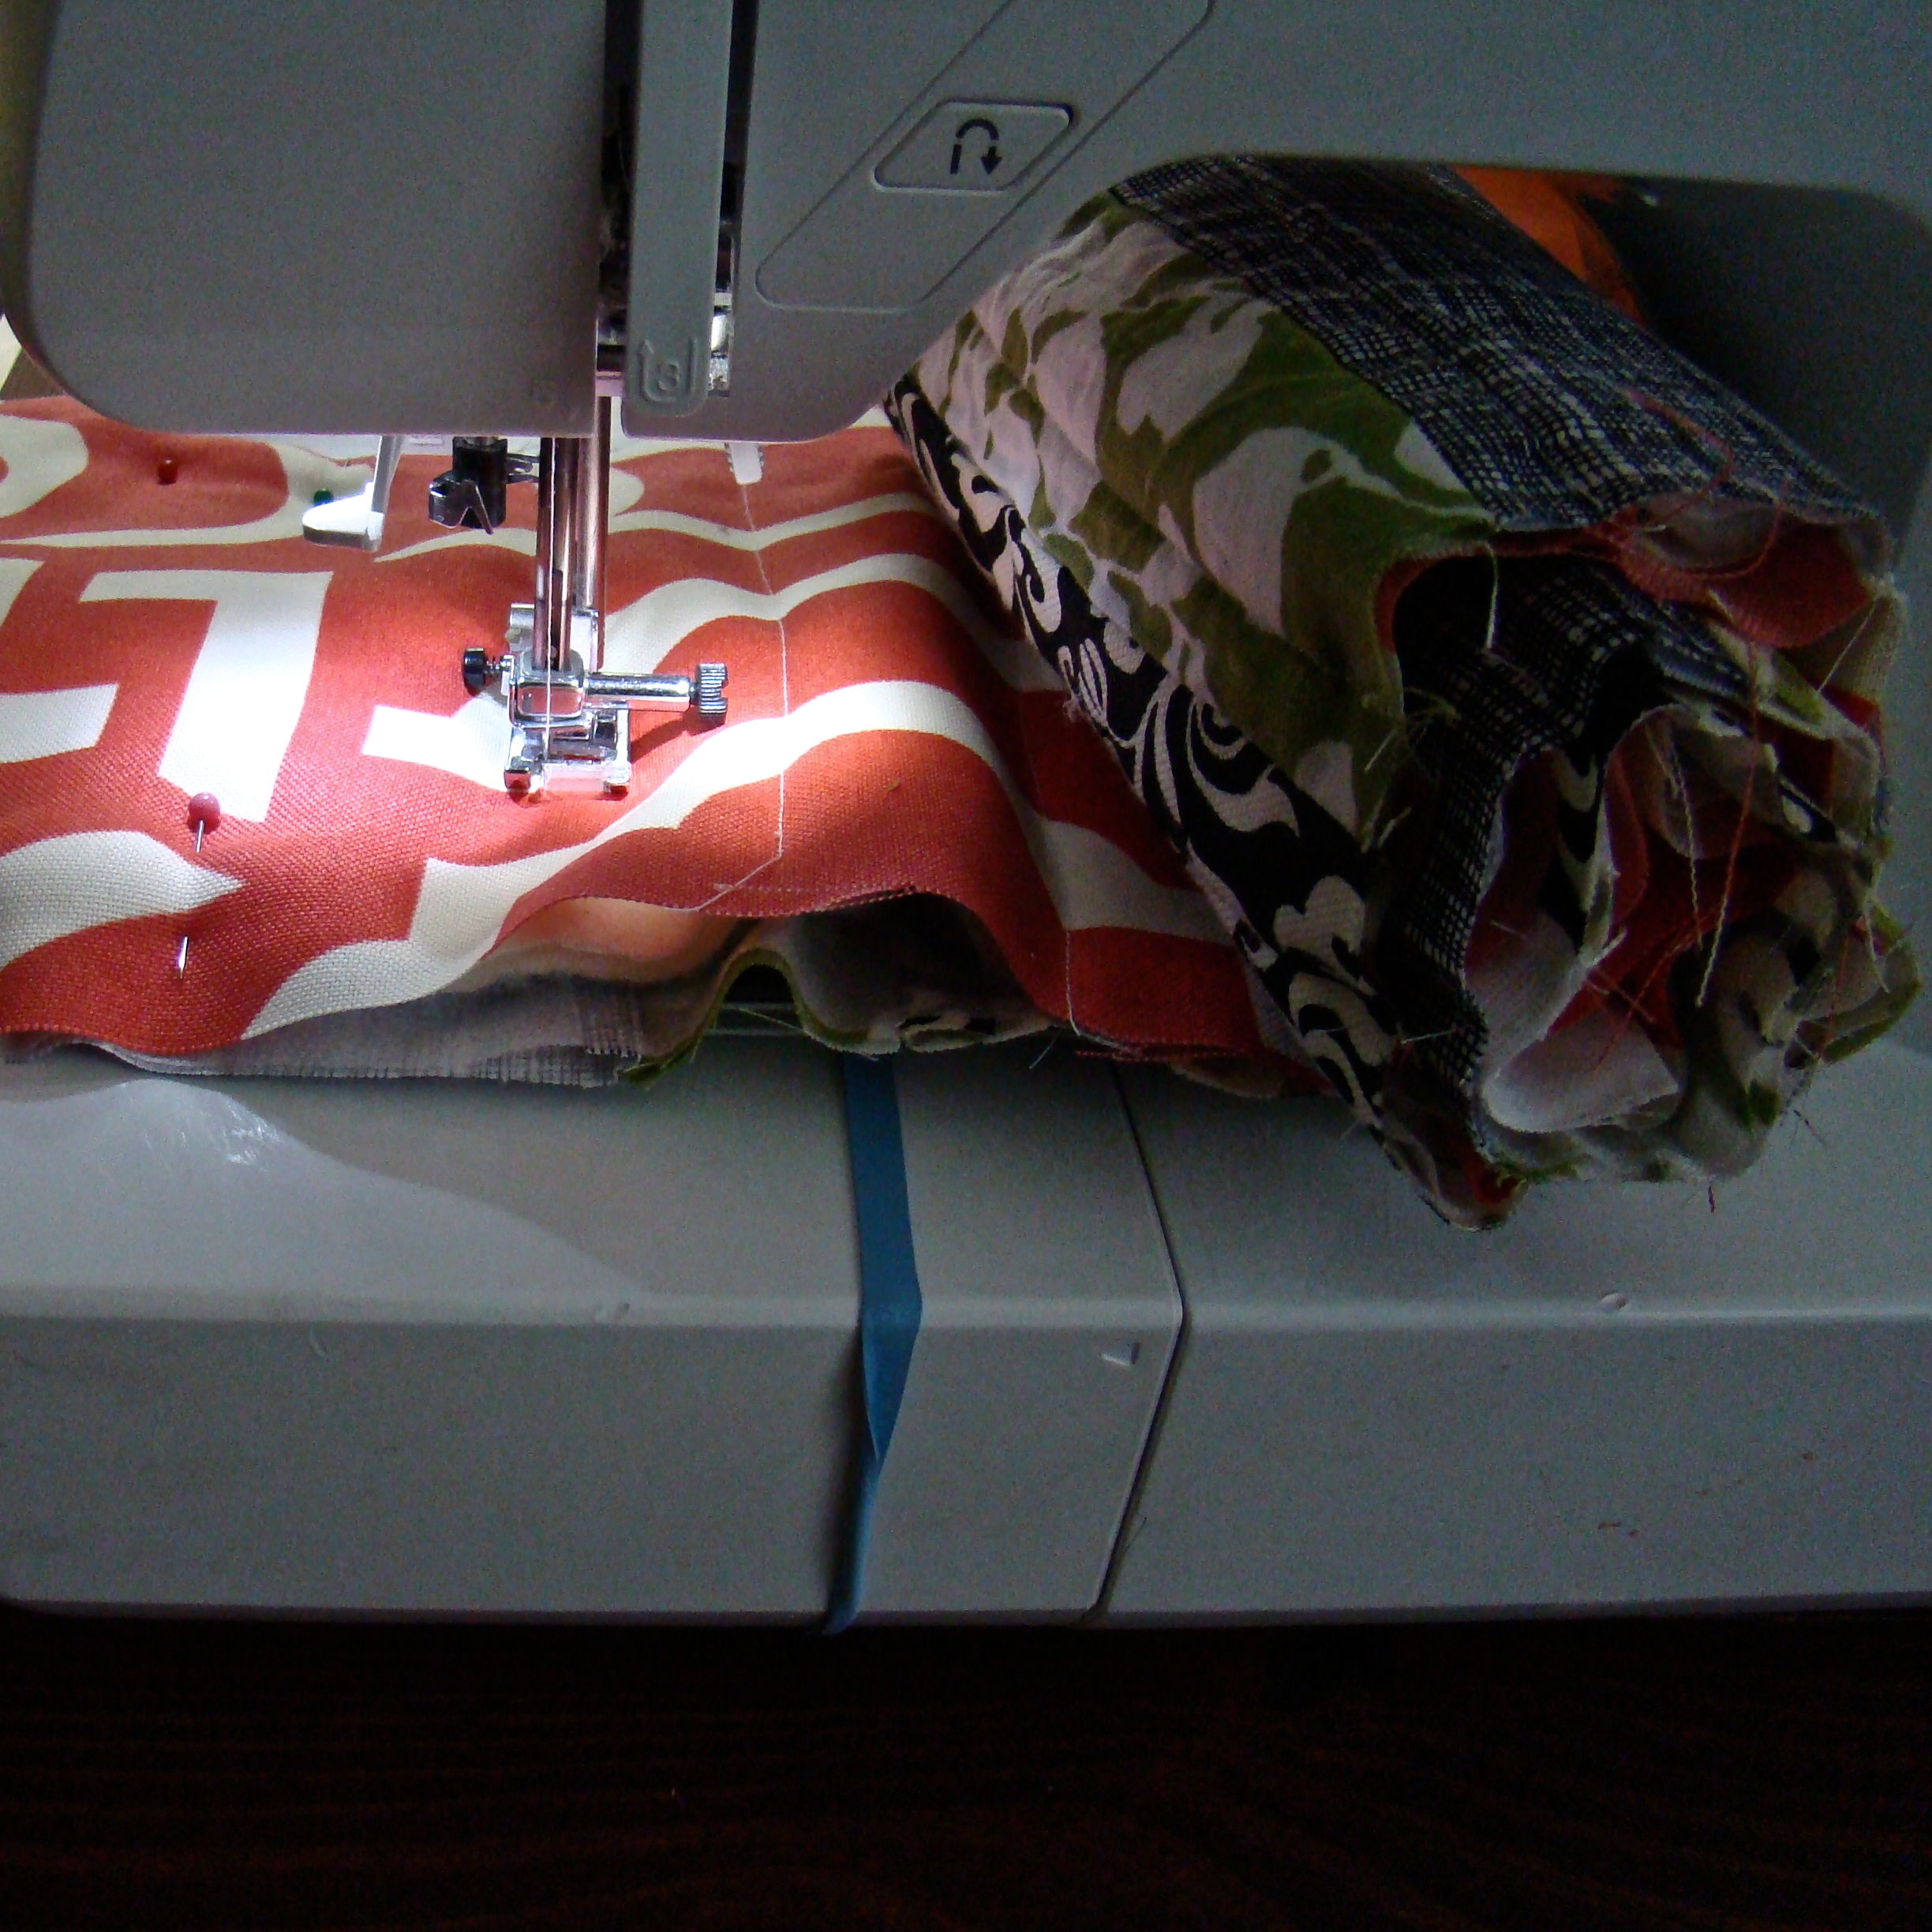
Roll the sewn end up to fit it through the machine. The further along you get, the tighter you will need to roll it. (See picture below).
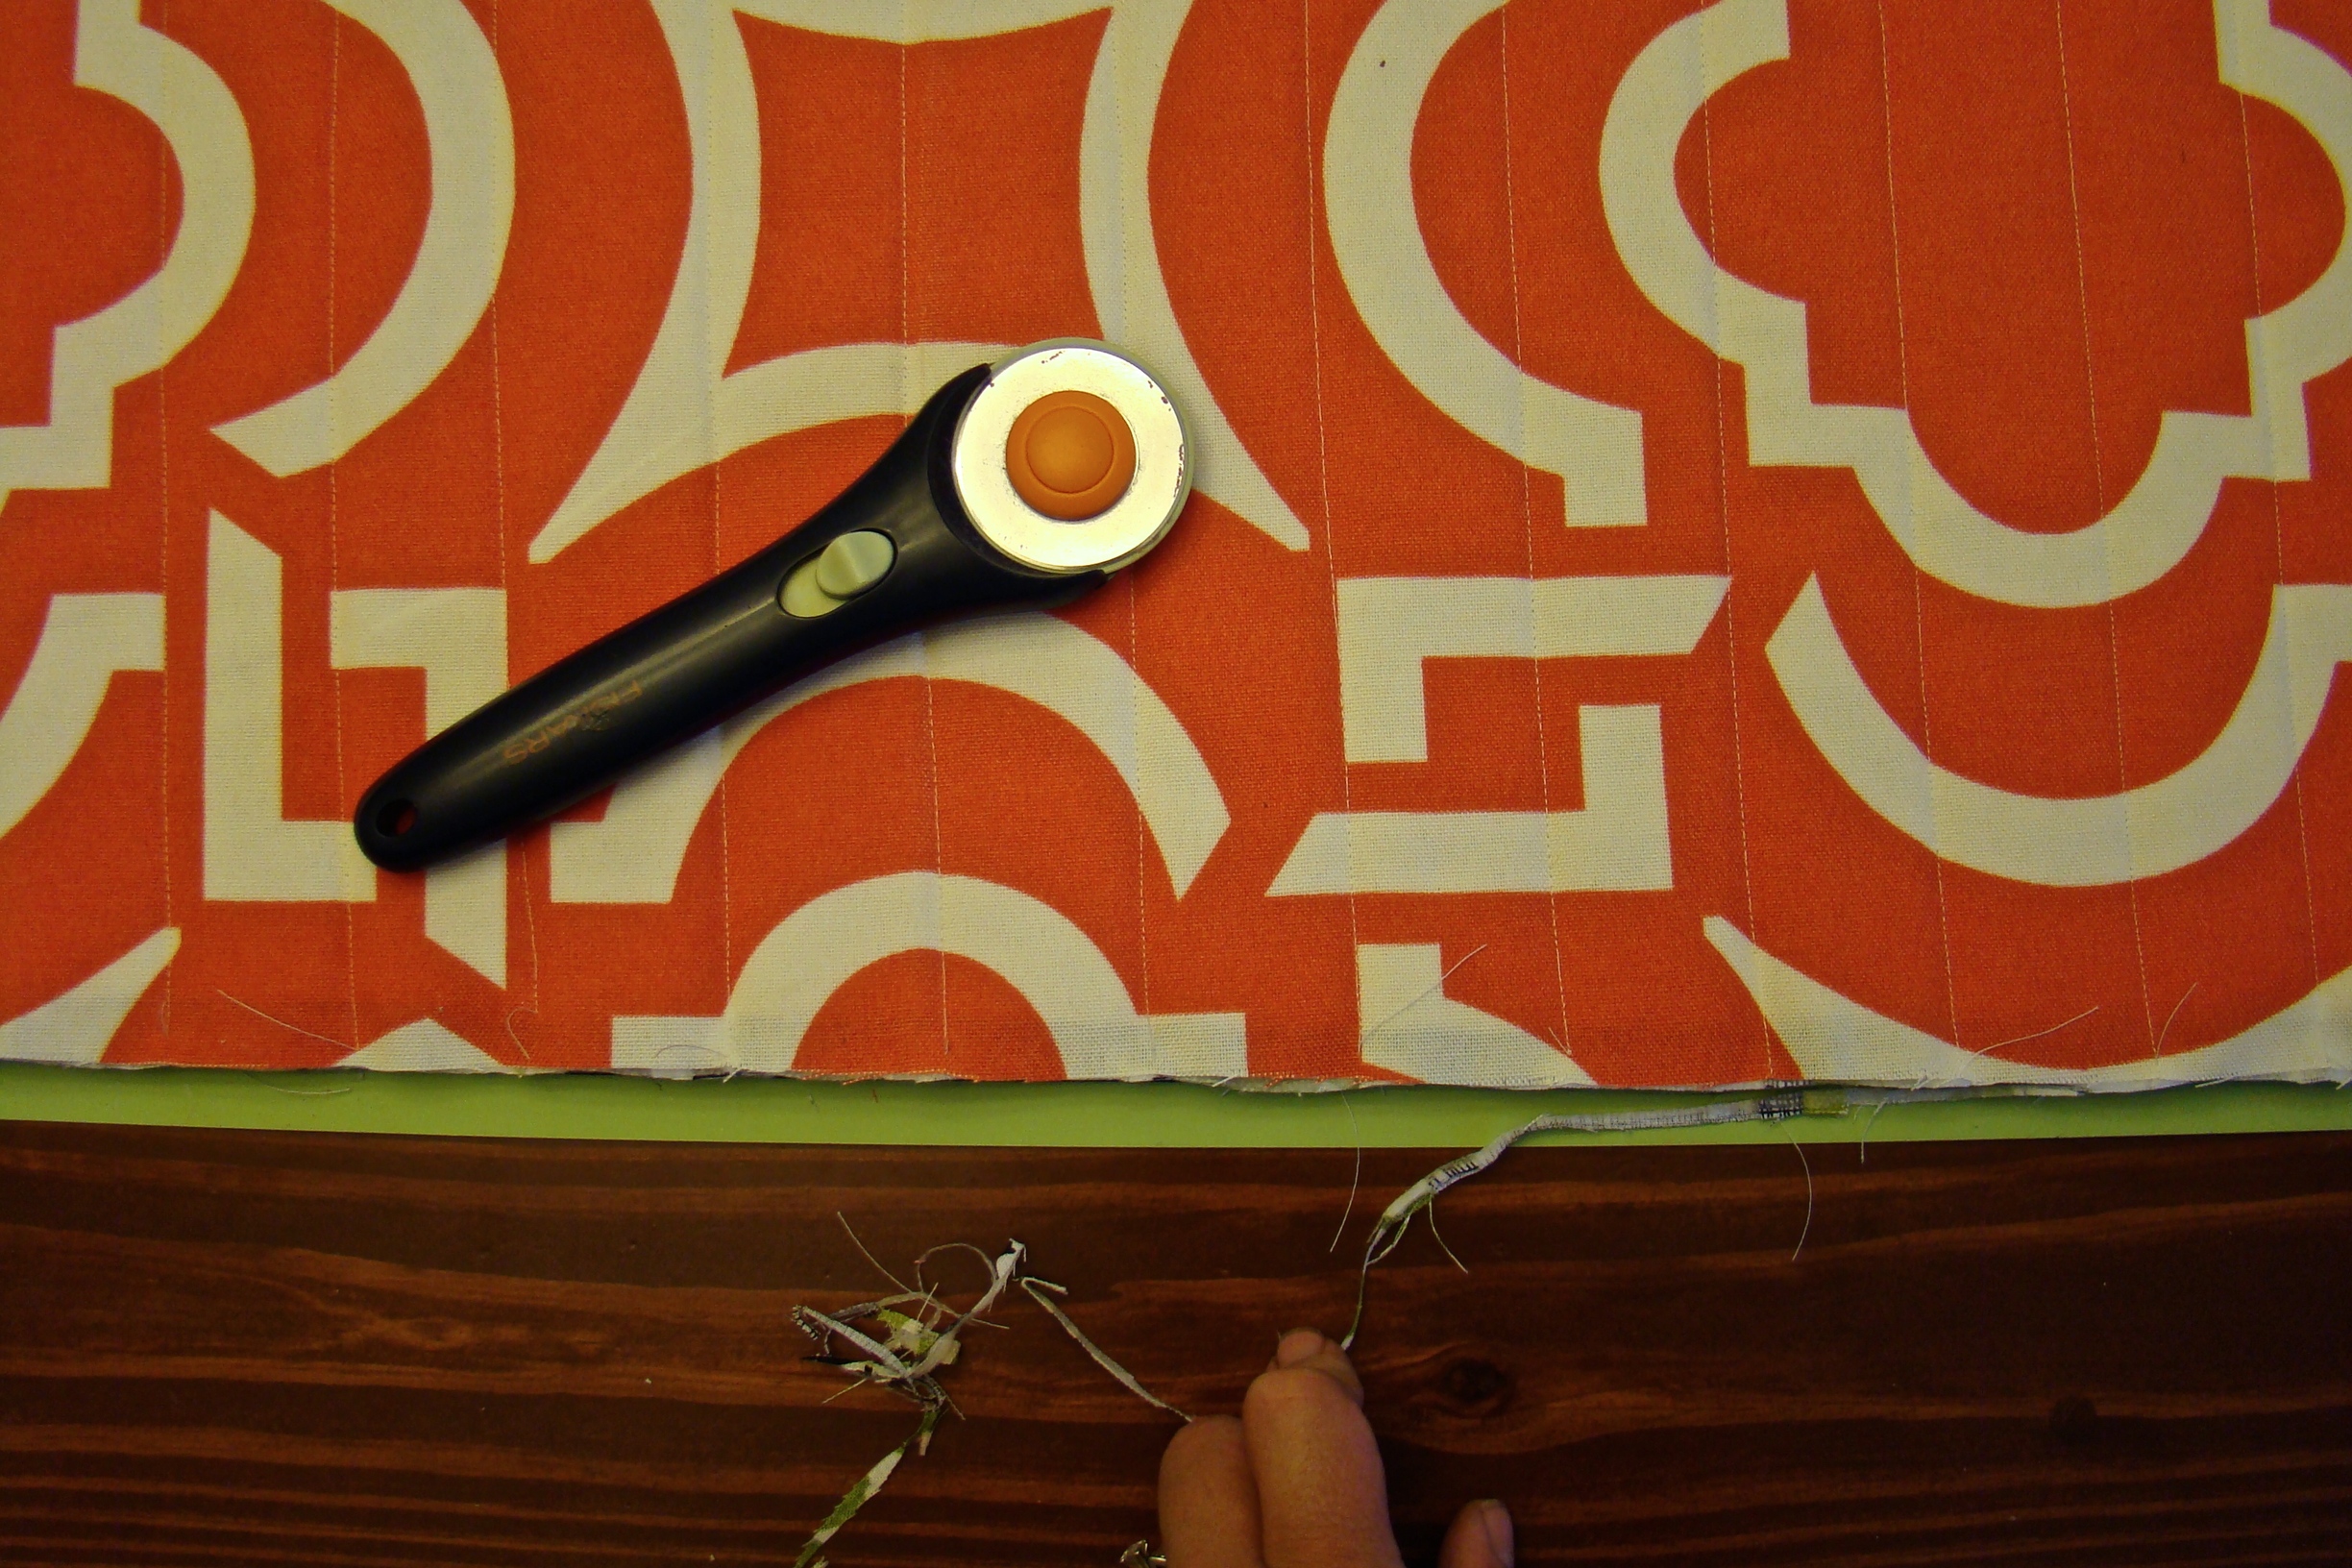
9. Trim the edges. Once all the layers are sewn together down the entire length of the table runner, lay the runner out on a cutting board and trim the long edges. Cut any excess or loose strings from the edges to make the table runner an even ten inches in width from one end to the other.
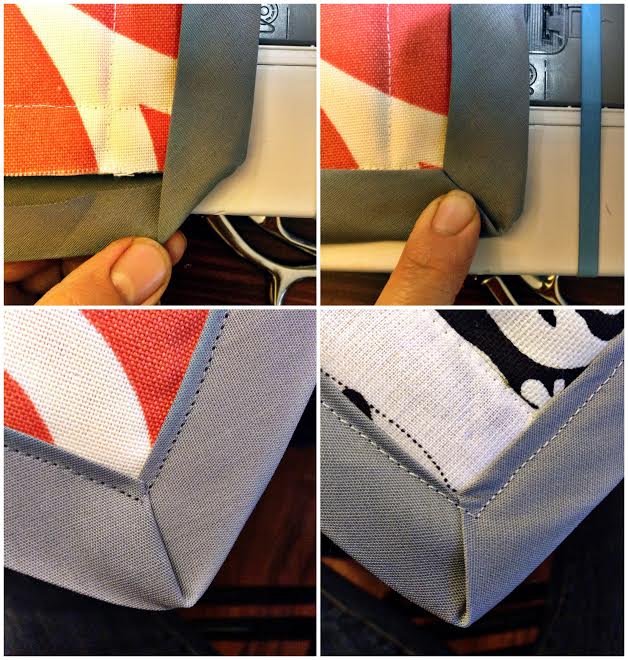
10. Attach the binding to the quilted side. Unfold one end of the bias tape and pin it in the middle of one of the short ends on the quilted side.
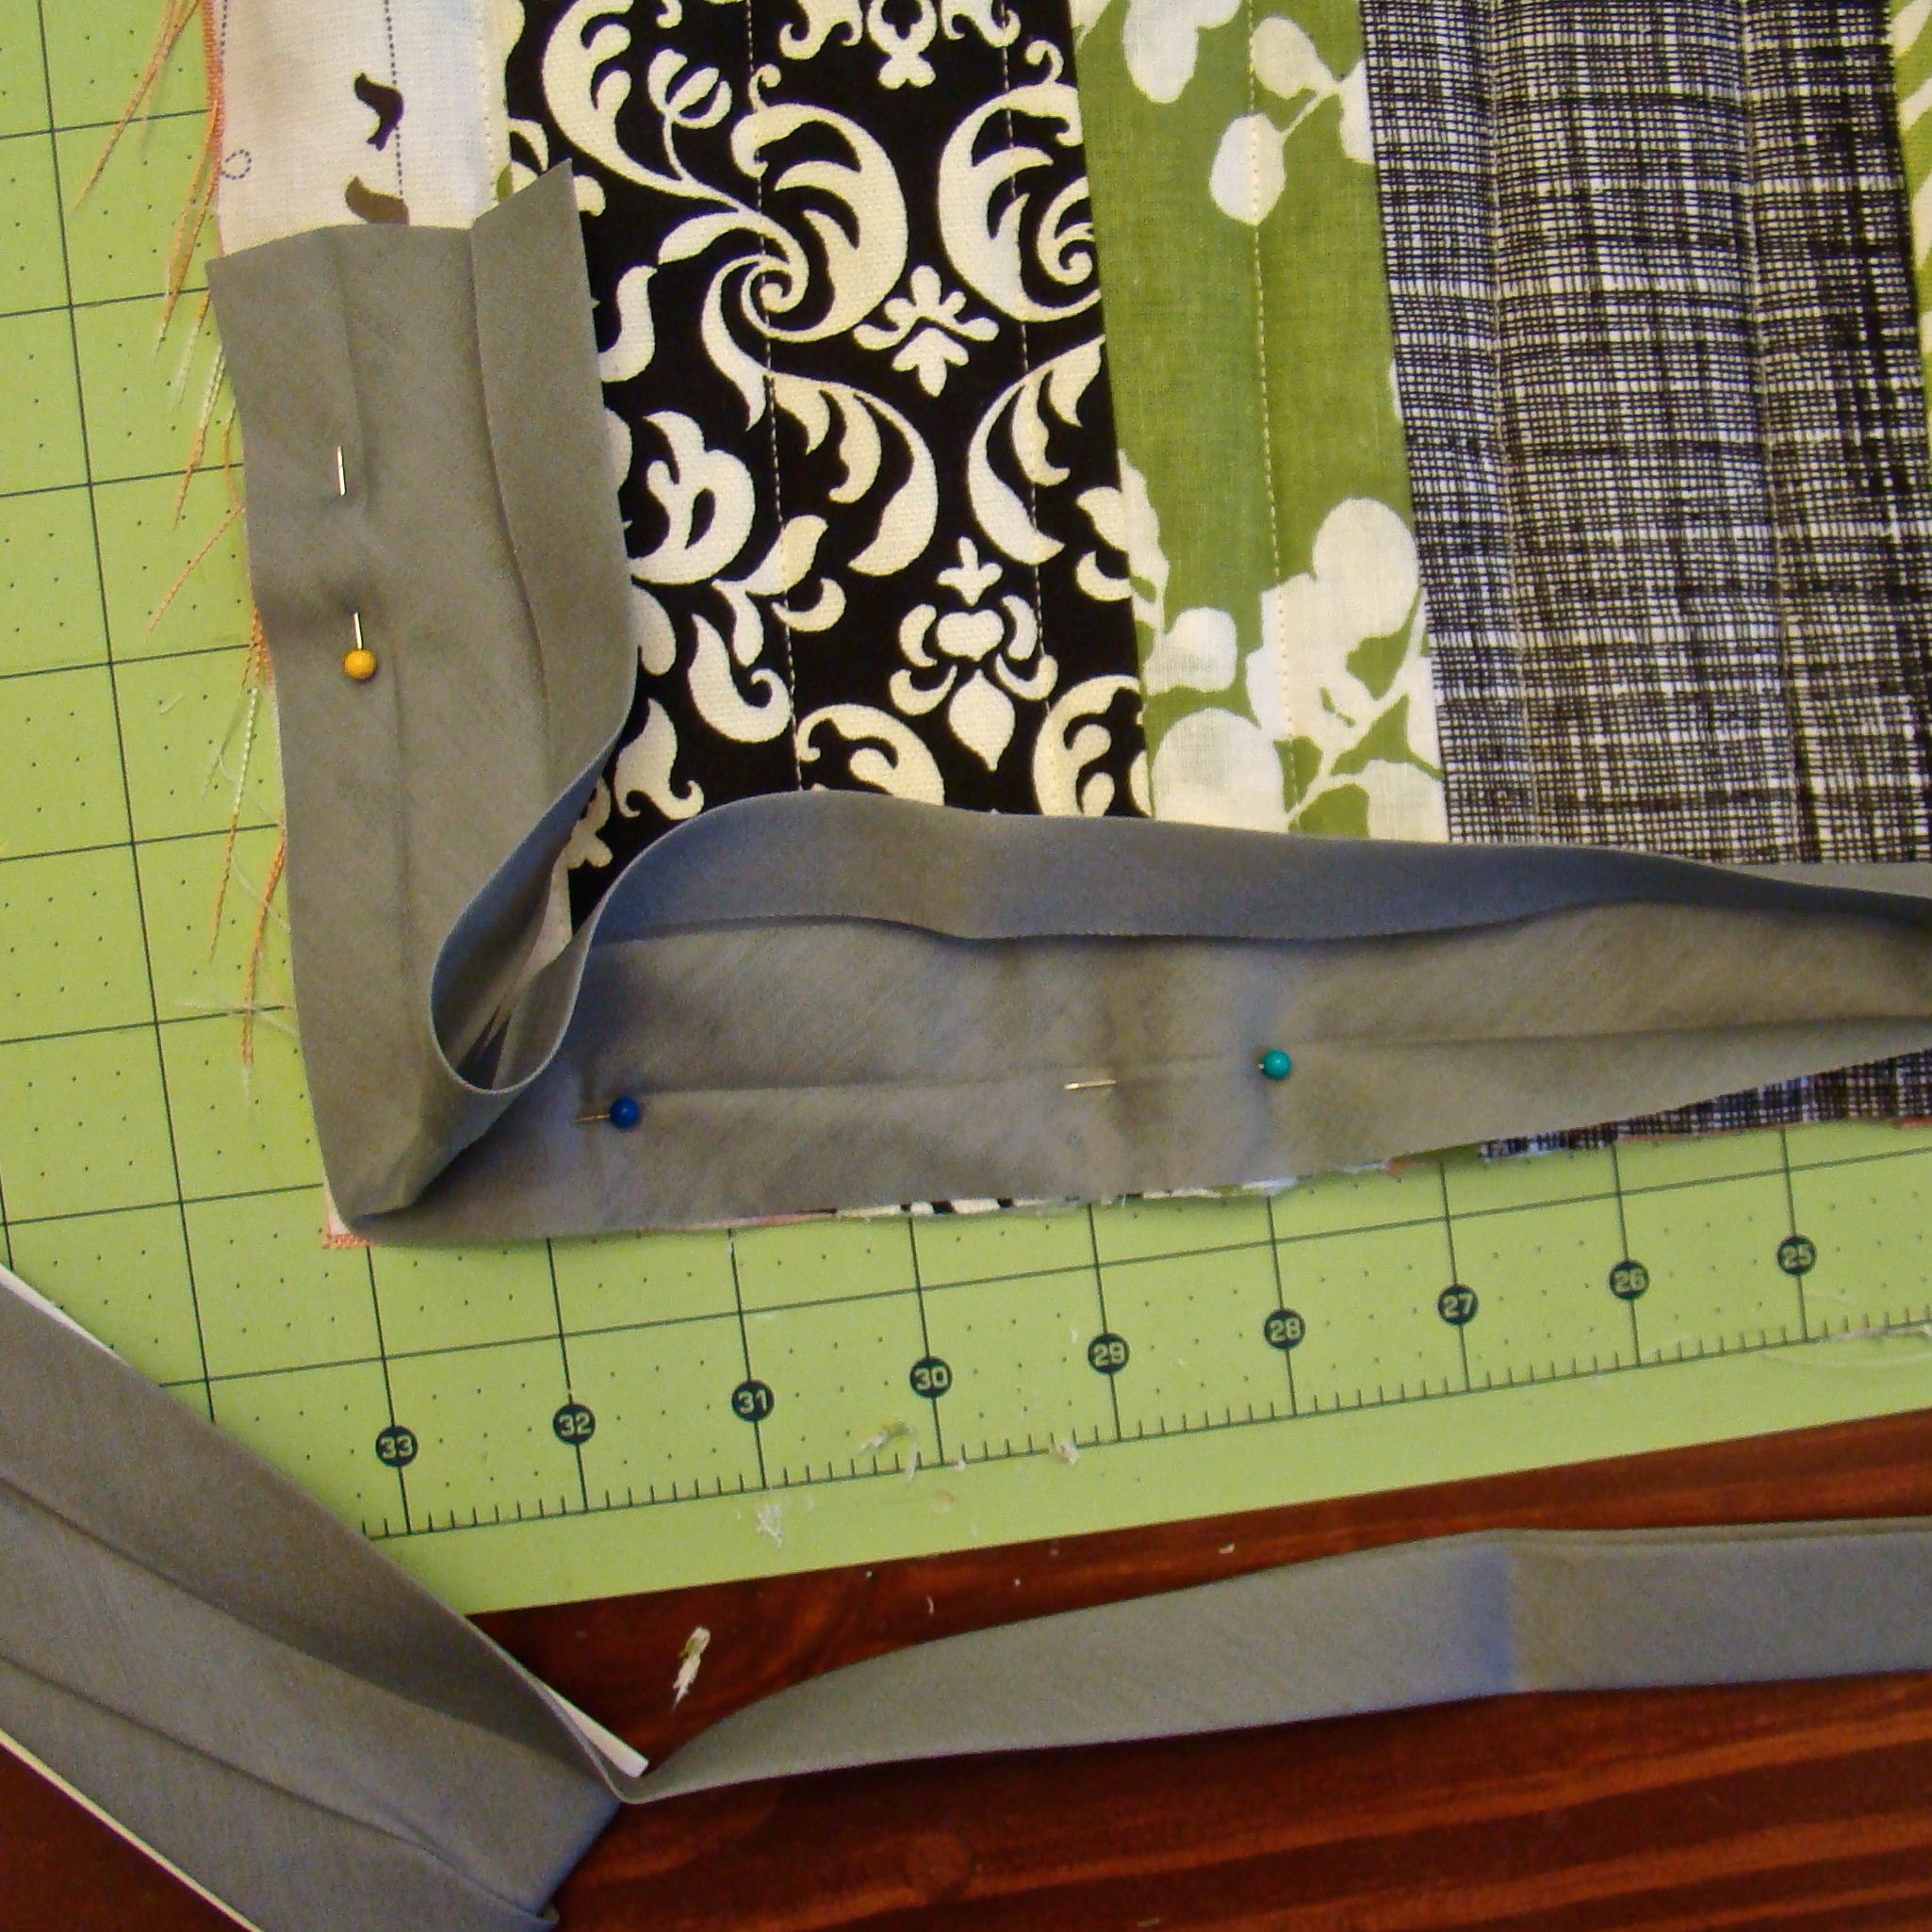
Leave three inches at the end and start sewing along the crease closest to the edge all the way around the table runner.
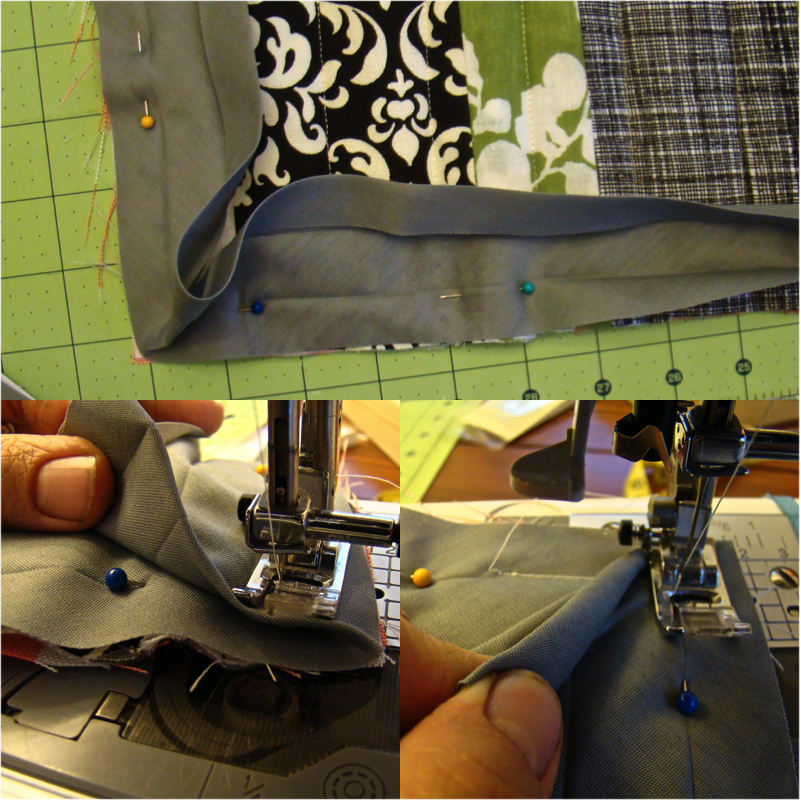
At the corners, fold the bias tape so that it lays flat and make a corner flush with that of the table runner. Squeeze the extra together and sew up to the excess but not over it. Lift the needle, rotate the table runner, and continue on the other side (again not sewing on the excess bias tape). See picture below to illustrate.
Just before you reach the end of the first roll of bias tape, sew together the end of the remaining bias tape and the end of the new roll (unfolded and right sides together).
When you reach the short side you started on, take the three inches you first left and the bias tape you are currently sewing and meet them together so that they are flush with the edge of the table runner. Unfold and pin the pieces right side together. Sew the two pieces together. Finish attaching the bias tape to the quilted side. See picture below to illustrate.
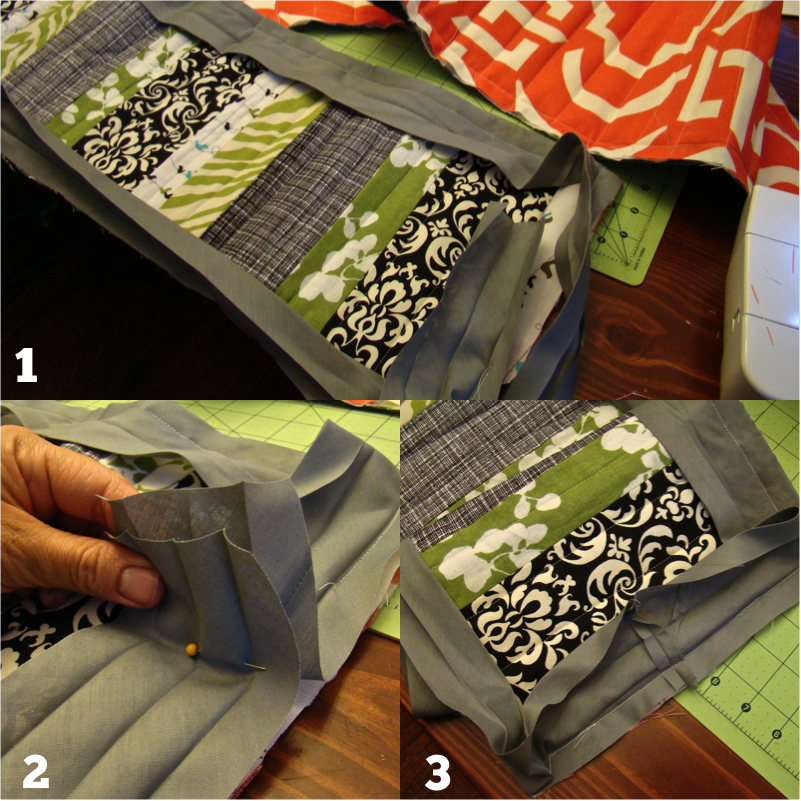
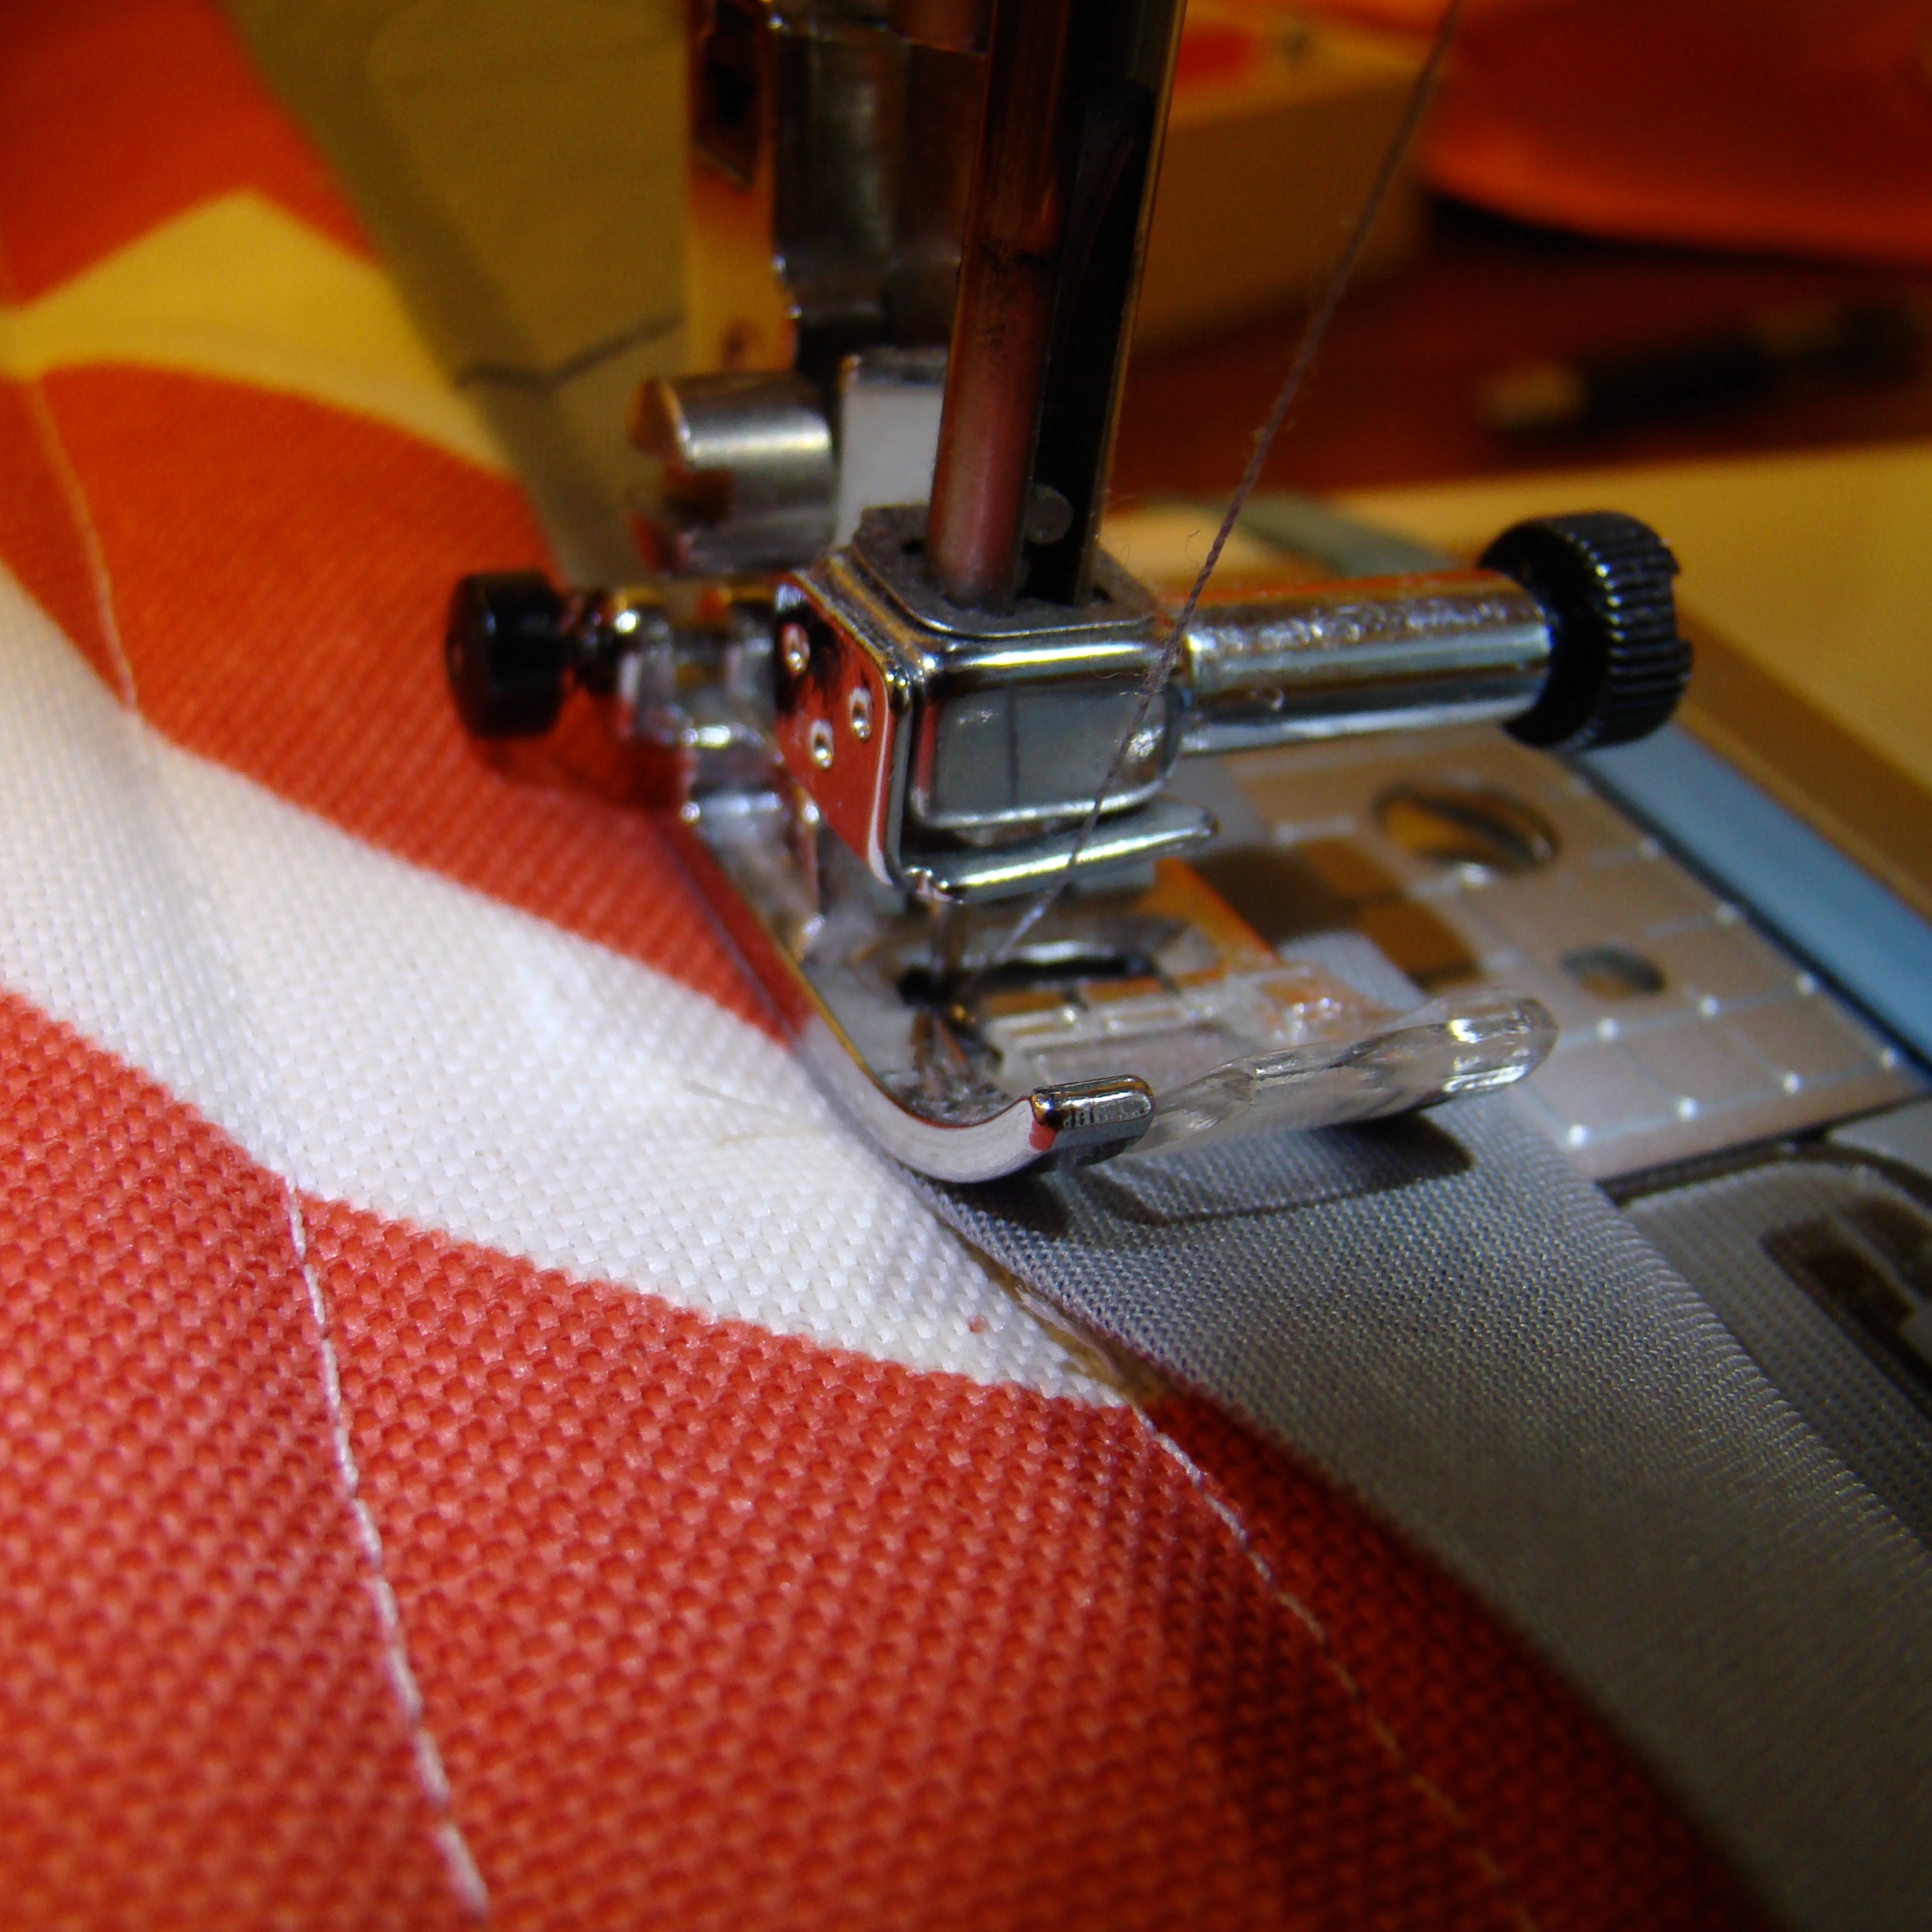
11. Finish attaching the bias tape. Fold the bias tape over the edge of the table runner. The middle crease should line up with edge of the table runner. Sew along the folded edge of the bias tape on the back side with a quarter-inch seam.
At the corners, pull down the bias tape then fold up to meet the edges and make a neat corner. See picture below to illustrate.
And You’re Done!!!
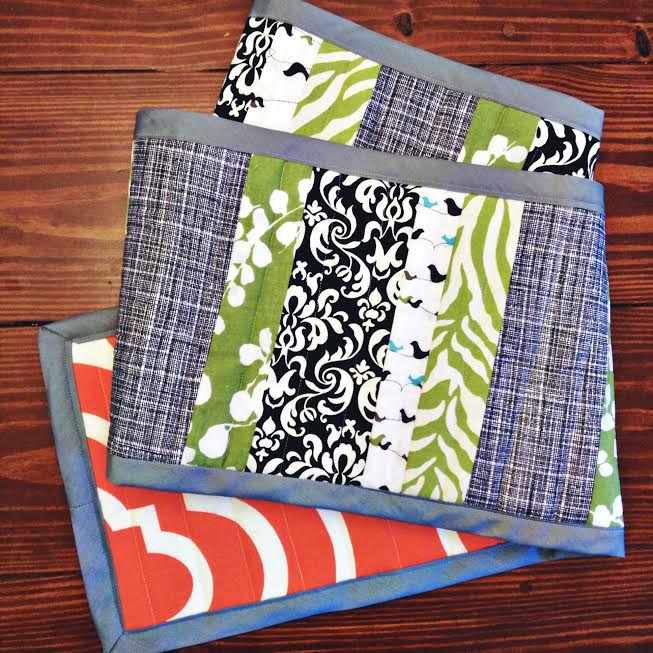
Gift it to a loved one or enjoy it yourself along with some yummy food and good conversation!
Don’t forget to check out the rest of the Handmade Christmas series for other great gift ideas.
Love this! I am totally making one for everyone I know1 Instead of using pins, spray with Temporary adhesive between the layers. It’s a life saver, a time saver and a finger saver!!
Is it heat safe from both sides?
Yes!
I’m a little concerned about the interfacing. It’s not 100% cotton and it’s applied with heat… How does it stand up to being “heat safe”? Thanks in advance.
The layer of Insul-Brite is what makes the table runner heat-safe. Are you concerned with how the interface itself stands up to the heat? I have used mine for years without any issues.
What a smart idea!! I would NEVER be able to make one though! ha! Thank you for linking this up on the #SHINEBlogHop this week! 🙂
I am so impressed! Your instructions are unreal. Thank you.
Thank you so much for the feedback Angela 🙂
Such a creative idea! I have a table runner but would love to upgrade to an insulated one!
Thanks Julie! Insulated table runners are the only kind I make now 🙂
What a great idea! I’m with you, I love table runners! But, I’m always moving my to the side when we eat so they won’t get dirty. I love how useful yours is…and adorable! Too bad I can’t sew, but I sure can send the tutorial to my mom who CAN sew as a Christmas hint, right?! 😉
Sounds like a great Christmas gift Samantha!
Wow, you are so talented! I need to learn how to sew better!
I learned from following tutorials online Rachel. I really think it is doable if you are patient and willing to try!