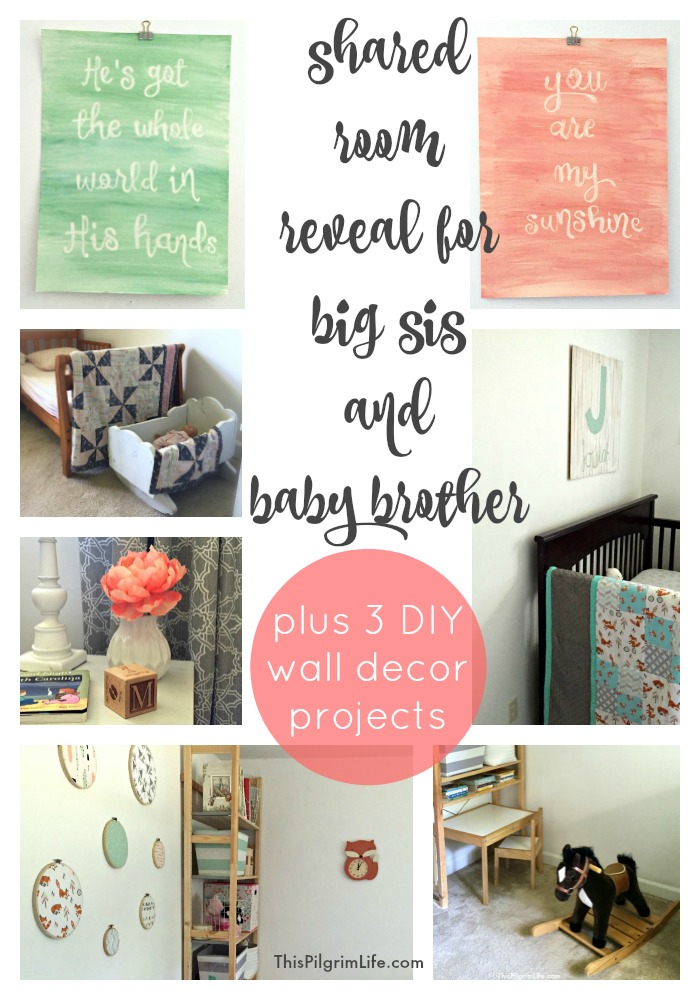
We recently made over our daughter’s room to make space for her new little brother. Check out the new look, a few favorite nursery items, and three DIY projects you can make for inexpensive wall decor!
Do your kids share rooms? Sharing rooms is a must in our three bedroom home. My older boys occupy one room– picture blue walls, bunk beds, and carpet (somewhere underneath the LEGOS, books, and clothes strewn across the floor).
They have shared a room for four years now, and even if we had a surplus of space, nobody would choose anything different. They love being together. Which is why I’m excited for my younger two children to have the room-sharing experience too!
When I first starting planning the room my baby and toddler would share, I was a little unsure of how to make the most of the space and give it a cohesive feel even though the room would be shared by a boy and a girl.
It took a lot of Pinteresting, a lot of floor plan sketches, and a lot of bouncing ideas off my best friend, but I love how the room turned out!
I DIYed the wall art, which saved a lot of money and gave me the flexibility to choose exactly what we wanted. Look for the pieces in the pictures below, then keep reading to see a simple explanation for how to do each yourself.
The room also holds a few special pieces that I’m also excited to share with you too!
But first, here’s what we started with…
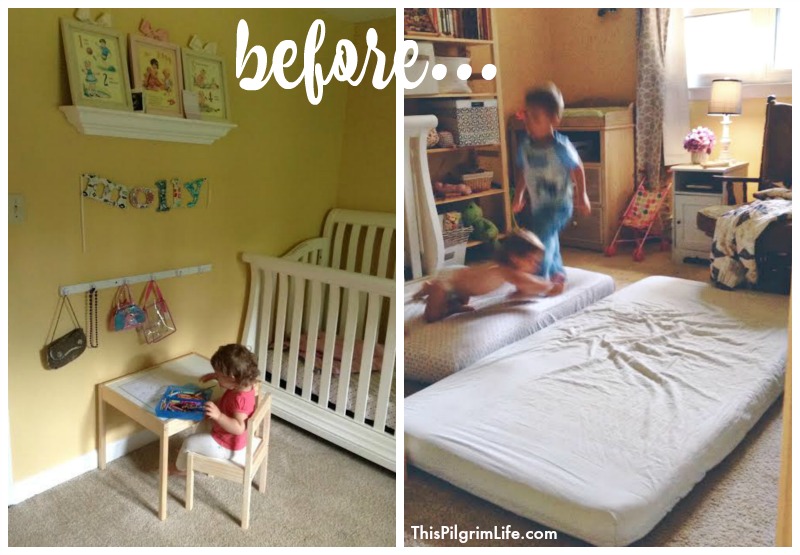
This room started as an office for my husband, then transitioned to a room for my daughter. The paint color was what was up when we moved in, and I wasn’t a fan. Actually, almost the whole house was painted yellow and we have been slowly changing up each room.
As far as decor and design go, her room was really just a throw together until we had time to do more.
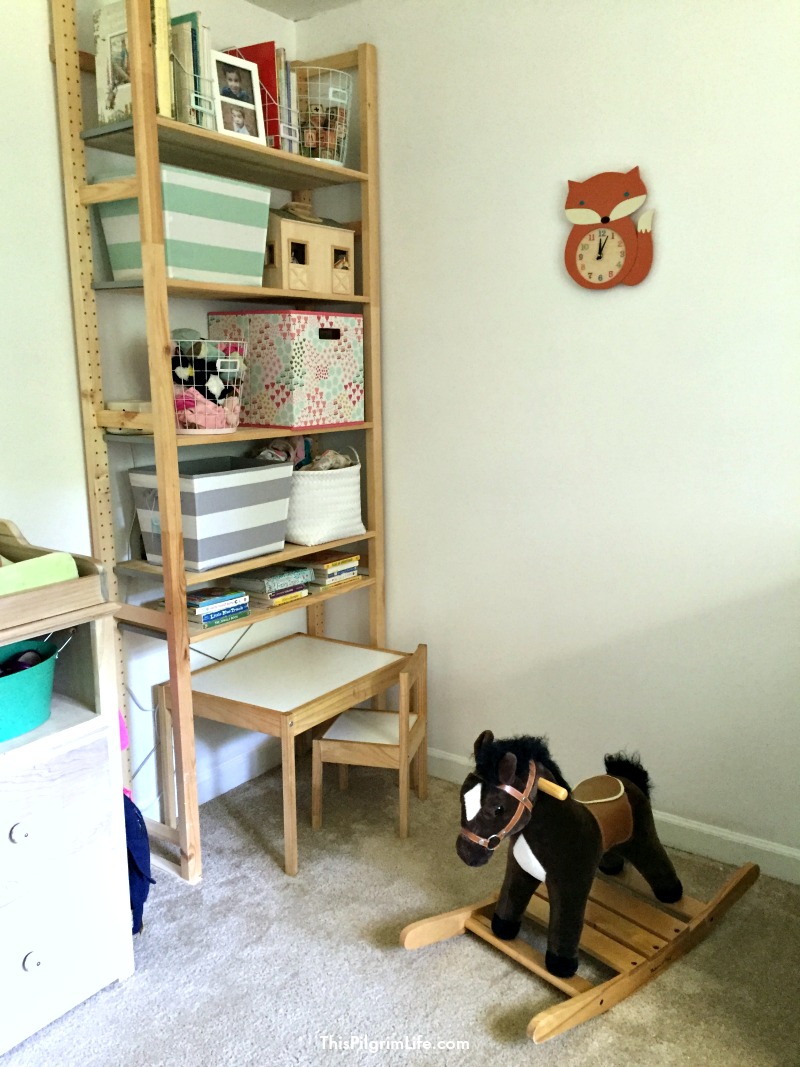
So glad we waited, because here’s the room now…
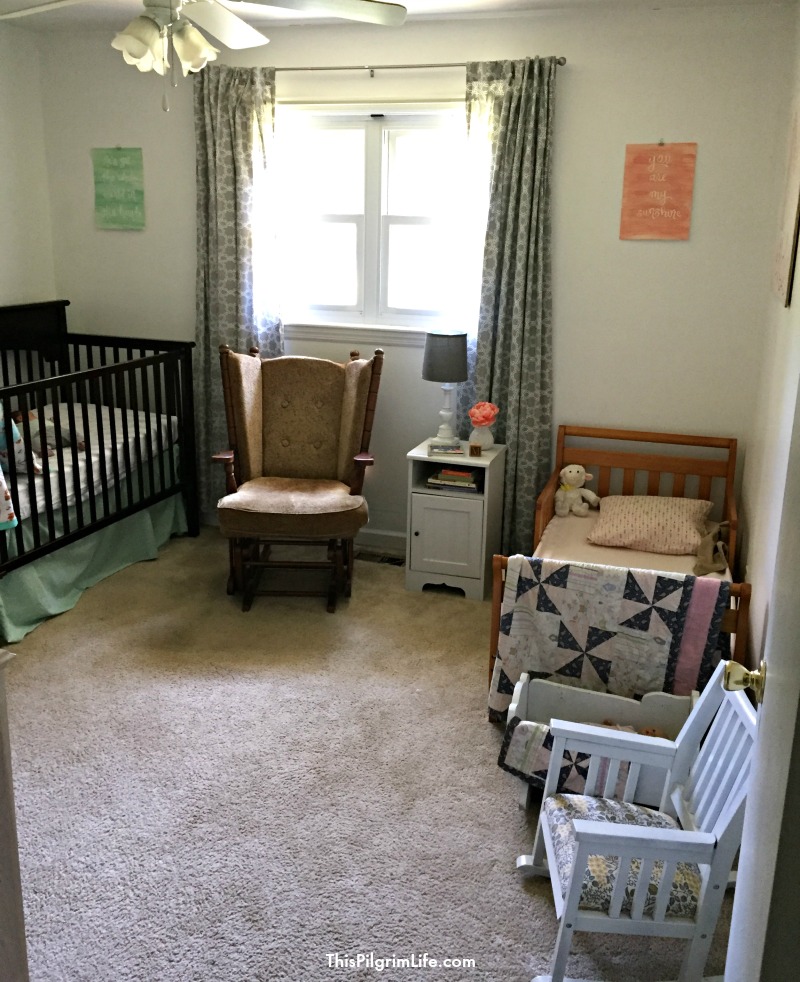
I was eager to ditch the yellow and brighten up the room with white walls. Mint green, coral, and gray are some of my favorite colors right now too– in this room and in my closet.
In a perfect world, all the furniture would be the same color, or at least coordinating. But I’m learning to let go of perfection, and to instead embrace the union of pretty and functional without being burdened by following all the “rules”.
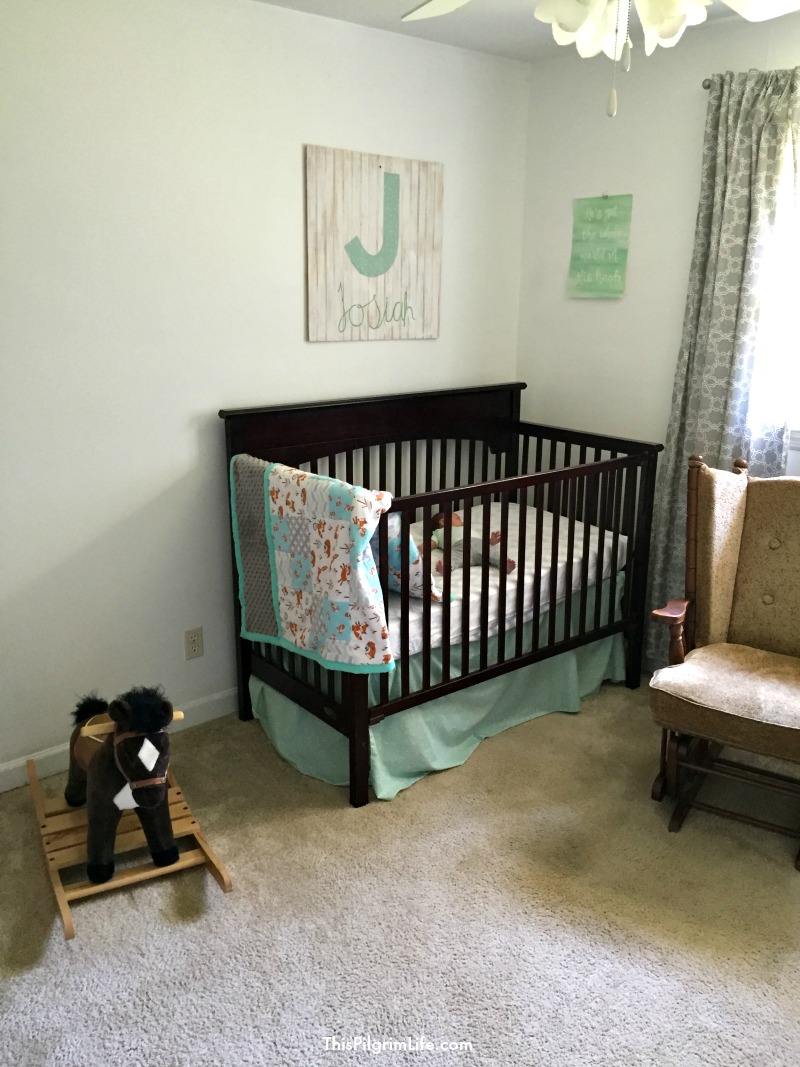
My middle son picked out the fox fabric for the baby’s quilt, and from there foxes became a theme in Josiah’s baby items and room design.
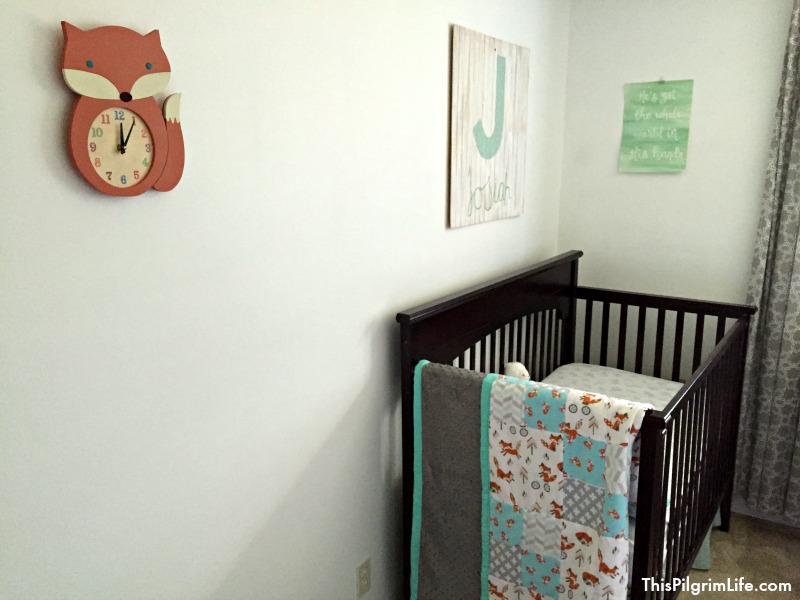
I found this fox clock from Uncommon Goods.
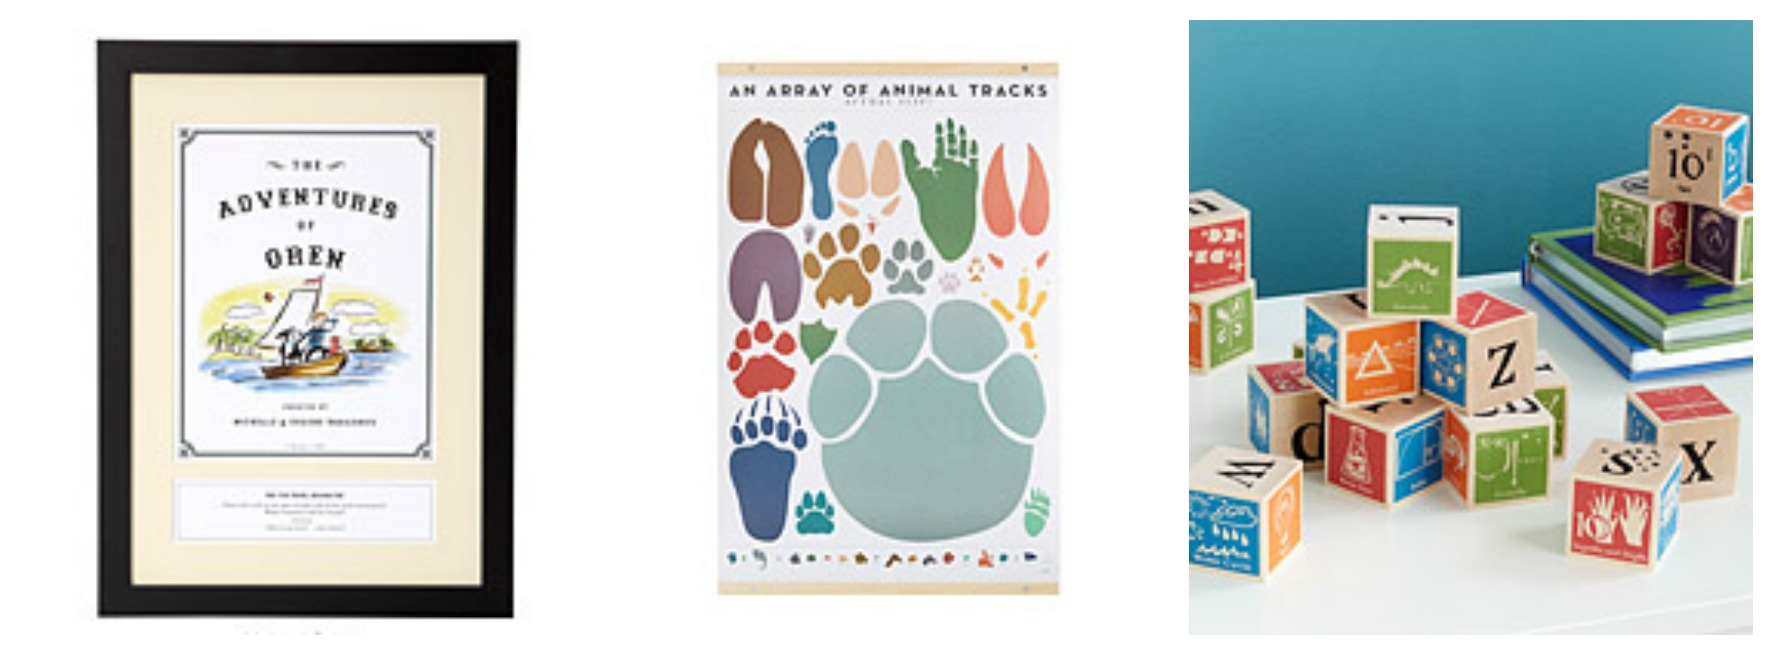
I was given the opportunity to select a piece of decor for their room and deciding what to pick was so difficult! Check out the kids’ decor section for a ton of creative and unique pieces, many which can be personalized for each child.
It took a few days to look through their online shop, mainly because there was so much to look at. I love how original the pieces are and appreciate how the company supports local artists– beautiful products and meaningful work. Even more fun, every purchase comes with information about the artists who created it and the story behind the piece.
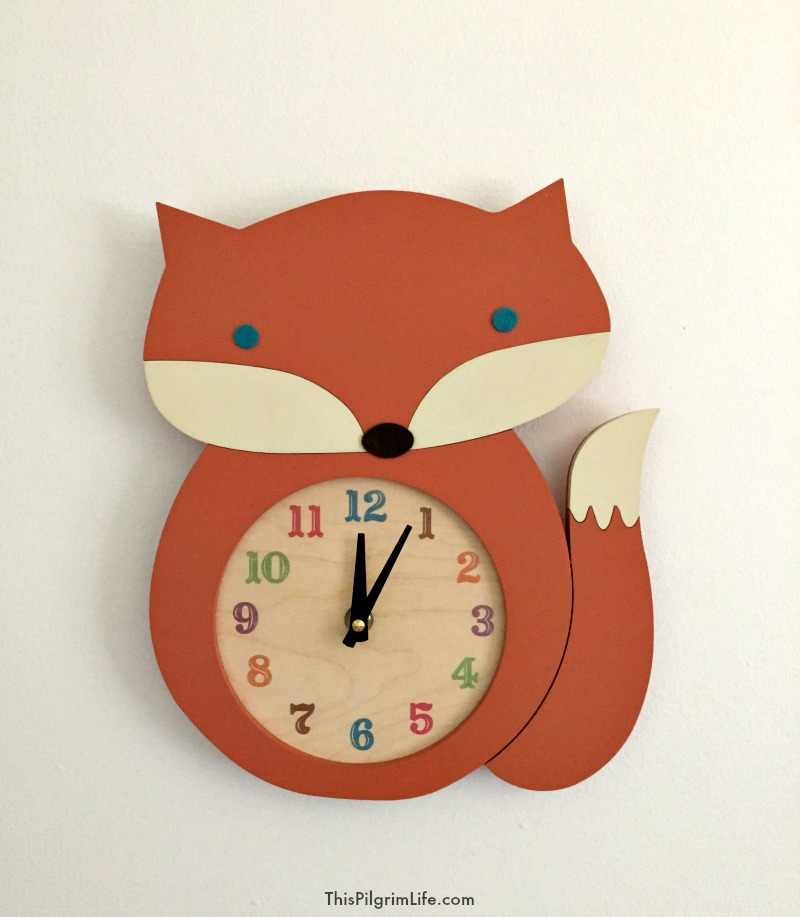
In the end, I decided on the adorable wooden fox clock for their room, but I still have my eye on the animal tracks poster for my boys’ room and these fantastic wooden blocks, full of math and science terms.
(I would really recommend checking out the toys and games pages too! I will be looking there for smart gift ideas in the future!)
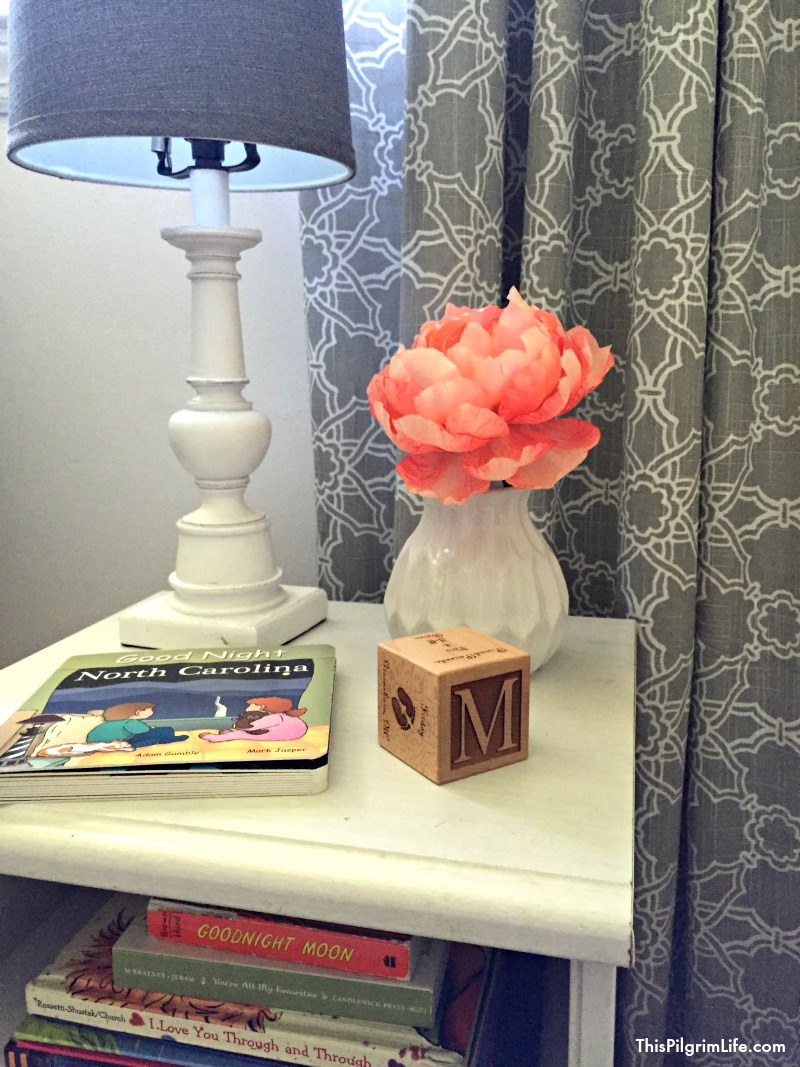
Another really special piece in the room is this wooden block a friend gifted us with after my daughter was born. On each side of the block, details from her birth are engraved. If you’re anything like me, remembering these details gets harder every year.
I can’t wait to get more for my other children!
This “Goodnight North Carolina” bedtime book is read daily right now– we love seeing some of our favorite places in our home state and talking about memories from the different locations. You can find books about other states here.
Sources:
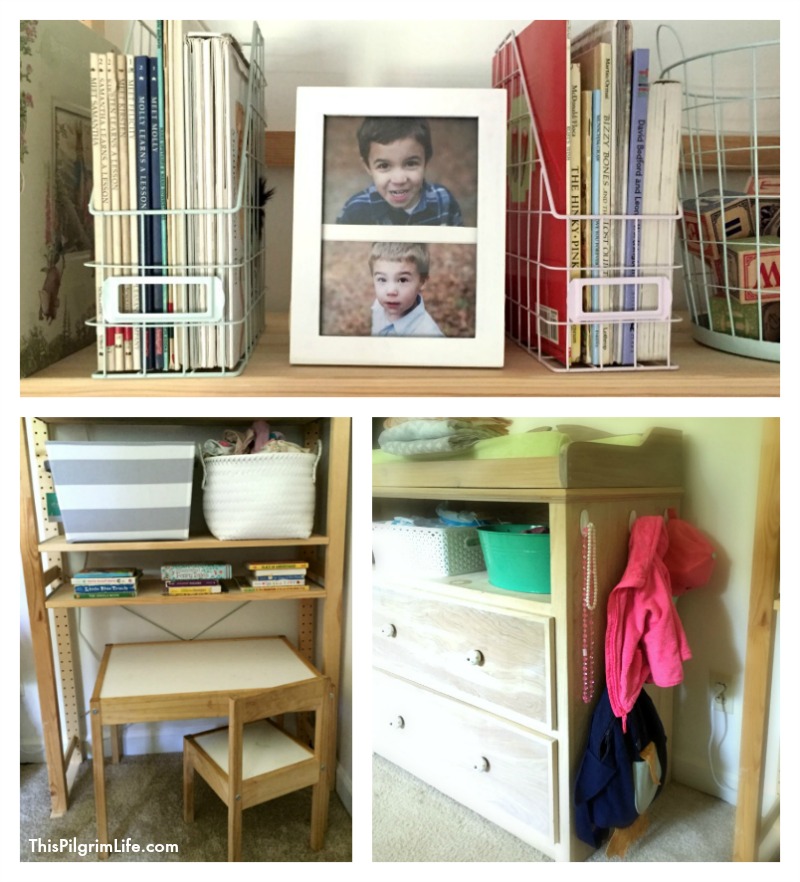
Shelves: Ikea
Nightstand: Ikea
Kids’ Table: Ikea
Baskets: Target
Curtains: Target
Clock: Uncommon Goods
Goodnight North Carolina: Amazon
Personalized Baby Block: Craft-E-Family
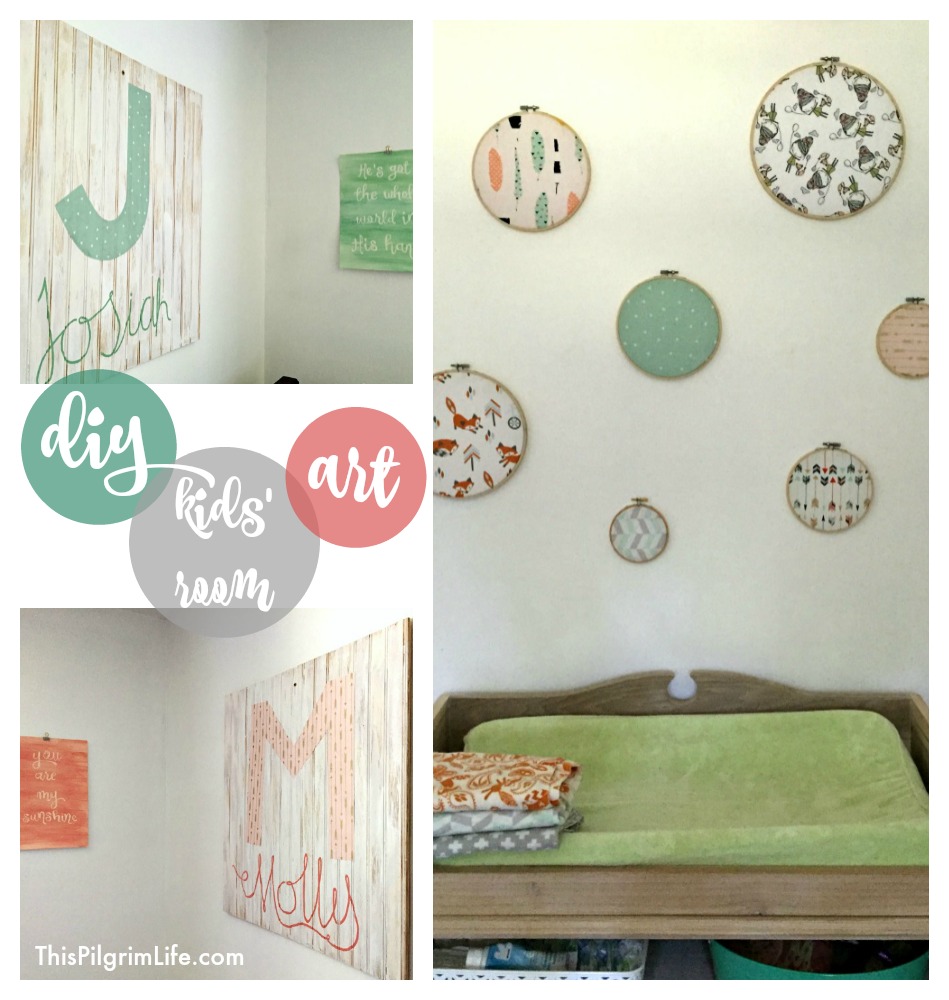
3 DIY Wall Decor Projects
I love being able to support artists and small shops when I am able to, but there are also often times when I just don’t have the funds on hand to do so. This season has been one of those times.
During those times, I have to get a little creative and adopt a “make-it-work” mentality. These three projects are quick and frugal– under ten dollars each (or free!) depending on what you have on hand.
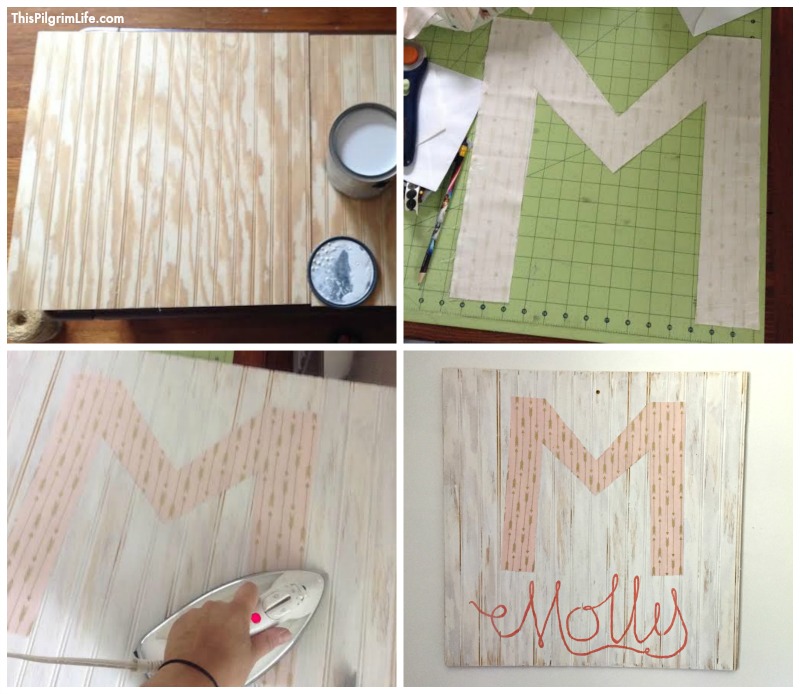
Beadboard Initial Art
We had some beadboard on hand from our kitchen remodeling, so they became the largest art pieces in the kids’ new room.
I whitewashed the boards with a foam brush first. Then I cut out the kids’ initials from coordinating fabric from their room. To get the letters to adhere to the board, I used WonderUnder (iron-on adhesive). It’s super easy to use and (this was a first for me) you can iron it onto wood.
Underneath the initial, I painted each of the kids names, and then the project was done! My husband hung the boards with a screw directly into studs in the walls.
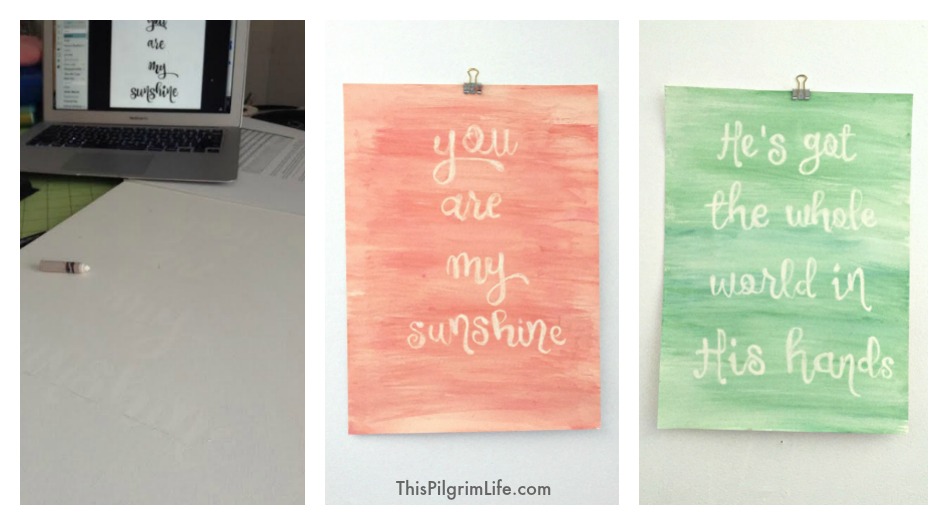
Lullaby Art
Watercolor paper, a white crayon, and watered down craft paint are all that’s needed to DIY this lullaby art.
I chose lines from the songs we sing to the kids each night, used PicMonkey to design the lettering, and then drew the words on the paper with a white crayon. The key is to make each letter bold and to try not to skip spots in the letters. With enough light, you can see the white writing. Once the lines are done, paint over them with watered down paint. (Mixing two colors together gives the art more depth). After you paint, gently wipe off the letters with the end of a q-tip.
I hung mine with clips and adhesive strips from Command hooks. Simple to hang and adjust, and no mark is left.
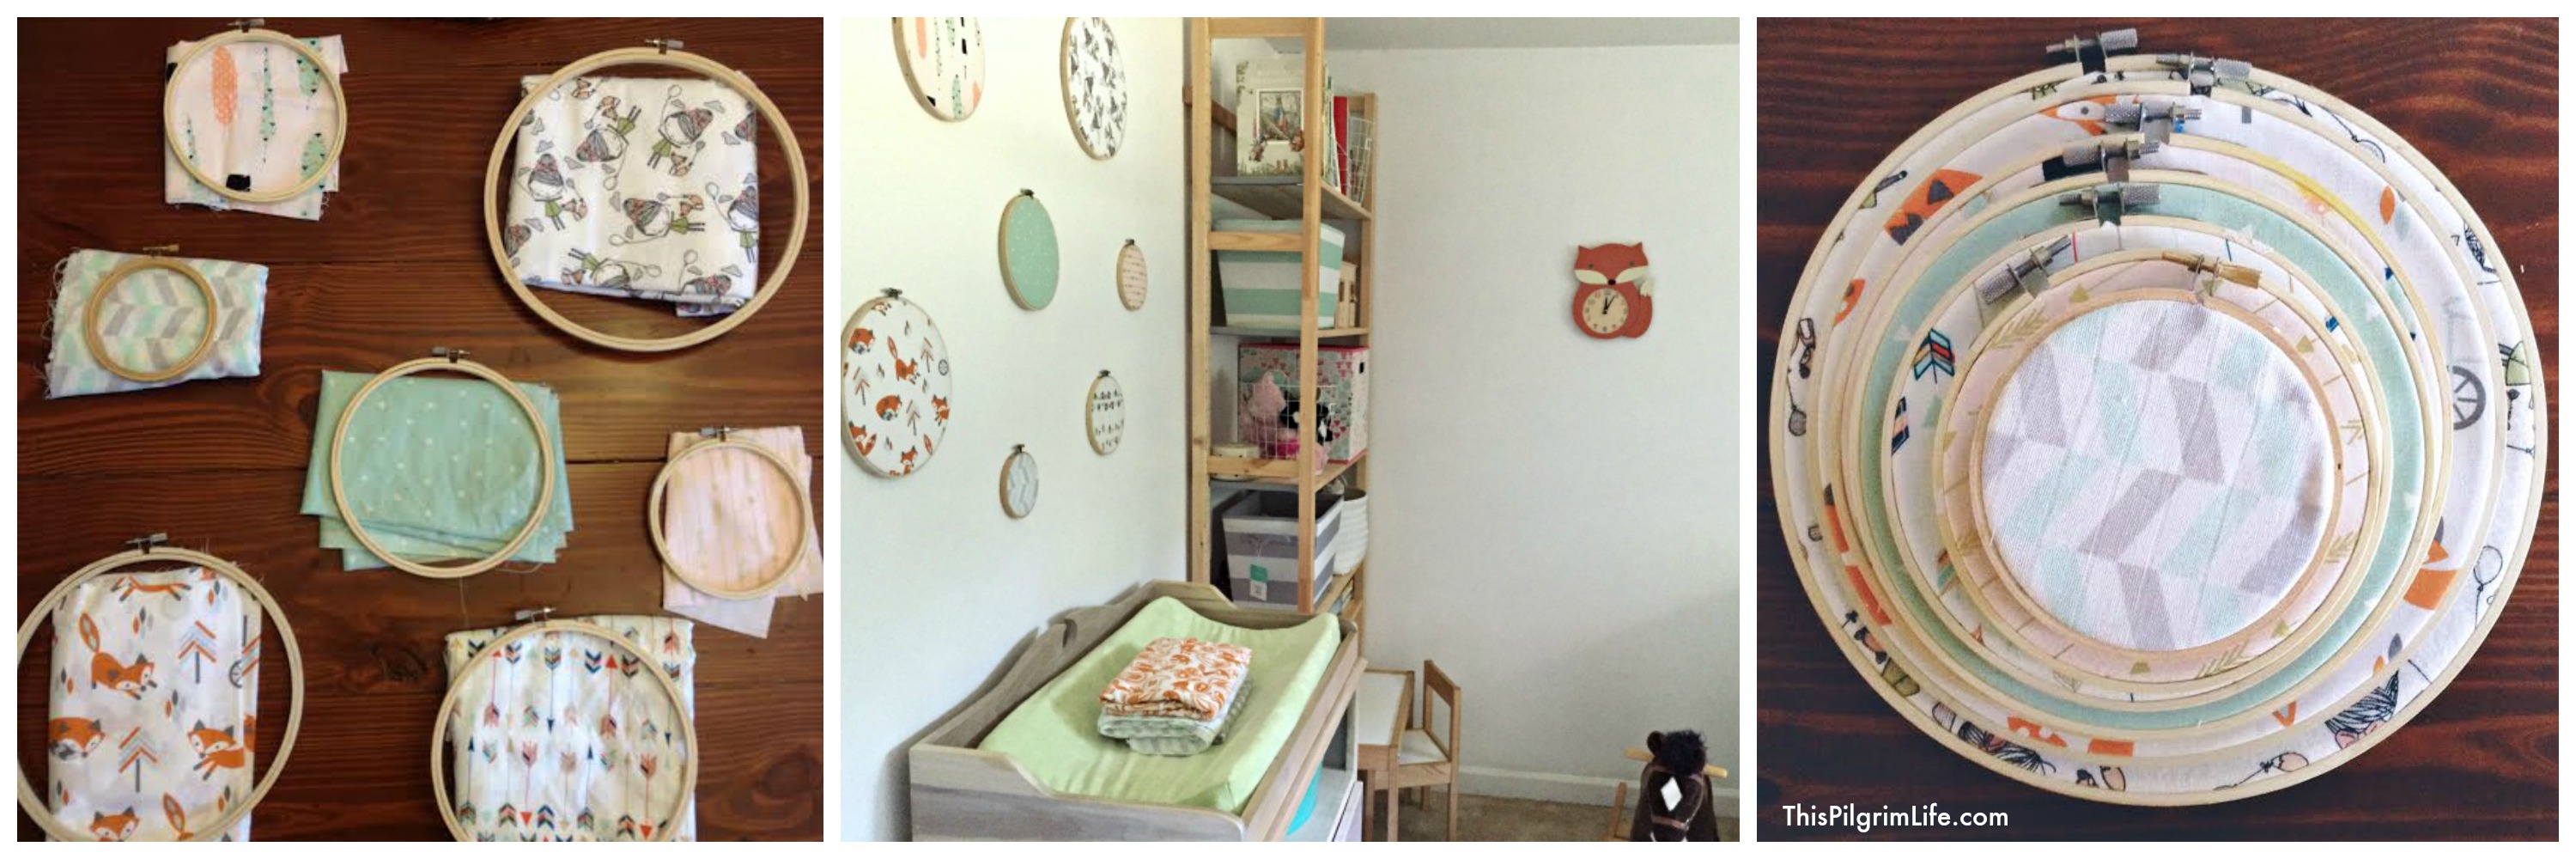
Hoop Wall
This is about as easy as it gets! I used a variety of fabrics, left over from Josiah’s quilt and other recent projects to make a design on the wall with different sized embroidery hoops. This was another quick and easy way to pull in the rooms’ colors and introduce a few more foxes in the decor.

And that’s that friends! I’m going to go put my kids down to bed in their new room and keep enjoying these newborn days before they are gone.
I am thankful for you all! Thanks for coming and reading and being a part of this community!
What lullabies do you sing to your kids at night?
Do your kids share a room?
Lisa, it turned out so beatiful! Such a sweet room! I love love love your wall decor ideas! The white crayon + watercolor is genius! Love the quilt and fox clock, too! I’m with you, embrace the mismatched look. When we did B’s room, we were starting from scratch with an empty room. Sure, everything matched when we got it done, but I struggled to make it feel homey and lived in for a long time because it was a little too perfectly coordinated if you know what I mean. Of course, now the Legos everywhere take care of the lived in look. Ha!
Thank you Samantha! I am all about free or inexpensive decor! And I totally know about Legos all over the room. Still trying to solve that one. We’ve tried a variety of organization methods, but I think it may just be a grin and bear it thing for several years. (As long as it’s in their room!)
Super cute room!! Love it!
Thank you!
I shared a room with my big brother in a two room house until we got old enough that it wasn’t ideal and we moved. Moving was a very traumatic experience for me…I had shared a room with my brother my whole life. It took me weeks to get used to my own room without my brother 🙂
Oh I imagine that was a hard transition! I can’t imagine how my boys would react if I separated them.
Thanks for your comment!