Make a new bag for the season! This two toned tote bag is the perfect go-with-everything, durable, stylish purse!
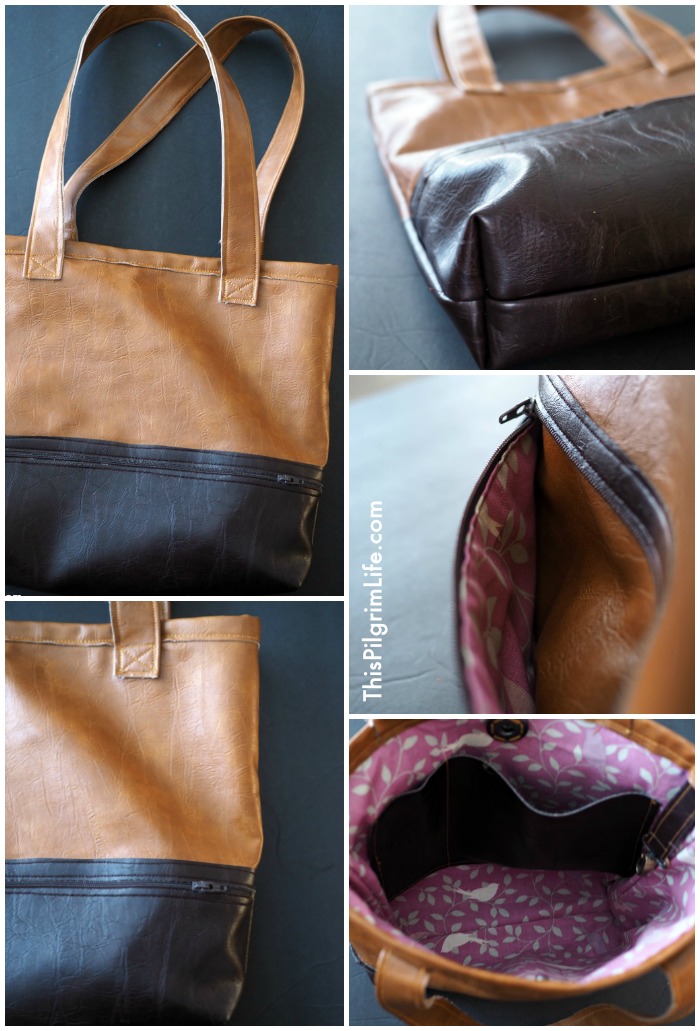
Every year I get an itch to make a new bag. Often, the desire has coincided with the arrival of a new baby and the “need” for a new “diaper bag”. (I’ve never used a true diaper bag, whatever that is. But I do like being able to design my own bags large enough and with enough pockets to meet all our needs).
I have been noticing recently how the bag I made just before my toddler son was born is getting stained and dingy. I could clean it, yes. But, then again, I could also just make another bag…
This time I decided to try making a bag completely out of vinyl (my favorite material for look-alike leather). This way the bag could avoid getting dingy looking and would be classic and timeless to boot. Of course, a colorful lining is a must. And I never make a bag without a key loop either.
I did not take step-by-step process pictures like I often do, but I wanted to share the bag and the steps I followed to make it just the same. If you have a moderate amount of sewing experience, you can follow the instructions and refer to the pictures of the completed purse for reference.
The basic process of making a tote bag is the same whether you are making a canvas tote for library books, a tote for groceries, or a purse like this one. Once you learn that process, than you can vary the size and add all the details you want.
You can check out this video demonstrating the process of making a trash bag for the car. It takes you through the process step-by-step.
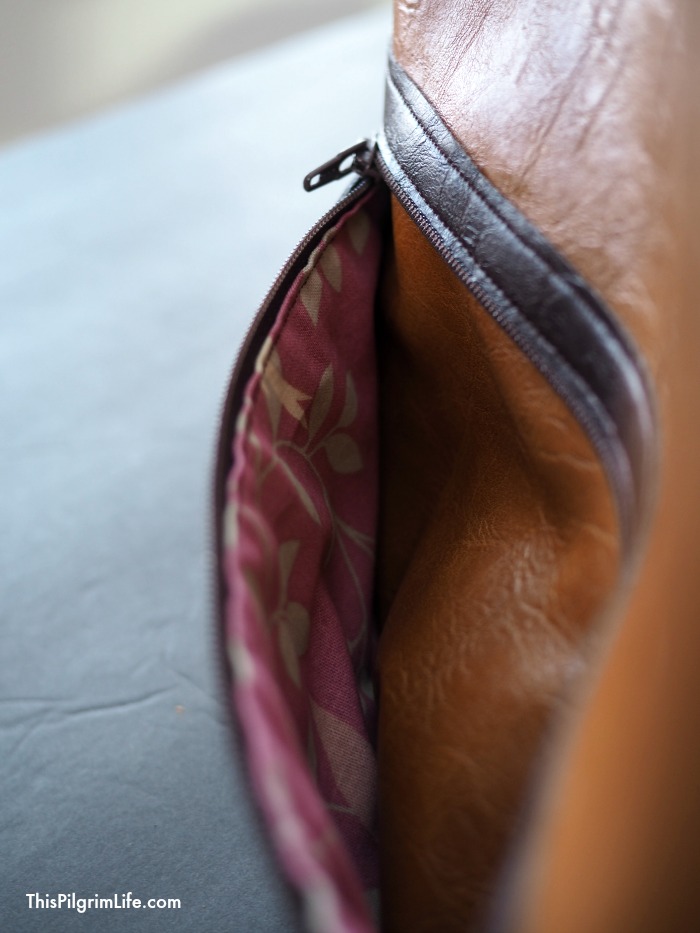
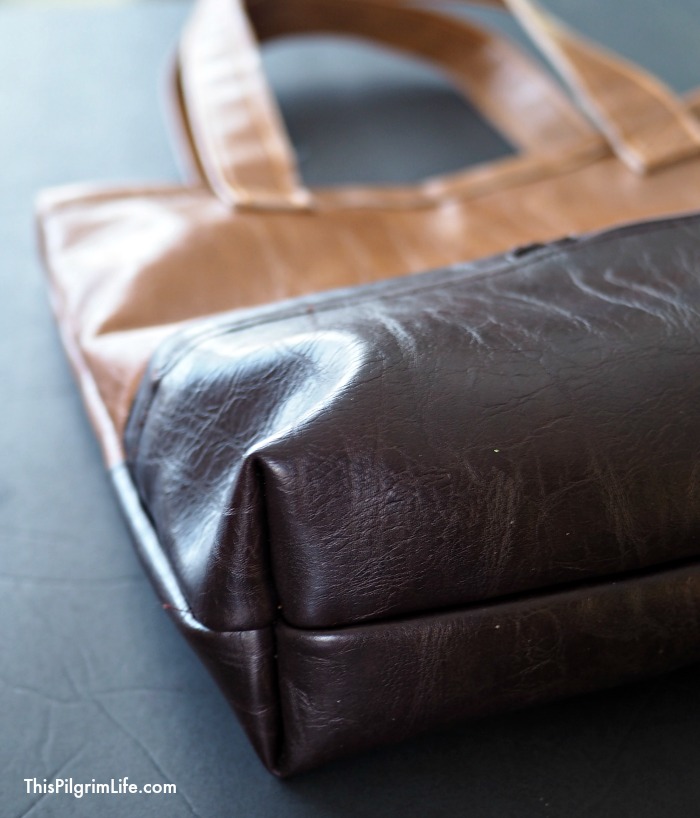
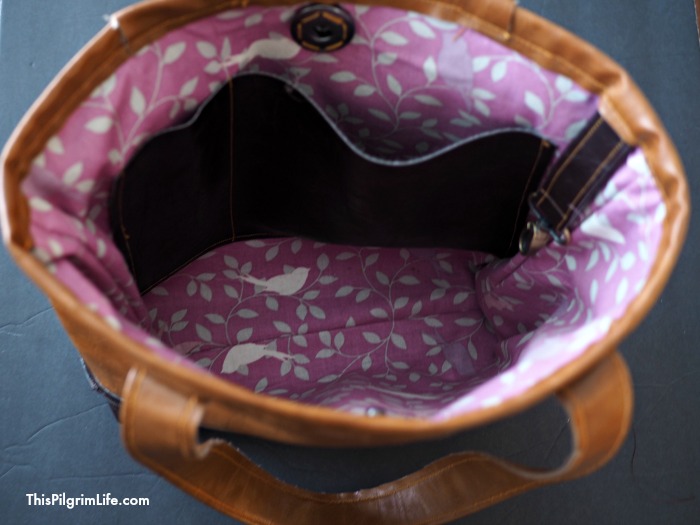
I added an inconspicuous zipper to the front of the bag, a key loop, and two simple inner pockets. In time, I may add grommets to the sides of the bag so I can attach a cross body strap.
Two Toned Tote Bag
Materials
- 1/2 yd lighter vinyl
- 1/4 yd darker vinyl
- 1/2 yd lining material
- midweight interfacing
- 12″ zipper
- swivel snaphook
- large snap (optional)
- heavy duty (leather) thread in coordinating color
- heavy duty (leather) needle
Steps
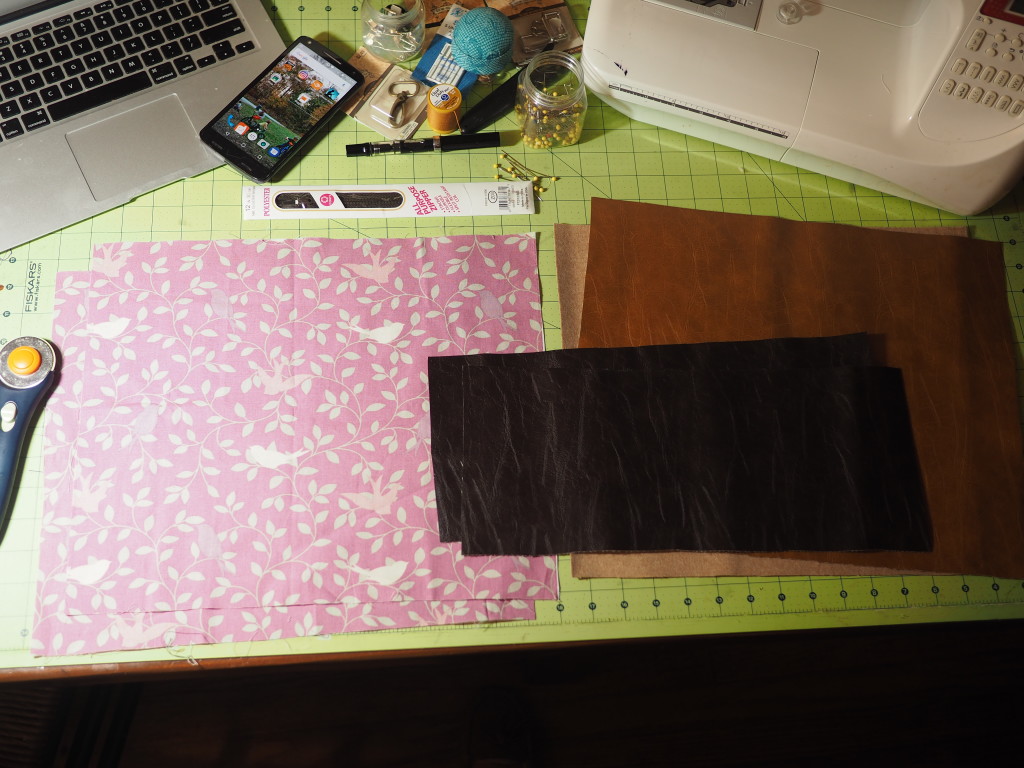
1. Cut out the pieces.
- Cut 2 pieces 12.5″x 15″ from the lighter vinyl for the main body pieces.
- Cut out 2 pieces 6″ x 15″ from the darker vinyl.
- Cut 2 pieces 12.5″ x 15″ from the lining material.
- Cut 2 pieces 11.5″ x 14″ from the interfacing.
- Attach the interfacing to the wrong sides of the lining pieces.
2. Attach the zipper and assemble the front of the bag.
- Sew one darker vinyl piece to the bottom zipper piece.
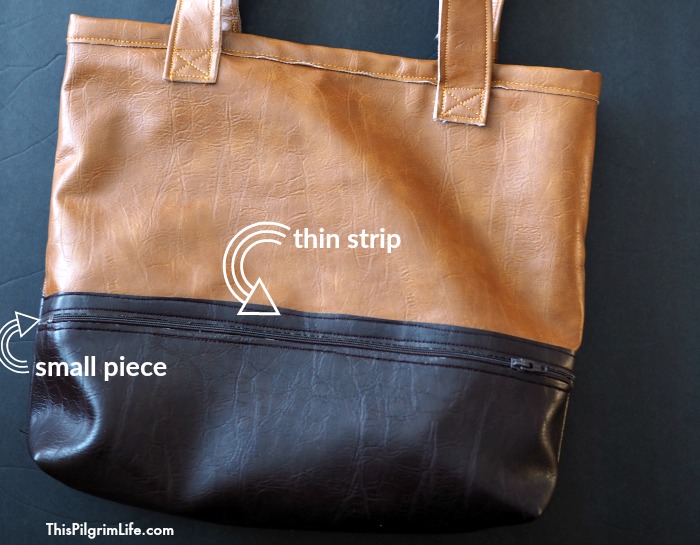
- Cut a small strip of the darker vinyl, about a half-inch wide and 15″ long, for the top of the zipper. Cut two small tabs about 1″ x 1″ from the darker vinyl for the sides of the zipper.
- Cut a piece from the lining material to fit below the zipper to line the pocket. Fold and press the top edge of the pocket lining in a half-inch towards the wrong side. Attach the pocket lining by tucking it against the wrong side of the darker vinyl and sewing along the seam you just made attaching the zipper.
- Lay the zipper and darker vinyl piece on top of one of the lighter vinyl pieces. Place the thin strip on the top piece of the zipper. Tuck the small pieces on the ends where the lighter vinyl is showing through. Pin in place.
- Sew along the top edge of the zipper to attach the pocket. Sew a second line across the top edge of the thin strip.
- (See photo for reference).
- Trim any overhanging material and then baste the darker vinyl to the lighter vinyl around the sides and bottom.
- Sew the second piece of darker vinyl to the second piece of lighter vinyl to make the back piece. Place the darker vinyl so that it will match the location of the darker vinyl on the front. (You want the sides to match when you lay the front and back together).
3. Sew together the main body pieces & lining pieces.
- Place the main vinyl pieces with their right sides together. Pin in place and sew around the sides and bottom with a half-inch seam, backstitching at the starting and stopping points.
- Box the bottom of the bag by creating a triangle by pressing the side seam to meet the bottom seam, and sewing two inches from the corner. (Watch this video to see the process of making a bag and boxing the bottom. Start at 12:00 to see boxing the bottom of the bag).
- Repeat the first two steps above to make the lining of the bag. (Sew on any inner pockets before you sew the lining pieces together. I used a piece of the darker vinyl to make a pocket so that I did not need to worry about finishing any edges).
4. Make the handles.
- Cut two strips from the light vinyl 24″ x 3″. Fold each long strip in half and sew down each long edge. Trim any uneven parts on the raw edges.
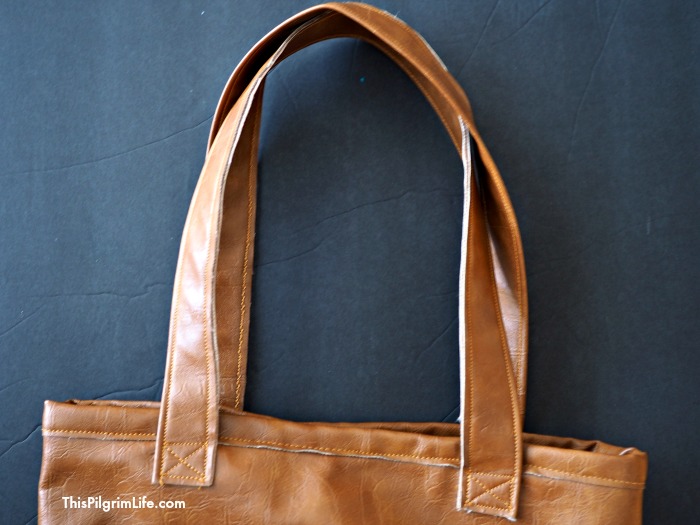
- Pin the straps so that nearest edge is 3″ from the side and the bottom of the strap is 1.5″ from the top edge of the bag. Sew a box and X to attach the straps to the bag. Leave space at the top of the back for the finishing strip. (See picture below for reference).
5. Finish the bag.
- Place the lining inside the main body pieces so that the wrong sides are together and the right side of the lining is facing out. Press the lining into the bottom of the bag, and then fold down and press the top edge of the lining in towards the wrong side so that the top edges line up.
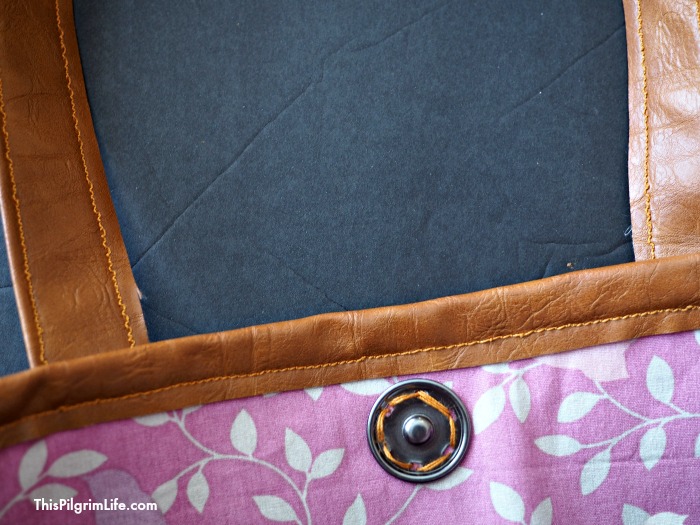
- If you want a button or magnet closure for the top of your bag, sew it on now before you sew the outer and inner pieces together.
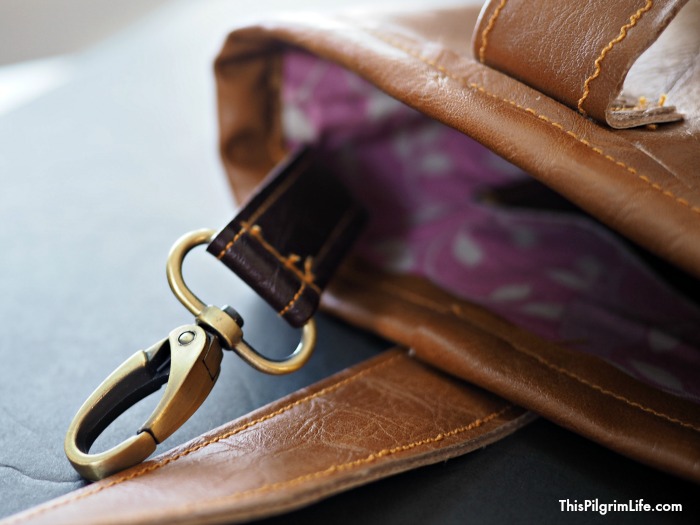
- Make the key loop by cutting a piece of vinyl 6″ x 2″. Fold the piece in half lengthwise and sew down both sides. Loop the strap through the swivel hook and sew a line to hold the hook in place. Pin the key loop inside to the lining somewhere on the top edge of the bag. (You will attach it in the next step).
- Baste stitch all around the top edge of the main body and the lining, attaching them together.
- Cut a strip of light vinyl 1″ wide and long enough to wrap around the top edge of the bag. (I didn’t have a piece long enough, so I used two pieces, attaching the shorter piece between the handles on the back of the bag.
- Fold the 1″ strip so that it sandwiches the top edge of the bag. Pin in place and then sew around the bottom edge, attaching it to the bag. Make sure as you sew that you are sewing through the thin strip on the outside and in the lining of the bag.
And you’re done! Way to go!

Sharing is caring! Don’t forget to pin and share. Thank you!

Just found you and I love the way you explain everything, you’re a great instructor!
Thank you for the February drawings.
You’re welcome!
Just had surgery on my foot would love to try the baby balm on the dry peeling parts.