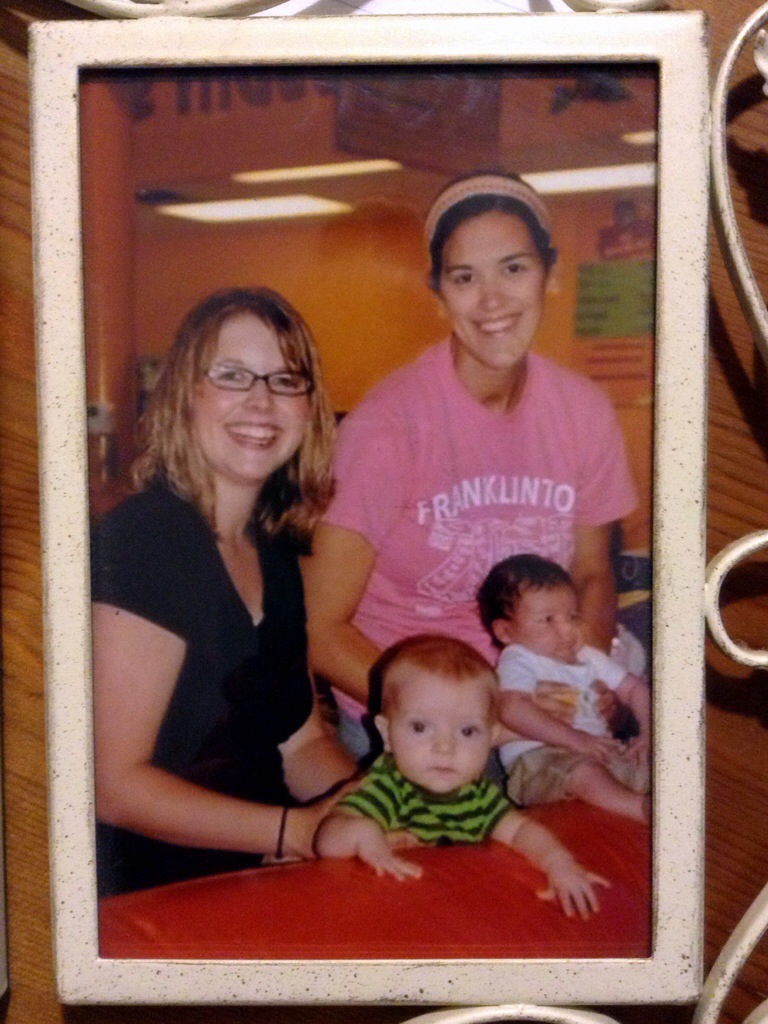
I can clearly remember the very first time I tried to use a nursing cover in public. I had the standard rectangular piece of fabric, boning at the top, and a strap around your neck. My baby was only three weeks old. We were at a birthday party. At a bouncy house. With lots of energetic and loud children running around.
Did I mention that there were lots of people in every direction? This will be important information in a minute.
I was a novice at breastfeeding and my baby was a novice at nursing still. It was awkward for us both.
I did not have the foresight to wear a button-up shirt that would make it easier to nurse in public. Probably because it was the middle of summer and the temperatures were sweltering. Probably also because I was still existing in that early period of drunken stupor I-have-a-newborn-I-am-not-sleeping-ever state.
 A picture of a picture- This is the best I can manage since this is in the pre-smartphone era.
There I was, floppy newborn baby in hand, sitting in an uncomfortable chair, trying to simultaneously nurse and preserve a bit of modesty (I was only on baby number one, remember?).
I was really struggling to help my baby eat while trying to prevent people in front of me, beside me, and behind me from seeing the whole show. It wasn’t working, though, and I ended up hiding in the bathroom to feed unencumbered by a cover.
To be fair, it did get better. Over time my son and I both became more comfortable and capable at nursing in public areas. I got the hang of using that style cover and it served me well through two years (two separate children) of breastfeeding. But it never stopped being awkward trying to watch the angles and wondering what people at my side and anyone behind me could see.
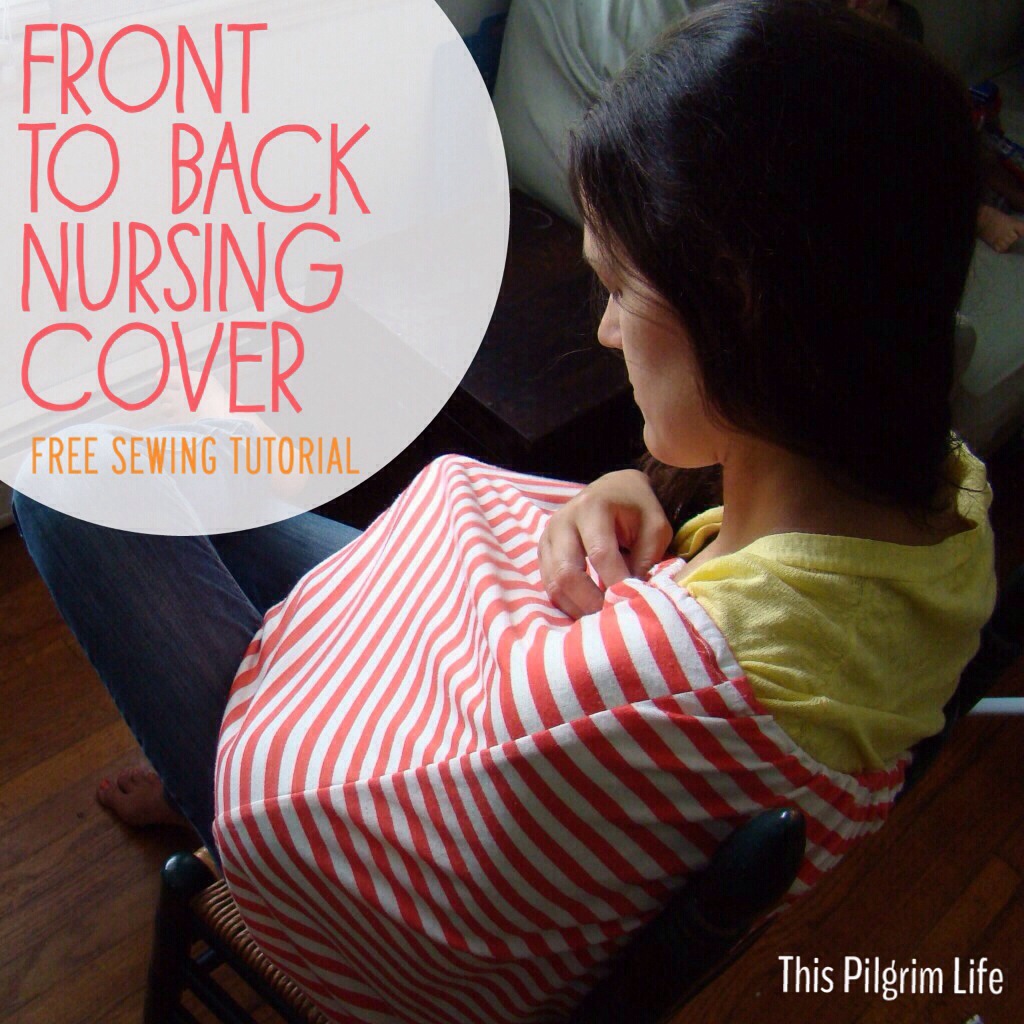
Now with my third baby, I am using a different style cover. It really is one of those brilliant, why didn’t I know about this two kids ago, kind of things. Chalk it up to another way my third baby is easier than my first two.
And while I can’t take the credit for the idea, I can tell you how to make one for yourself or for a friend. I have made several for friends and as baby shower gifts. For those who are able and wanting to breastfeed, it is an incredibly useful gift.
The beauty of this cover is that you don’t have to worry about your back being exposed, or your baby pulling the cover off while nursing. You can discretely nurse in the middle of a crowded restaurant (like I did last night).
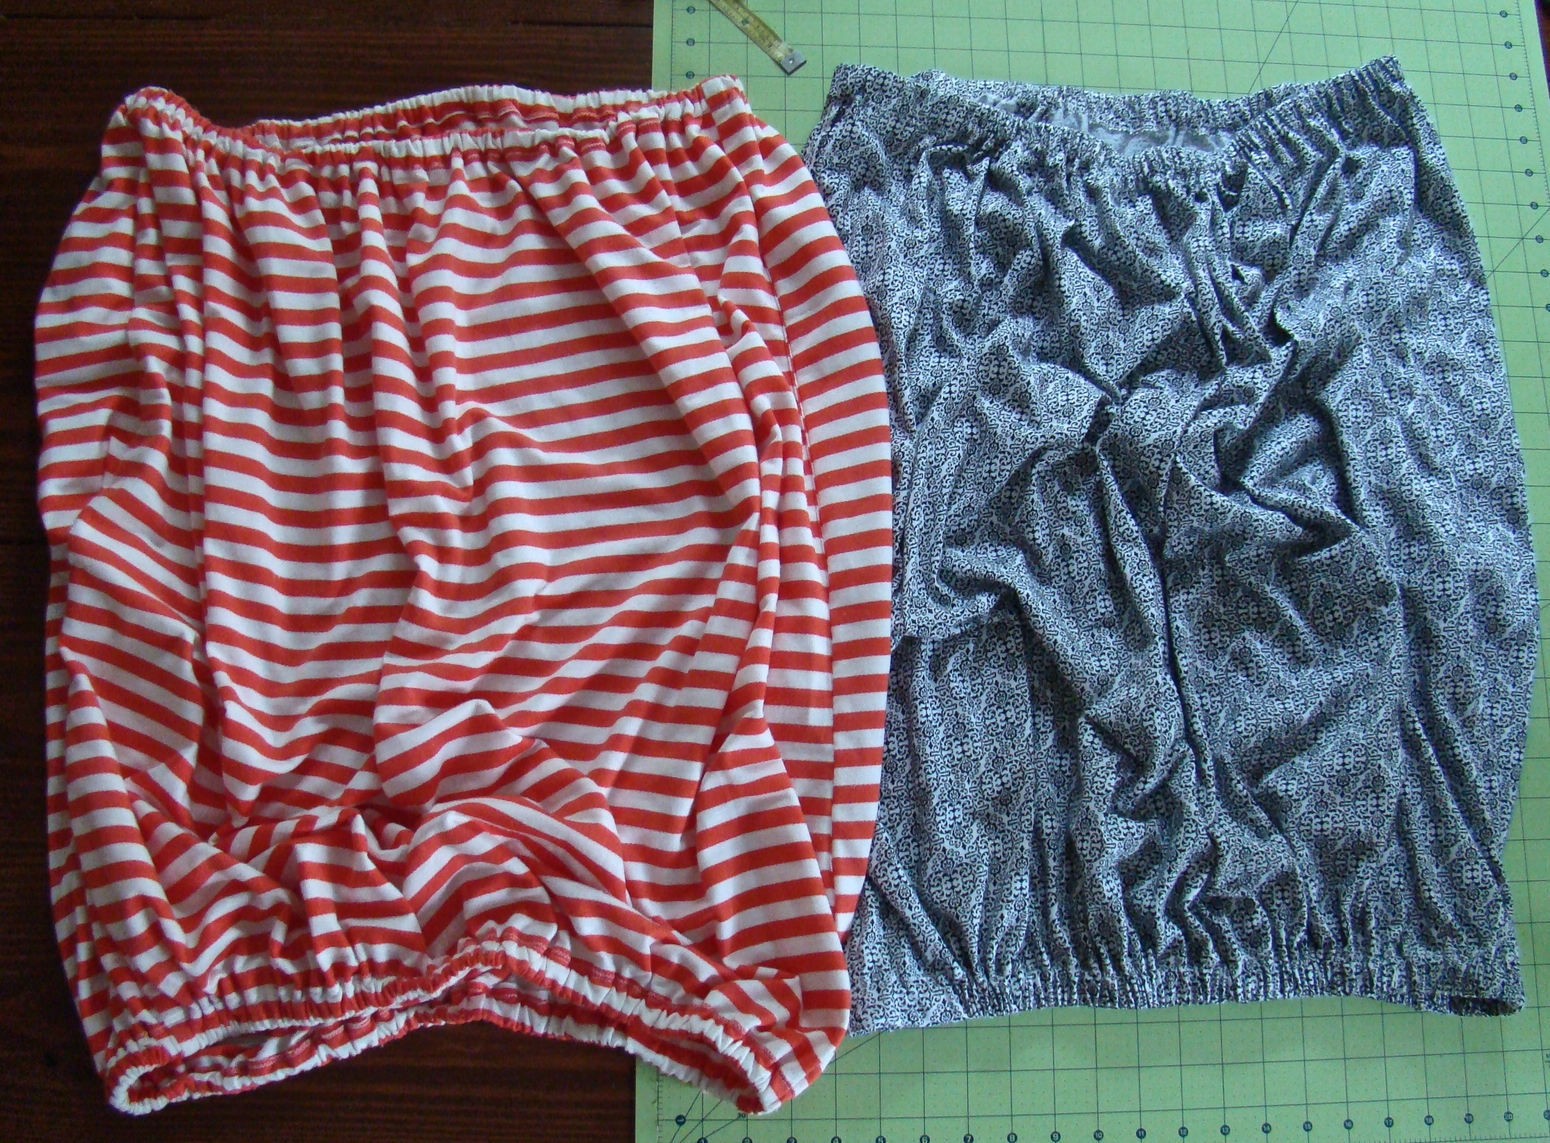
The cover is basically a big, baggy tube top. It has elastic on the top and the bottom so it fits below your waist and across one shoulder on top. Exposed backs or sides are not an issue. And the jersey knit makes it lightweight and breathable.

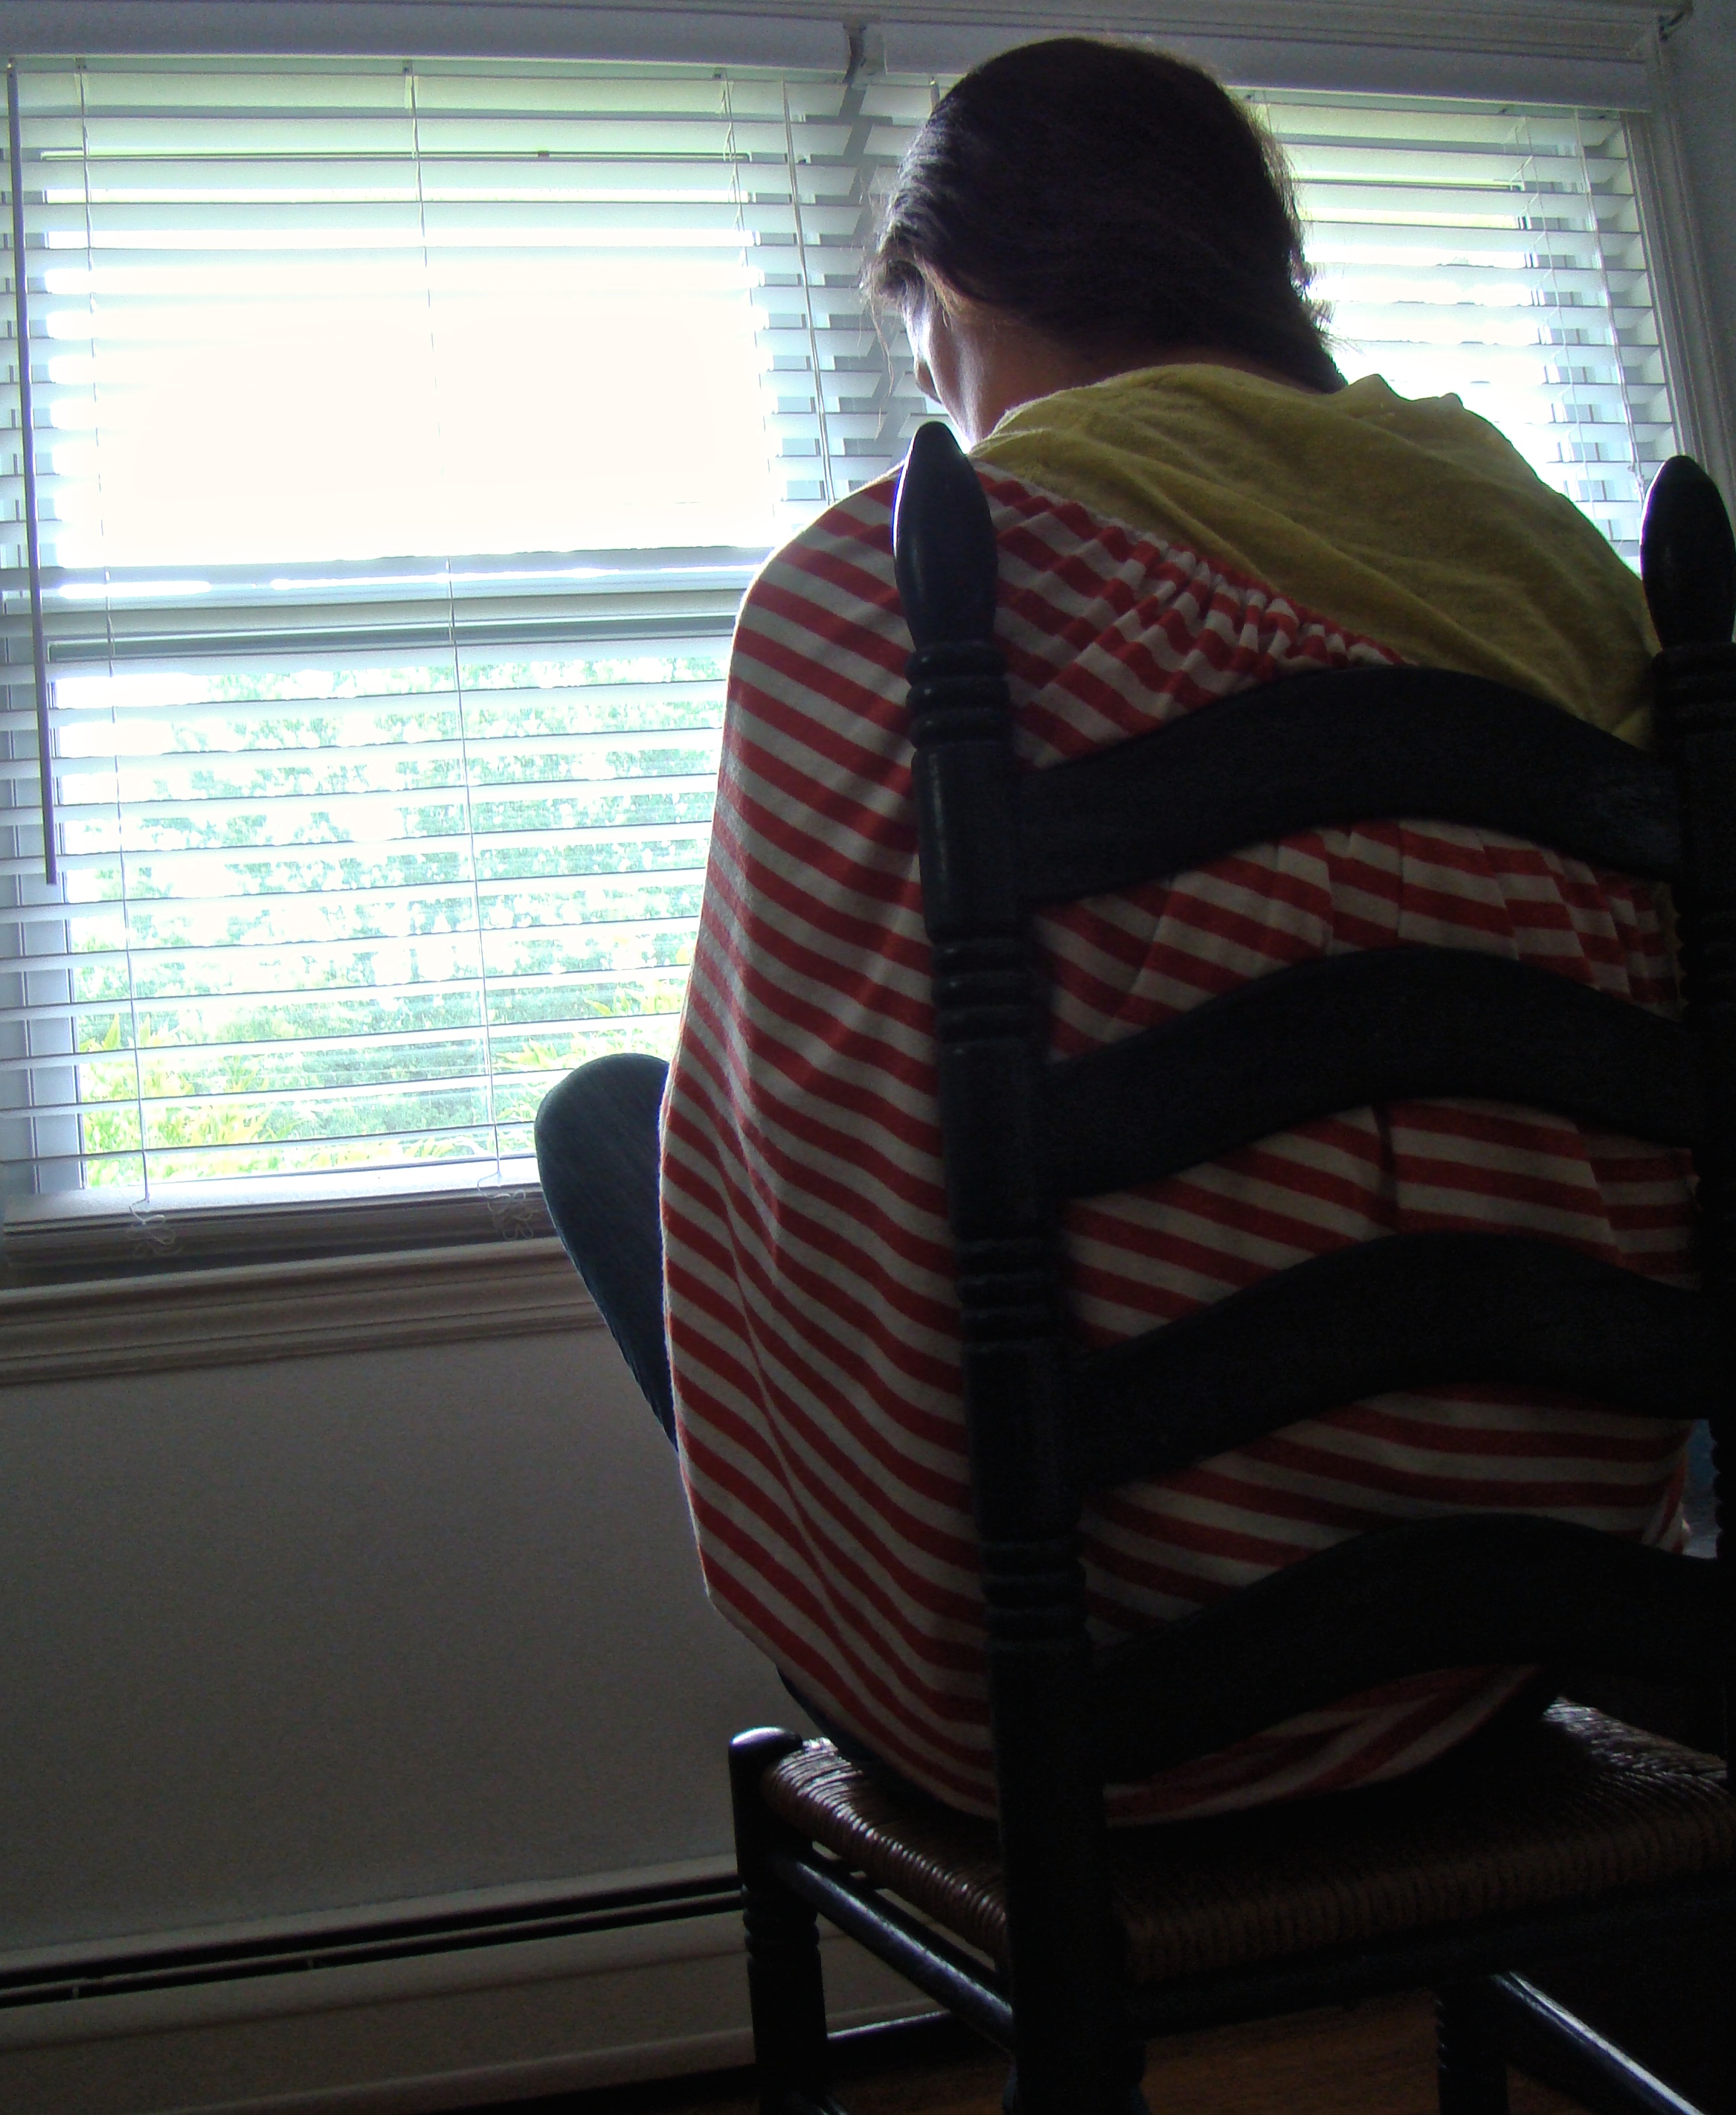
I feel it is necessary to ask you to excuse the bad lighting and mom-hair in these pictures. At least my husband reminded me to get out of lounge clothes before he took a few pictures.
How do you use one? Not to insult anyone intelligence, but it may not be clear if you haven’t seen one in use… I put the cover on like I would a tube top, pull one arm inside the cover and bring my baby under the cover with that arm. The cover is pulled up over my shoulder on the side I am nursing. The cover is large enough that I can rotate my baby to switch sides during a feeding. Though, in the early weeks, taking the baby out to burp in between sides is easy too.
Step-By-Step Tutorial:
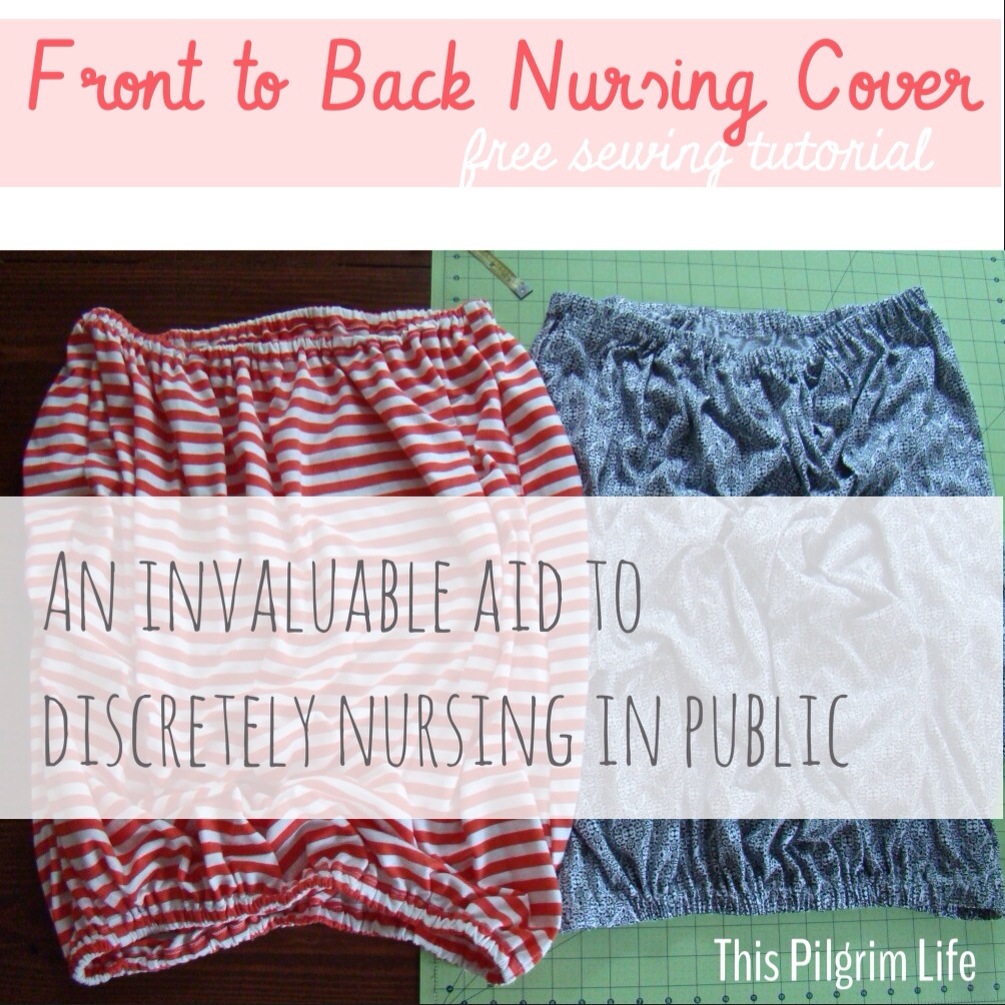
Materials Needed:
2 yards 1/2″ or 3/4″ elastic
1 yard jersey knit fabric (36″ by 60″– If the bolt is only 45″ you will need 2 yards)
Instructions:
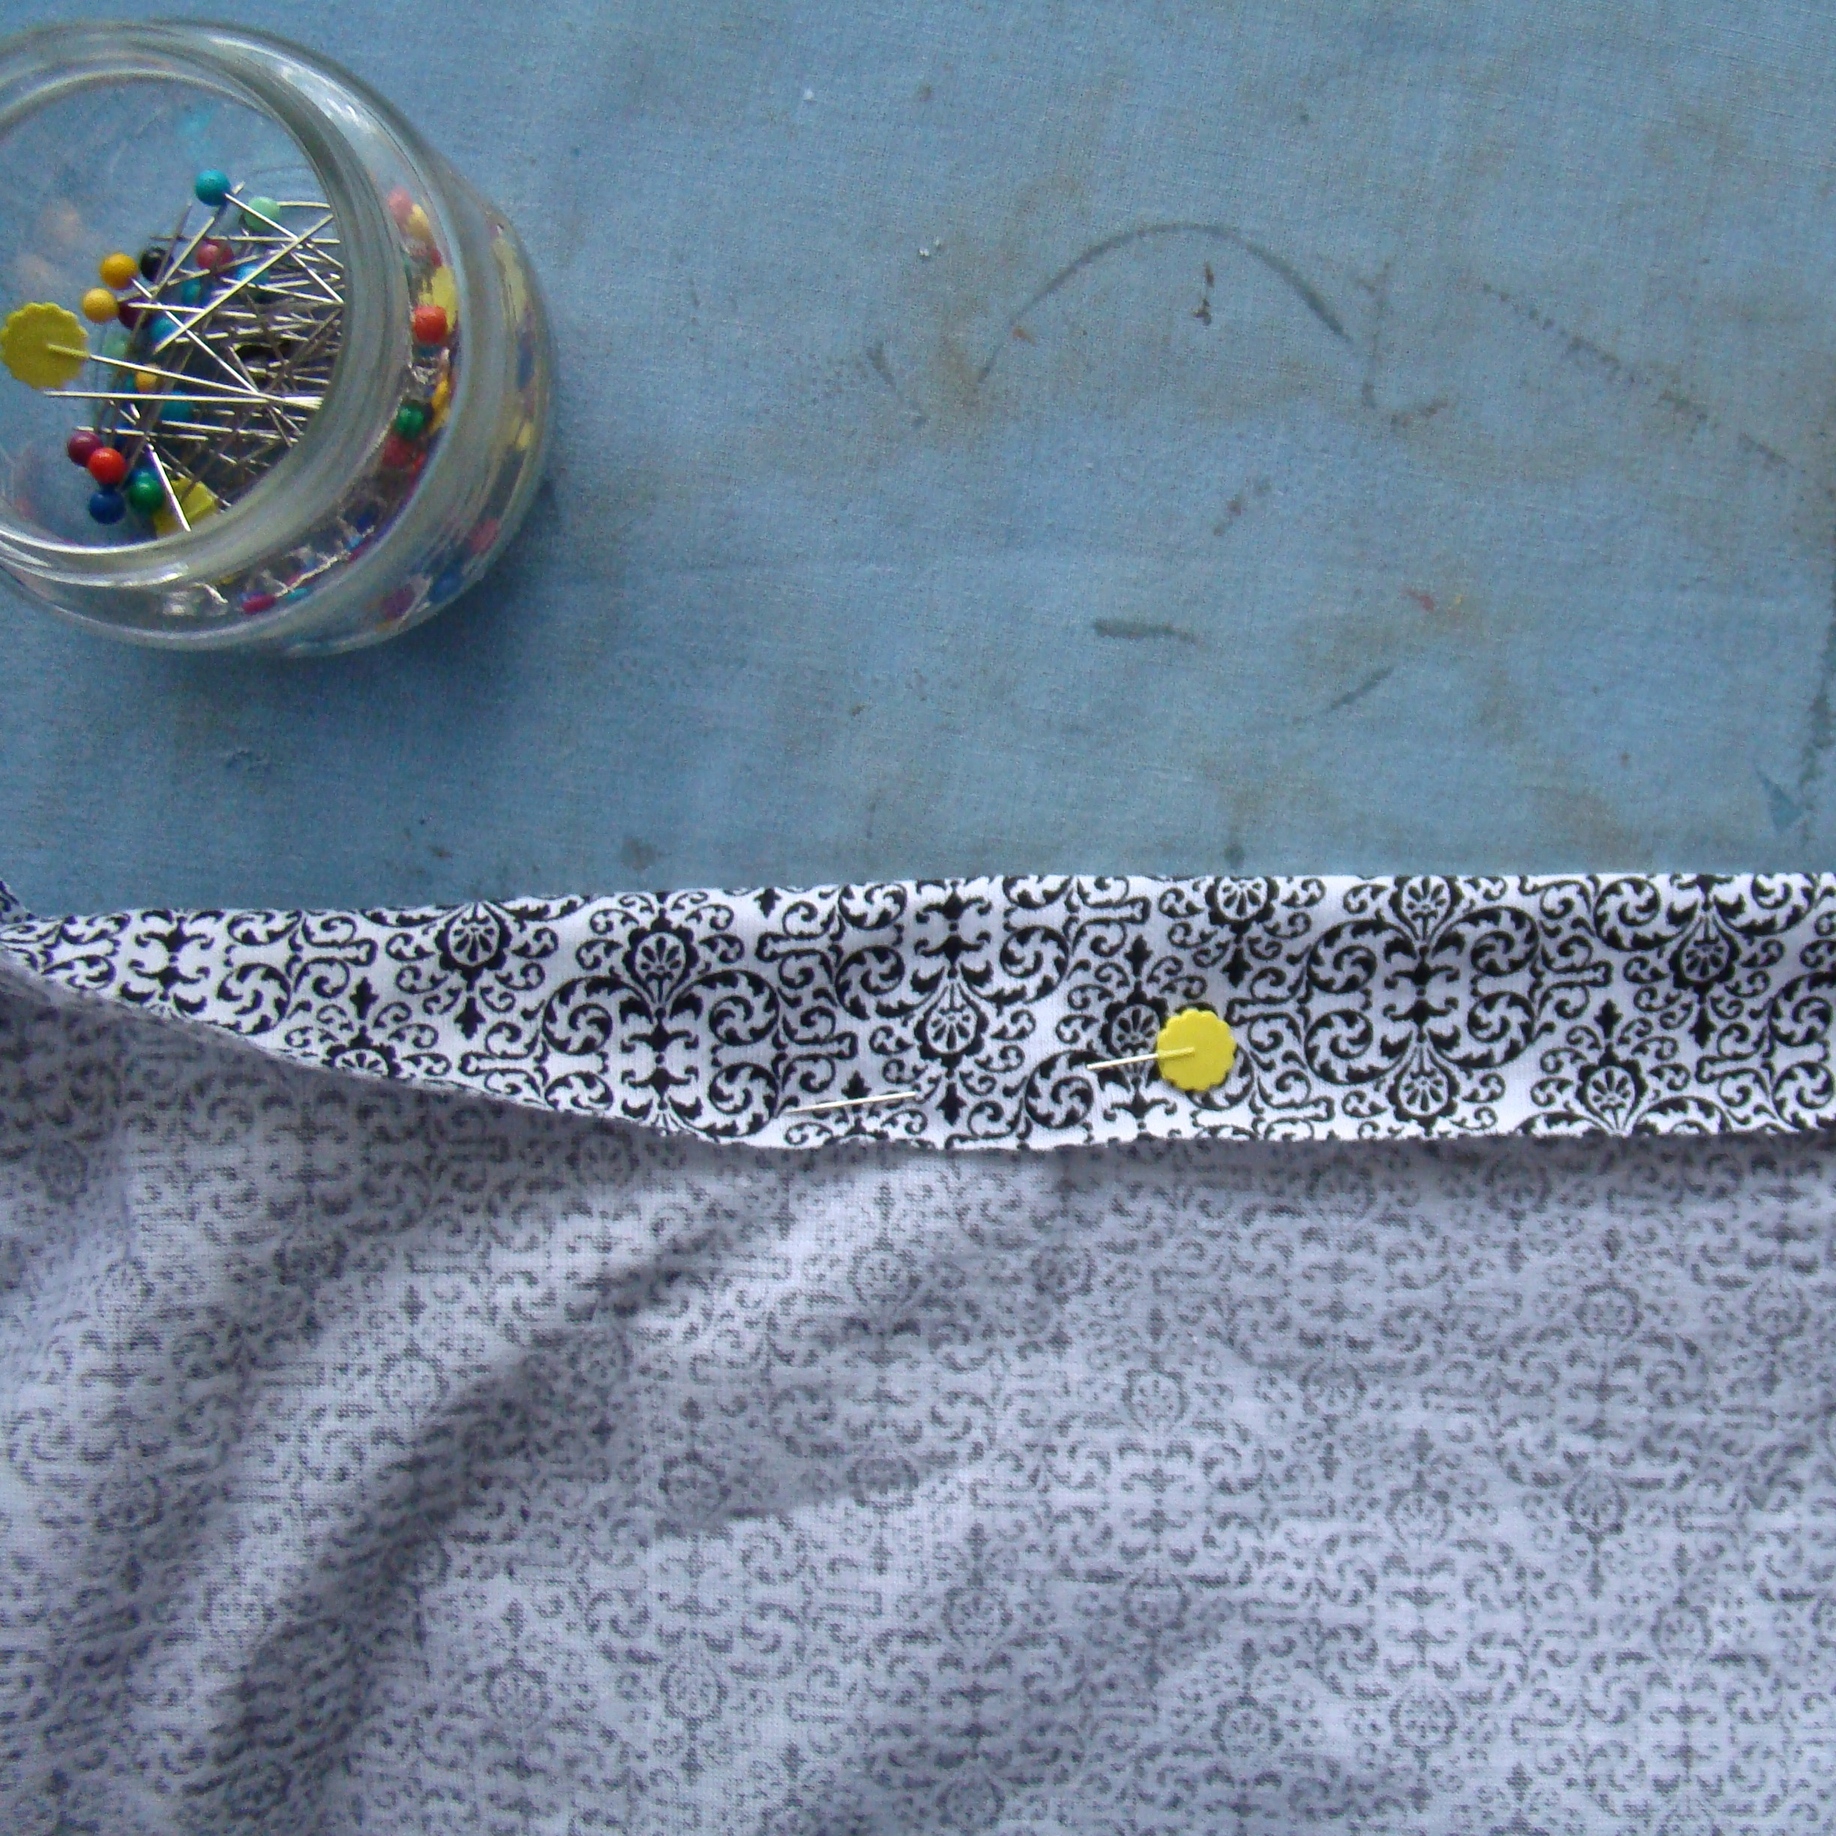
1. Cut two pieces 30″ tall and 36″ wide. If your fabric is 1 yard by 60 inches (most bolts of fabric are either 45″ or 60″ wide) you can just fold the fabric in half and cut along the fold to make your two pieces.

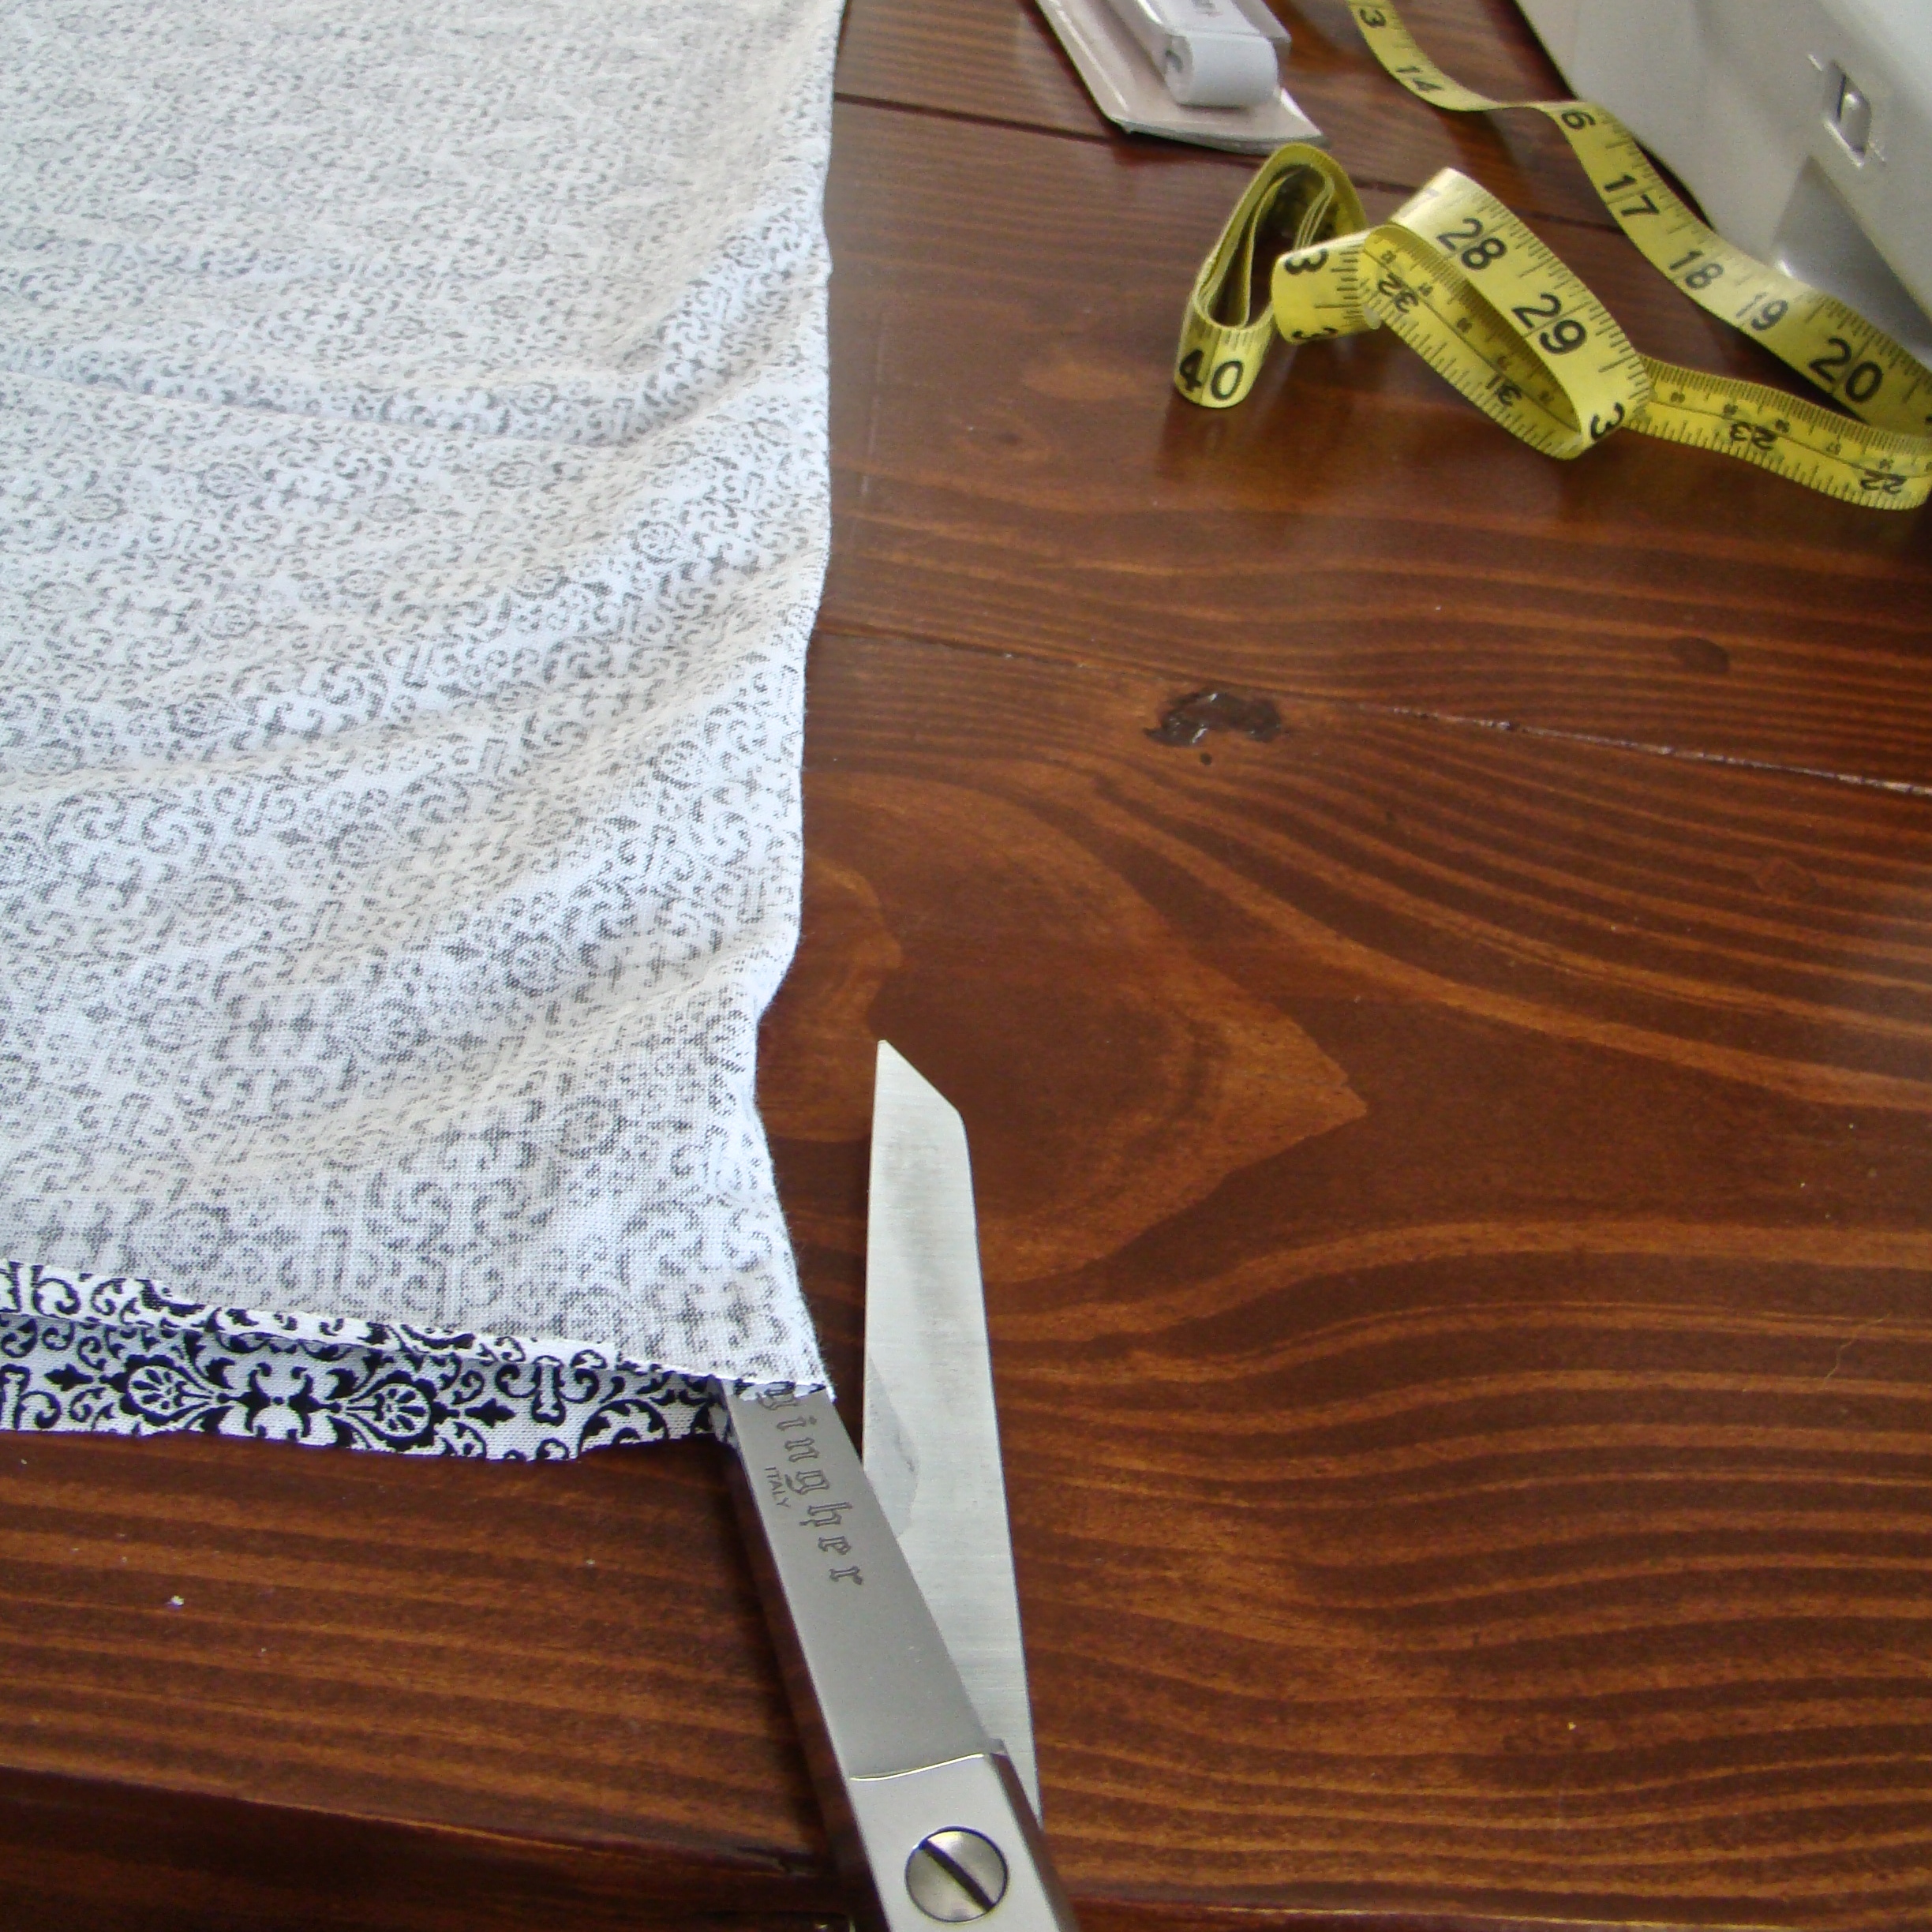
Optional Steps for a French Seam: Steps 2 and 3 are for making a French seam, which encloses the inside seam so that there are not raw edges on the inside of the nursing cover. If you are using a knit material for your cover, the fabric will not fray and so this step is not strictly necessary. You can save a bit of time and skip on to step 4 if you’d like. I often like to use a French seam, though, because I feel like it gives the end result a more finished look and adds to its durability.
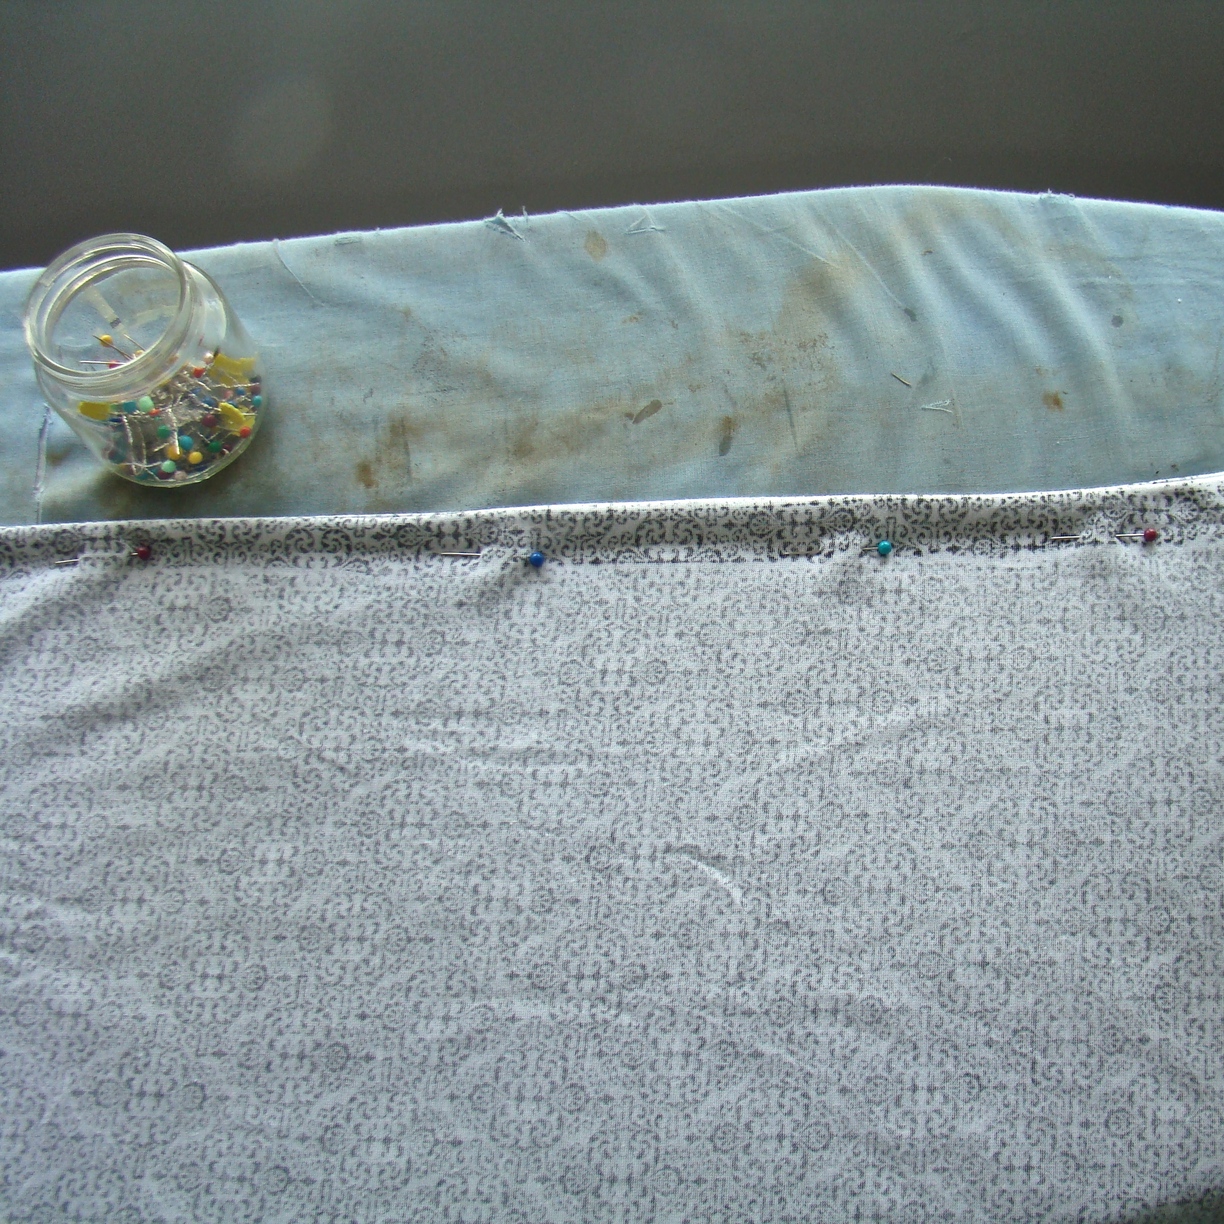
2. Lay the two pieces on top of each other, wrong sides together. Pin along each 30″ side.

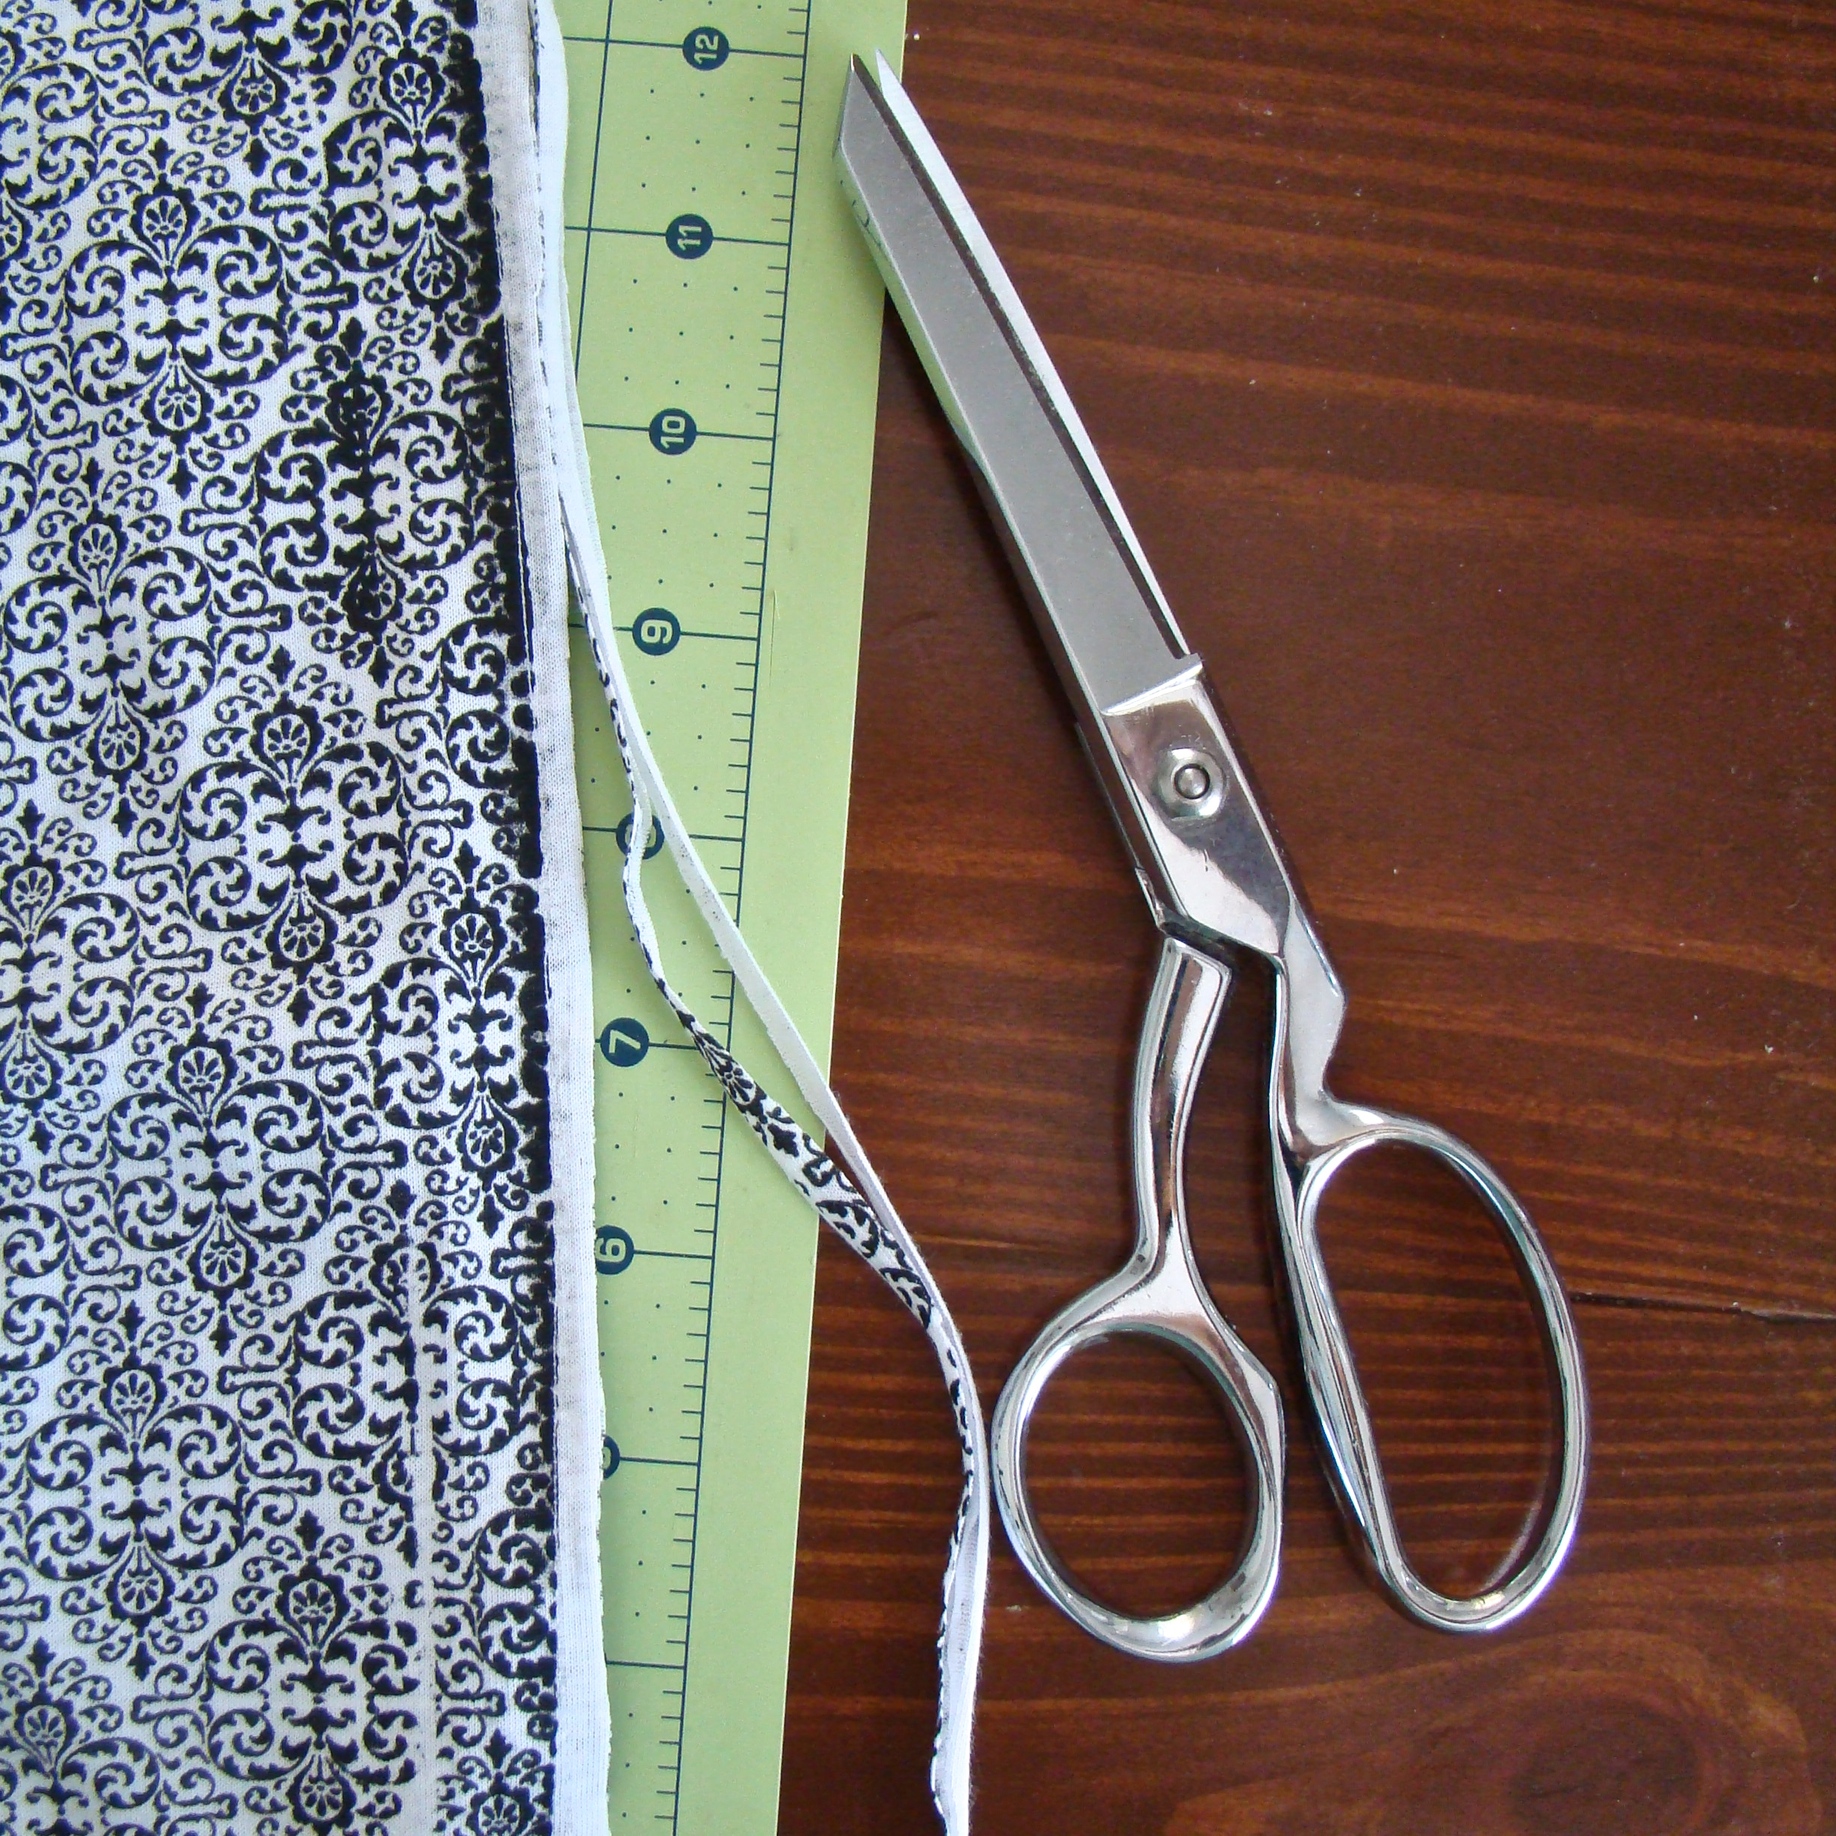
3. Sew a 1/2 inch seam down each 30″ side. Trim the seam allowance to 1/4 inch on both side. Flip the tube inside out so that the right sides are together. Press along the sewn edges.
4. Pin along both 30″ sides again (this time right sides together). Sew along each 30″ side with a 1/2 inch seam. You have now created a french seam, enclosing the raw edges inside the second seam.
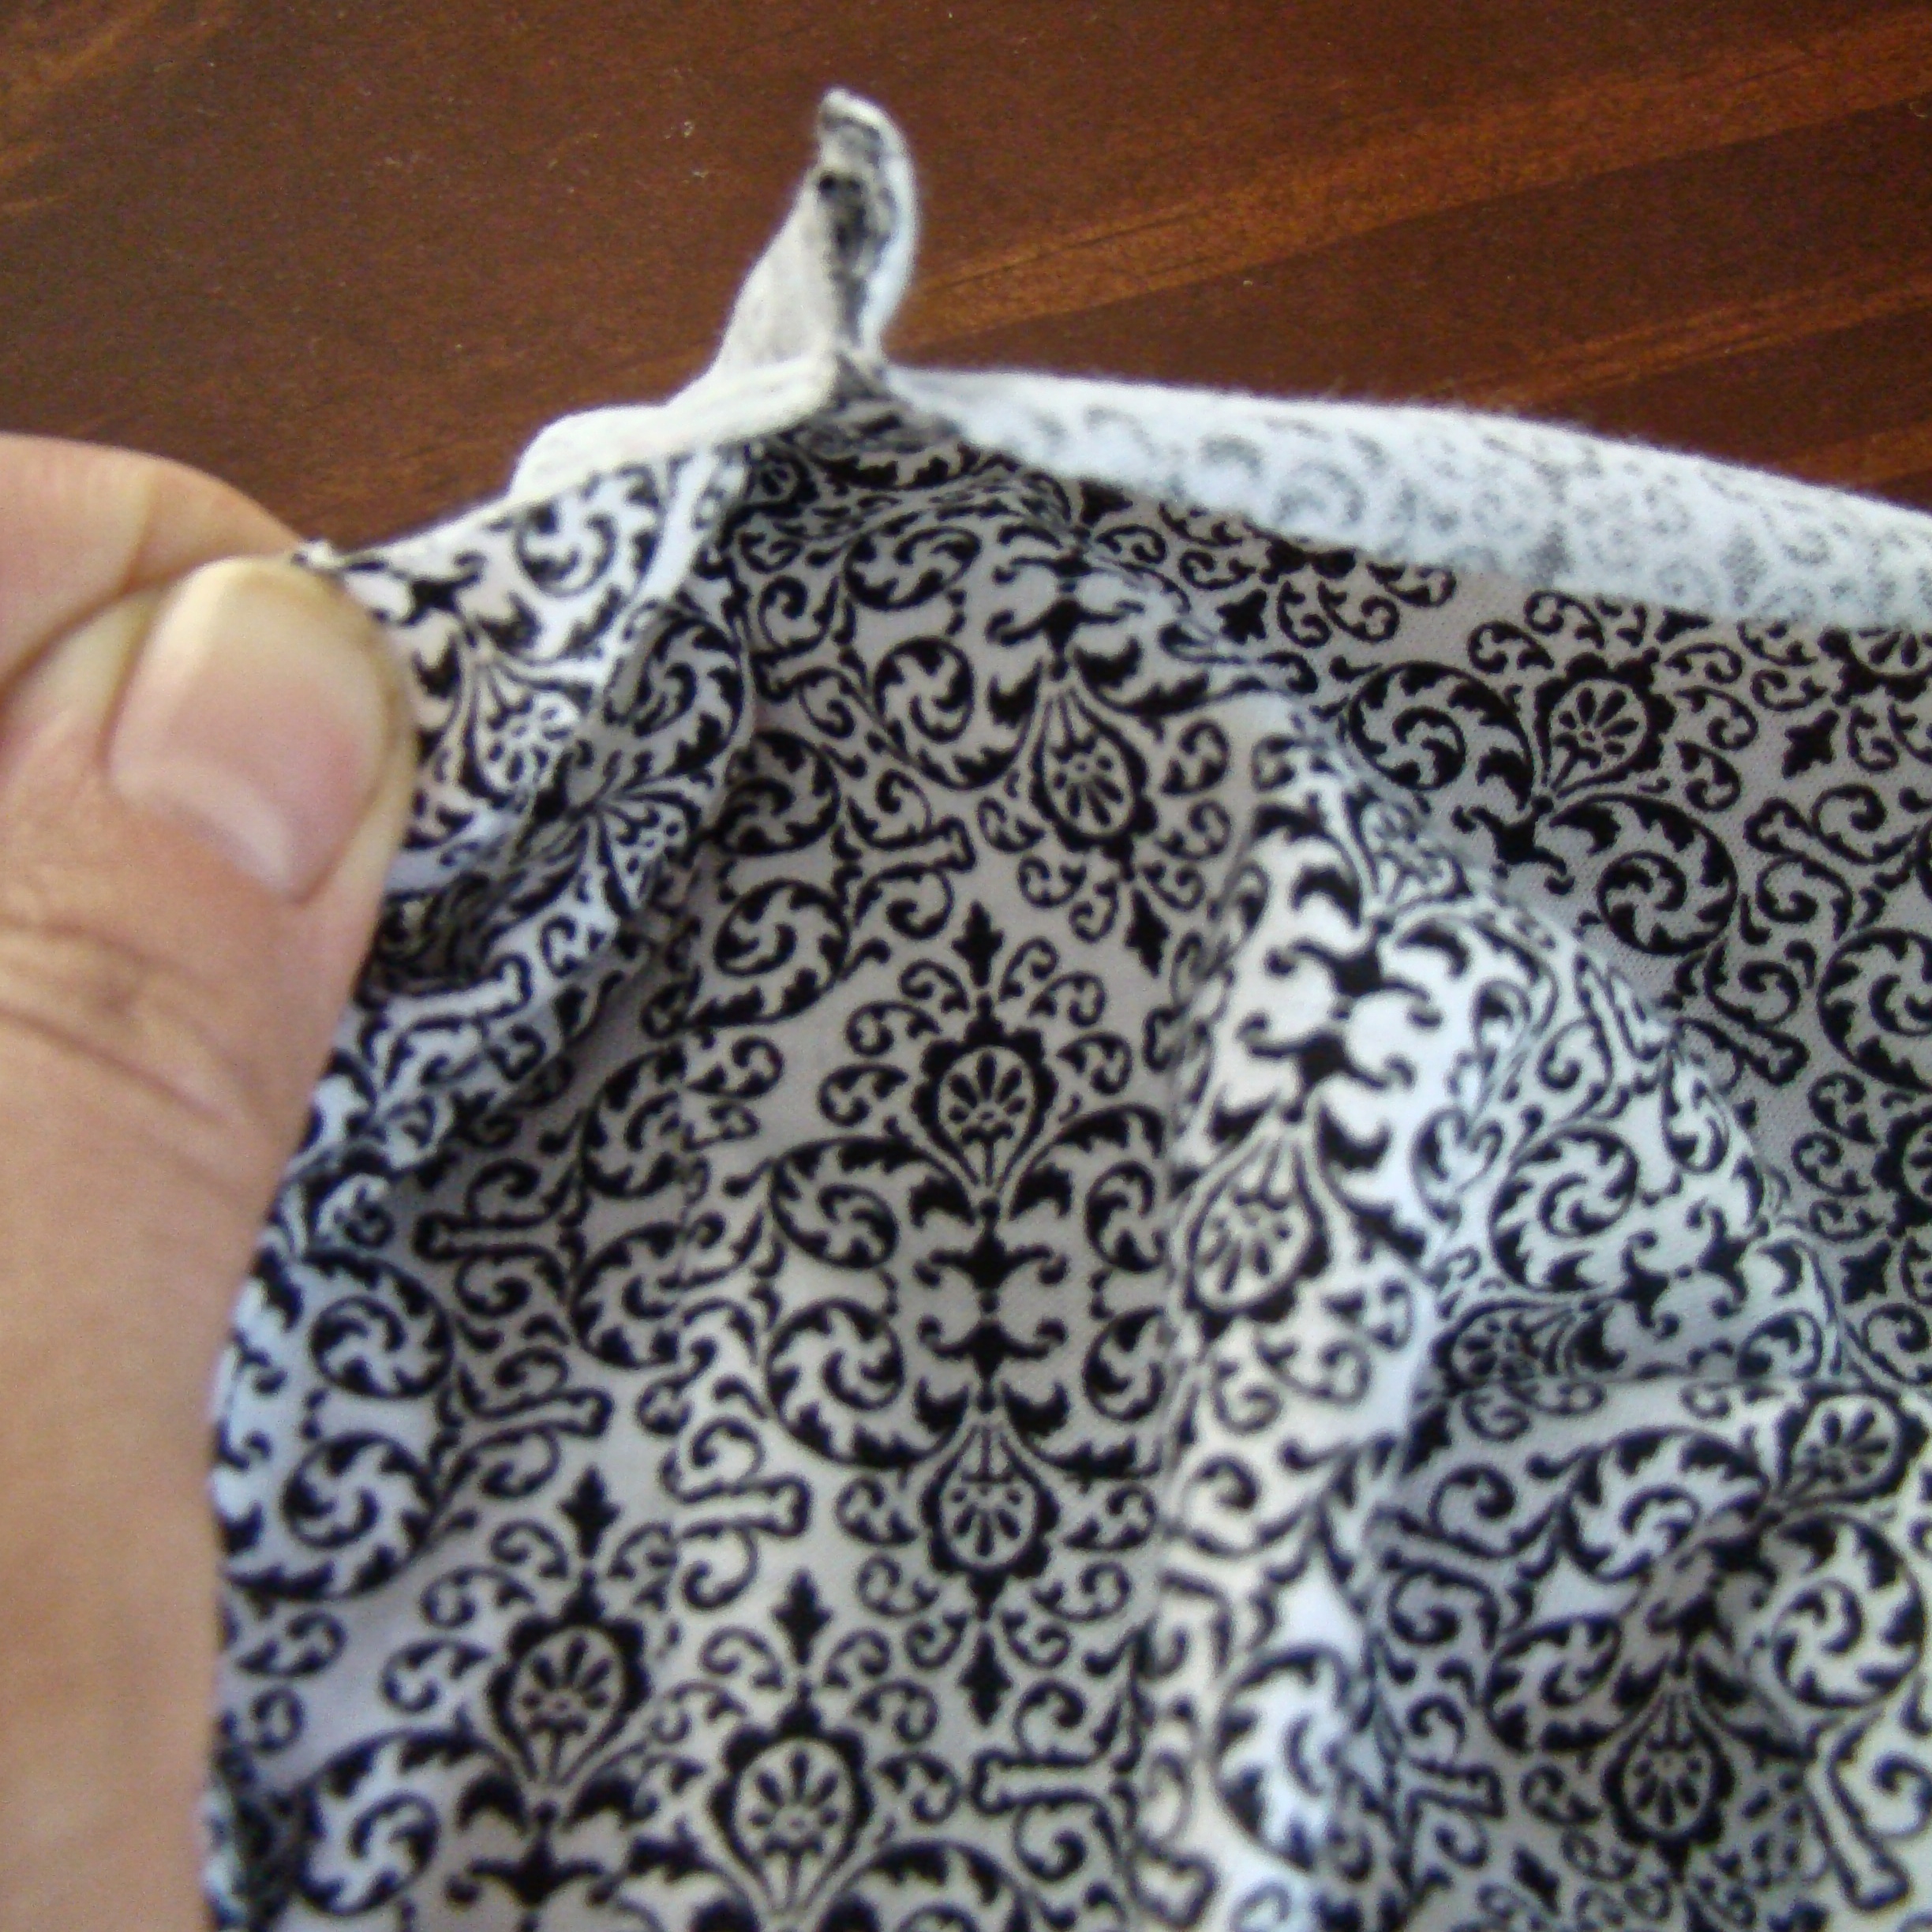
5. Fold down the edge about an inch along the top of the cover. Press and pin along folded edge. (Check to make sure that the folded edge is wider than your elastic. You are creating a casing to hold the elastic and it needs to be able to slide through with enough room after you have sewn the casing closed).
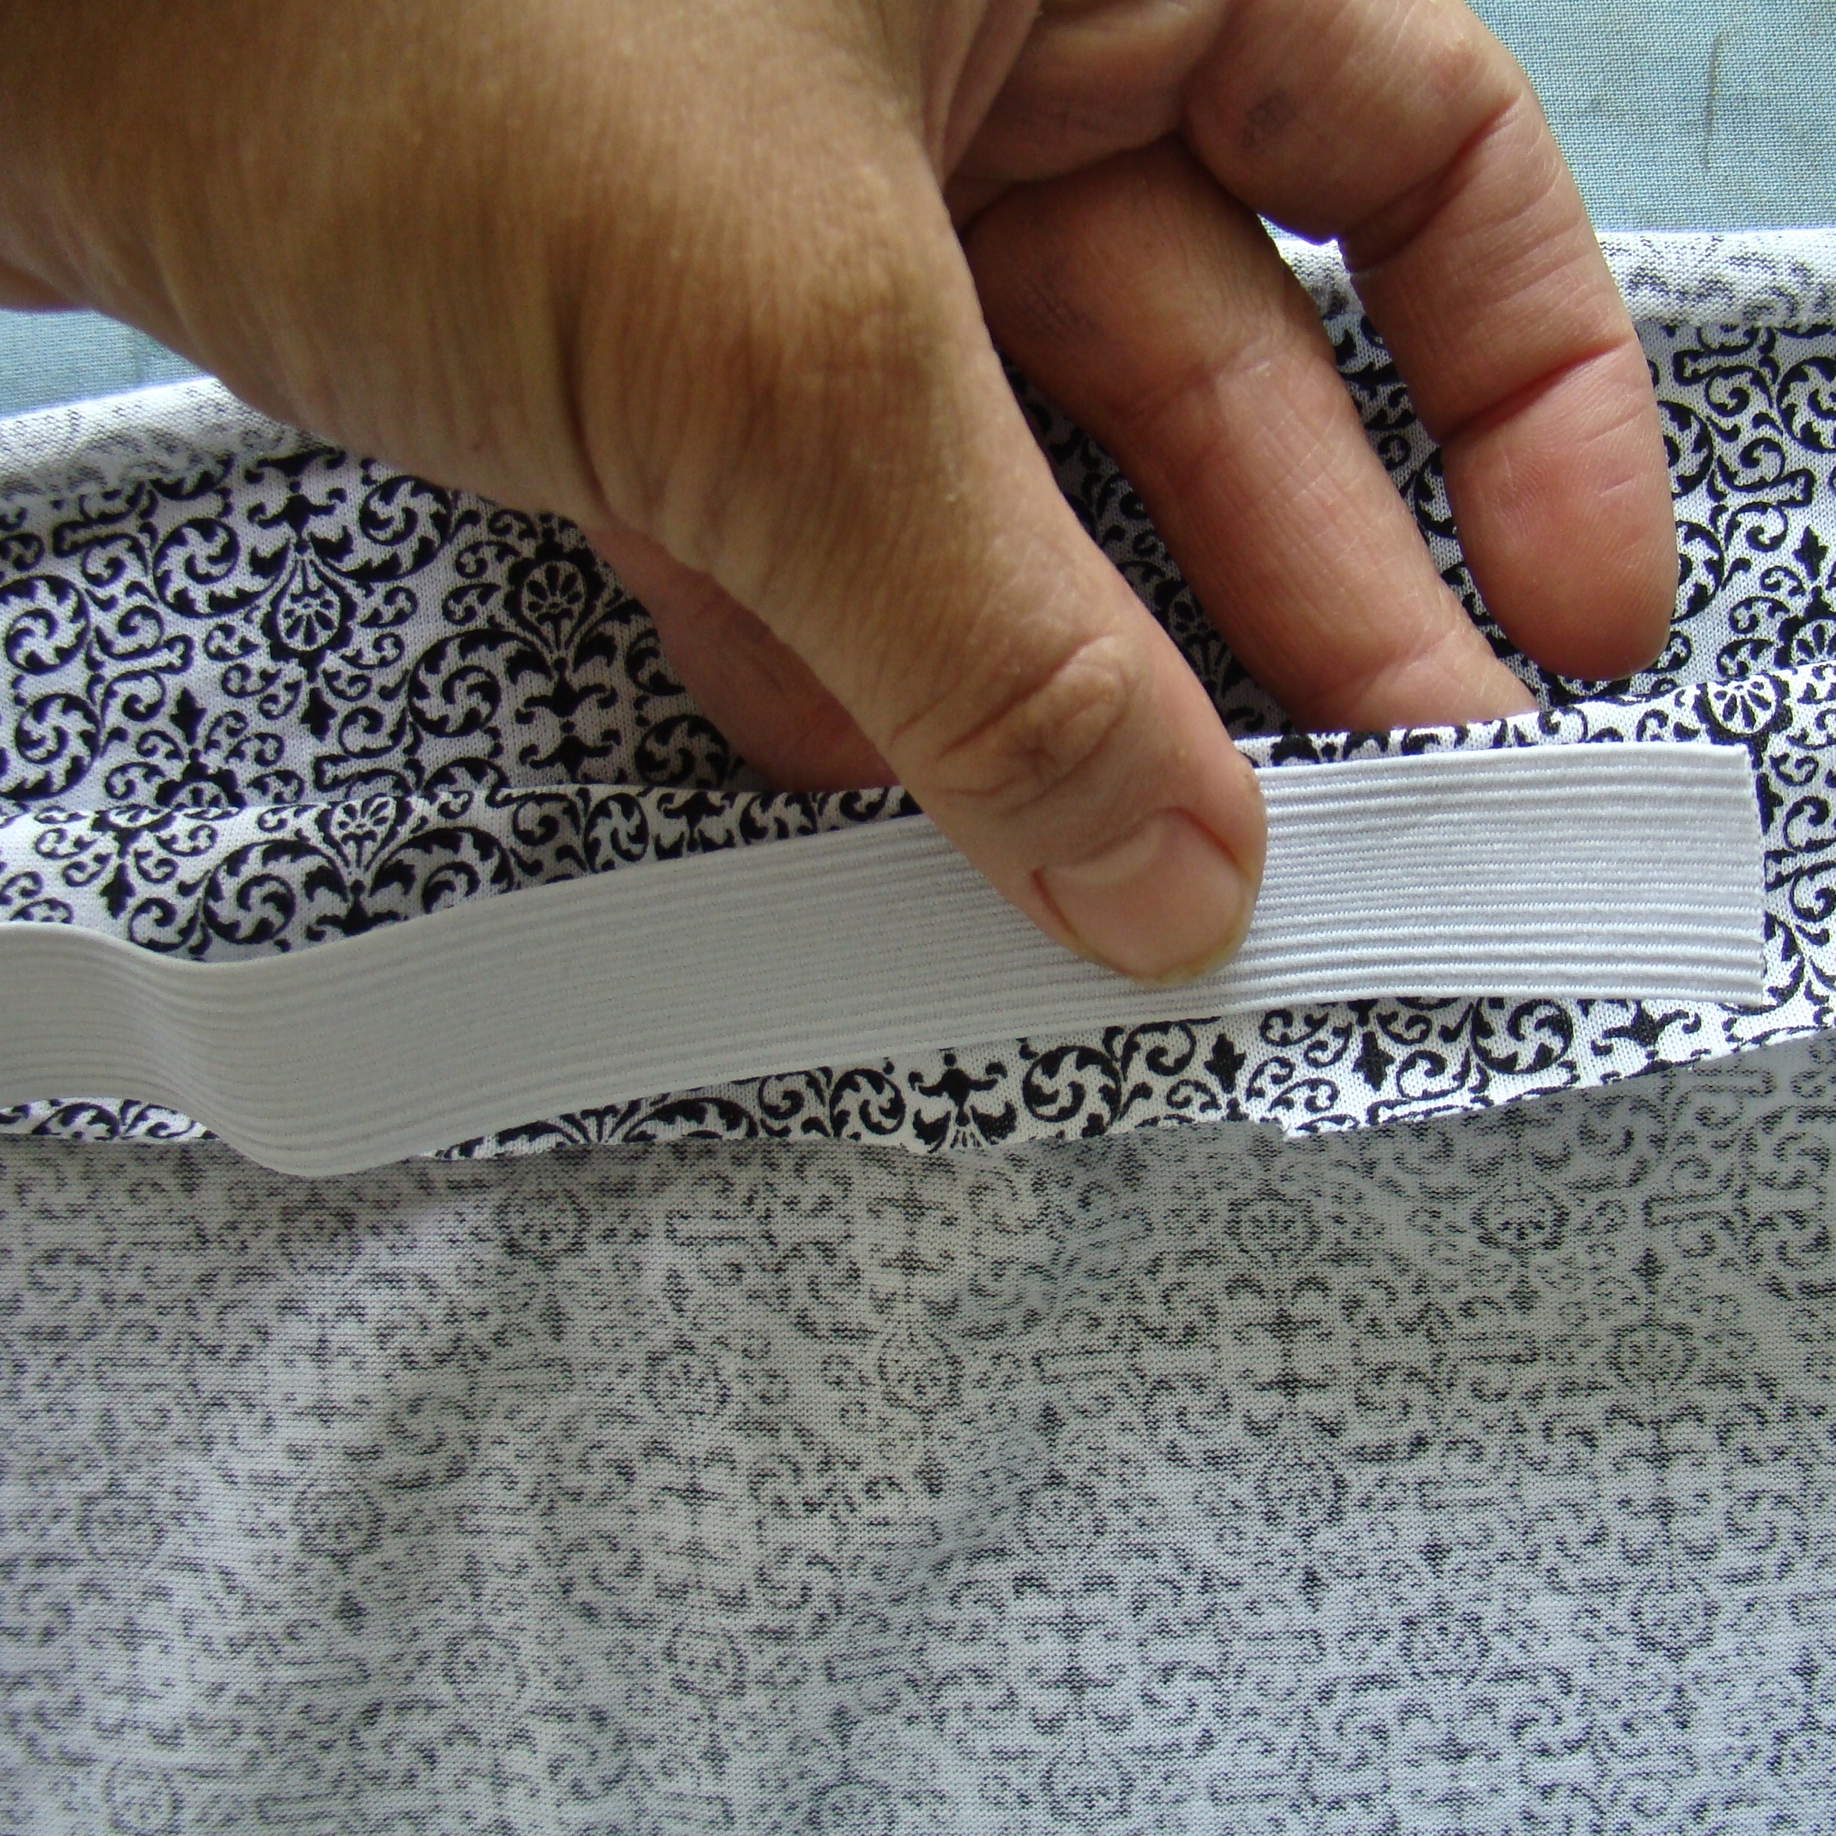
We are leaving the raw edges undone on the top and the bottom because they will not be seen and knit will not fray. If you are using a different material than a knit, you need to first fold the outer edge down a quarter inch, and then fold it down another inch, (making a casing without a raw edge).
6. Sew around the top of the cover, a quarter inch from the raw edge. Leave a two-inch opening to feed the elastic. You can also sew a zigzag stitch around the raw edge to finish it more.
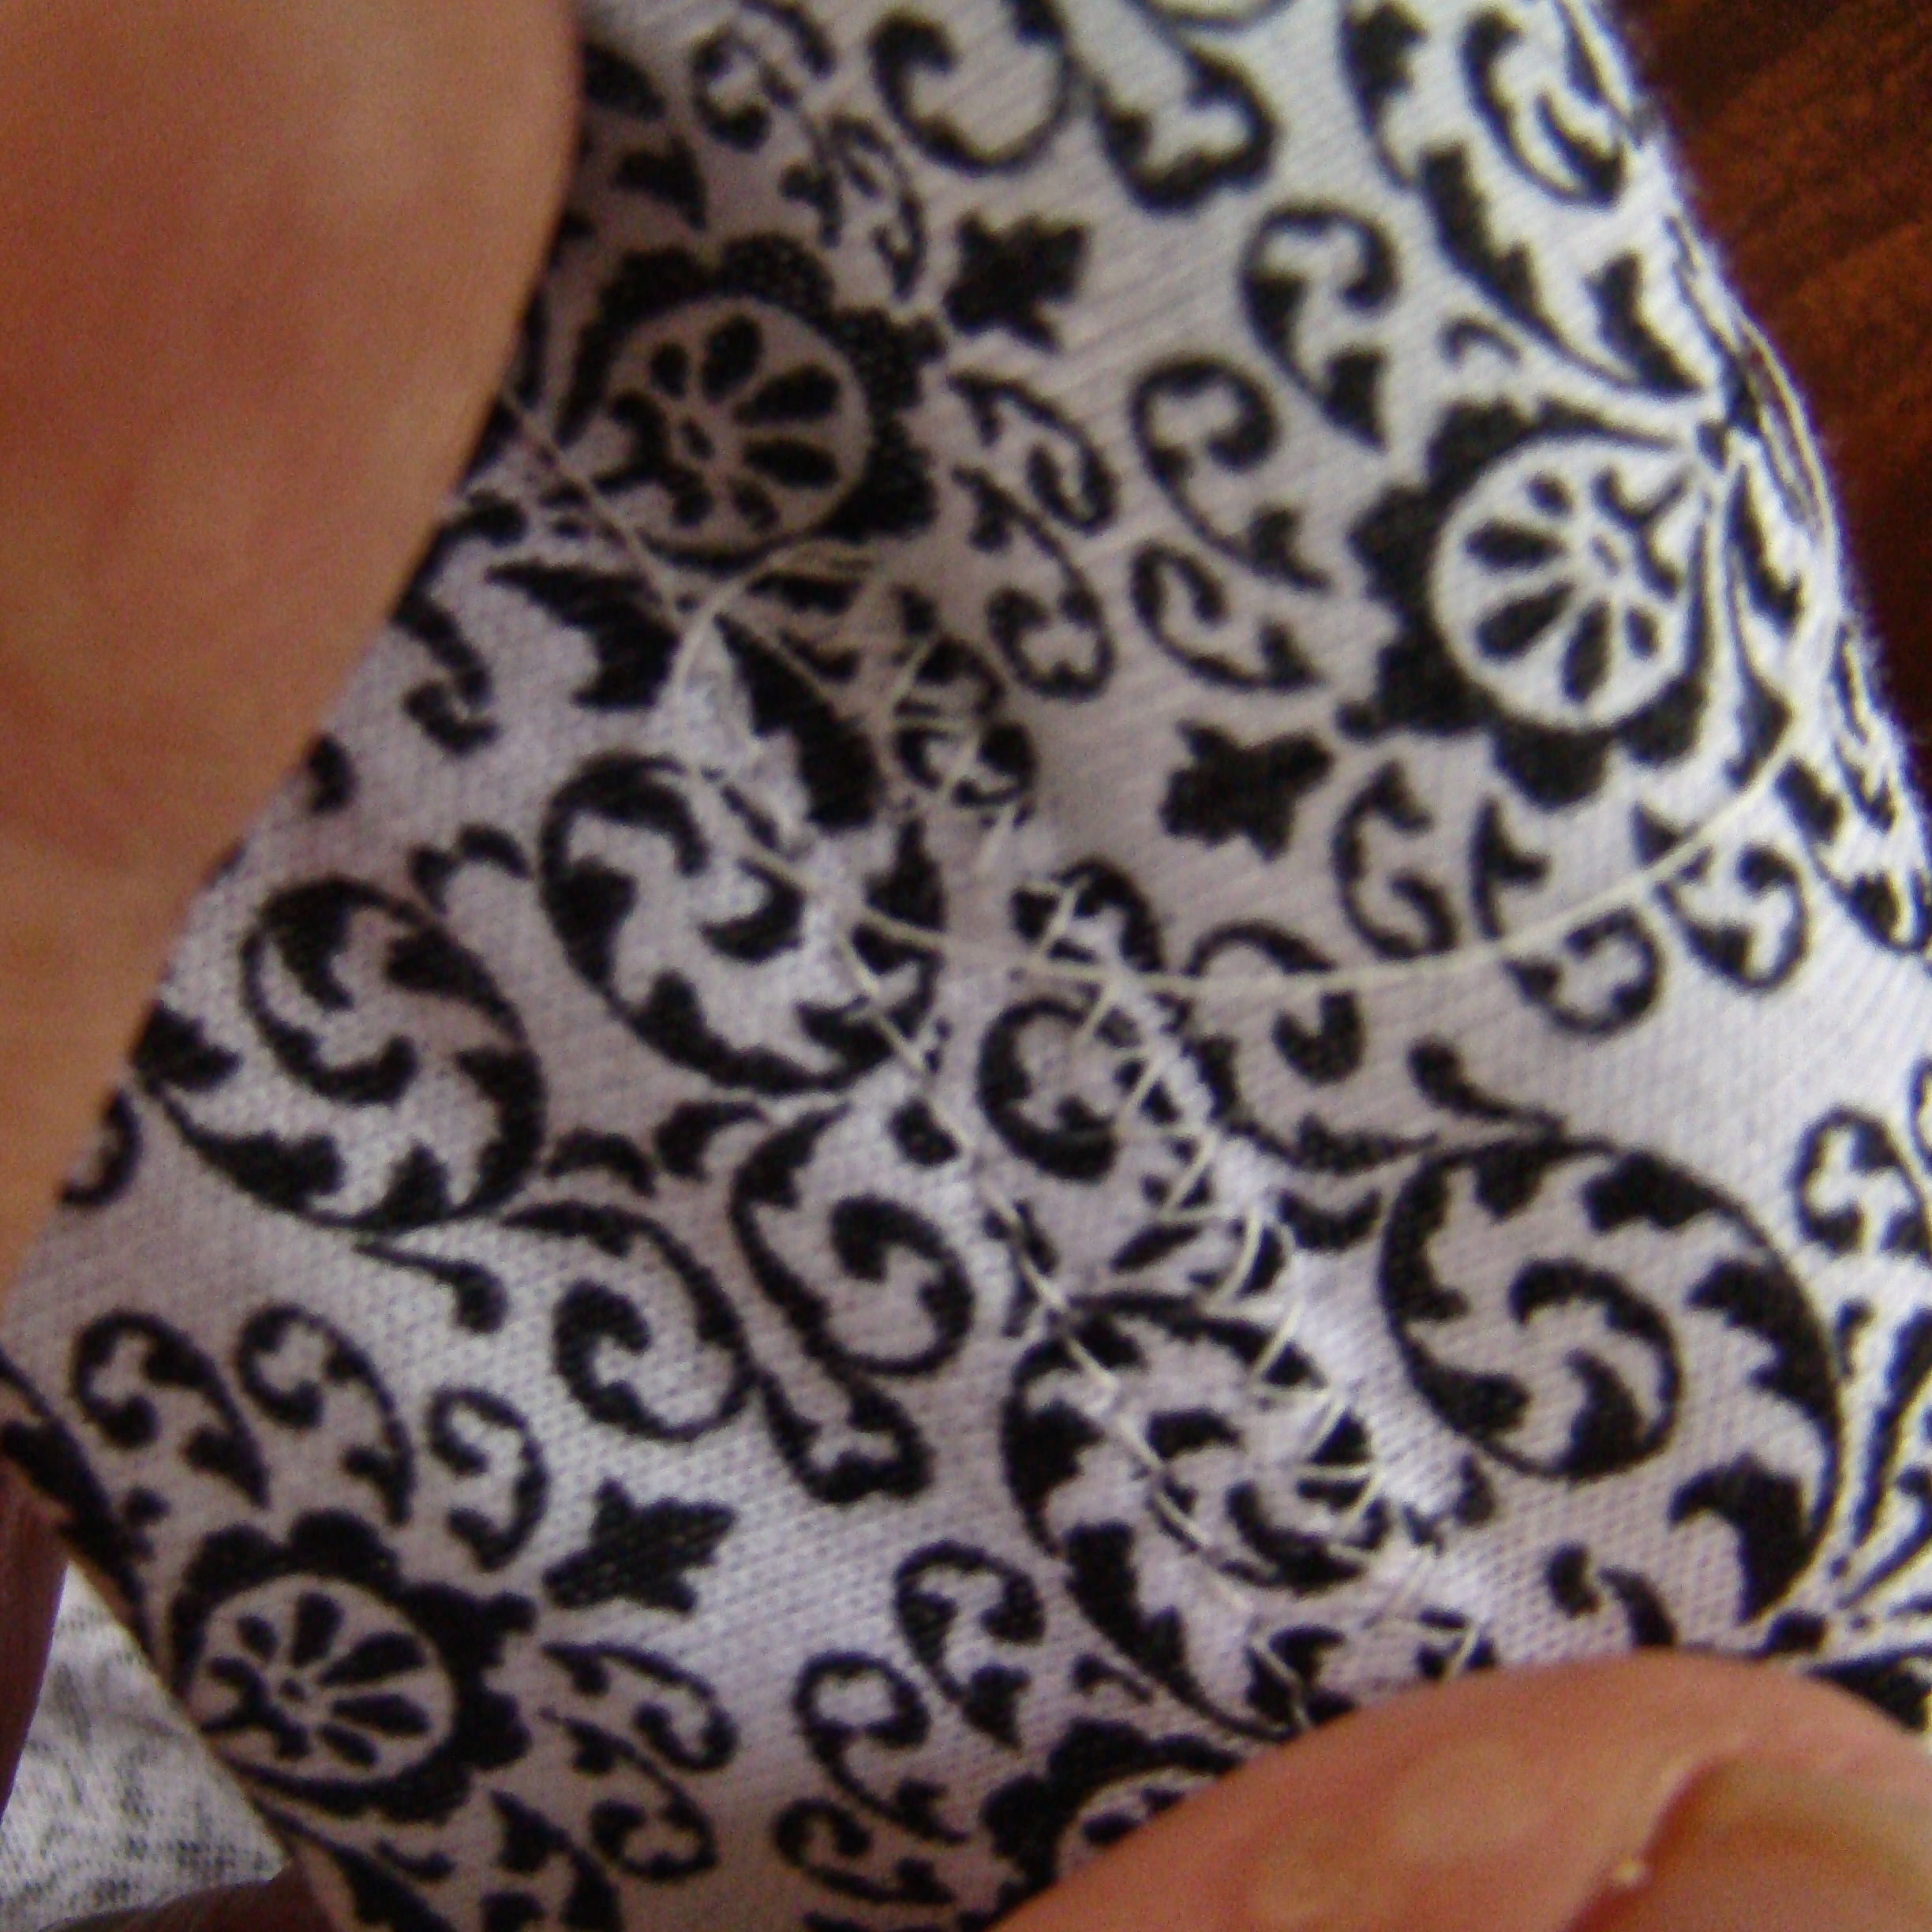
7. Cut one piece of elastic to 34″. Attach a large safety pin to one end and feed it through the casing on the top of the cover. Use the safety pin to push the elastic around the entire top, being careful not to lose the other end as it feeds through. Pull both ends out a few inches.
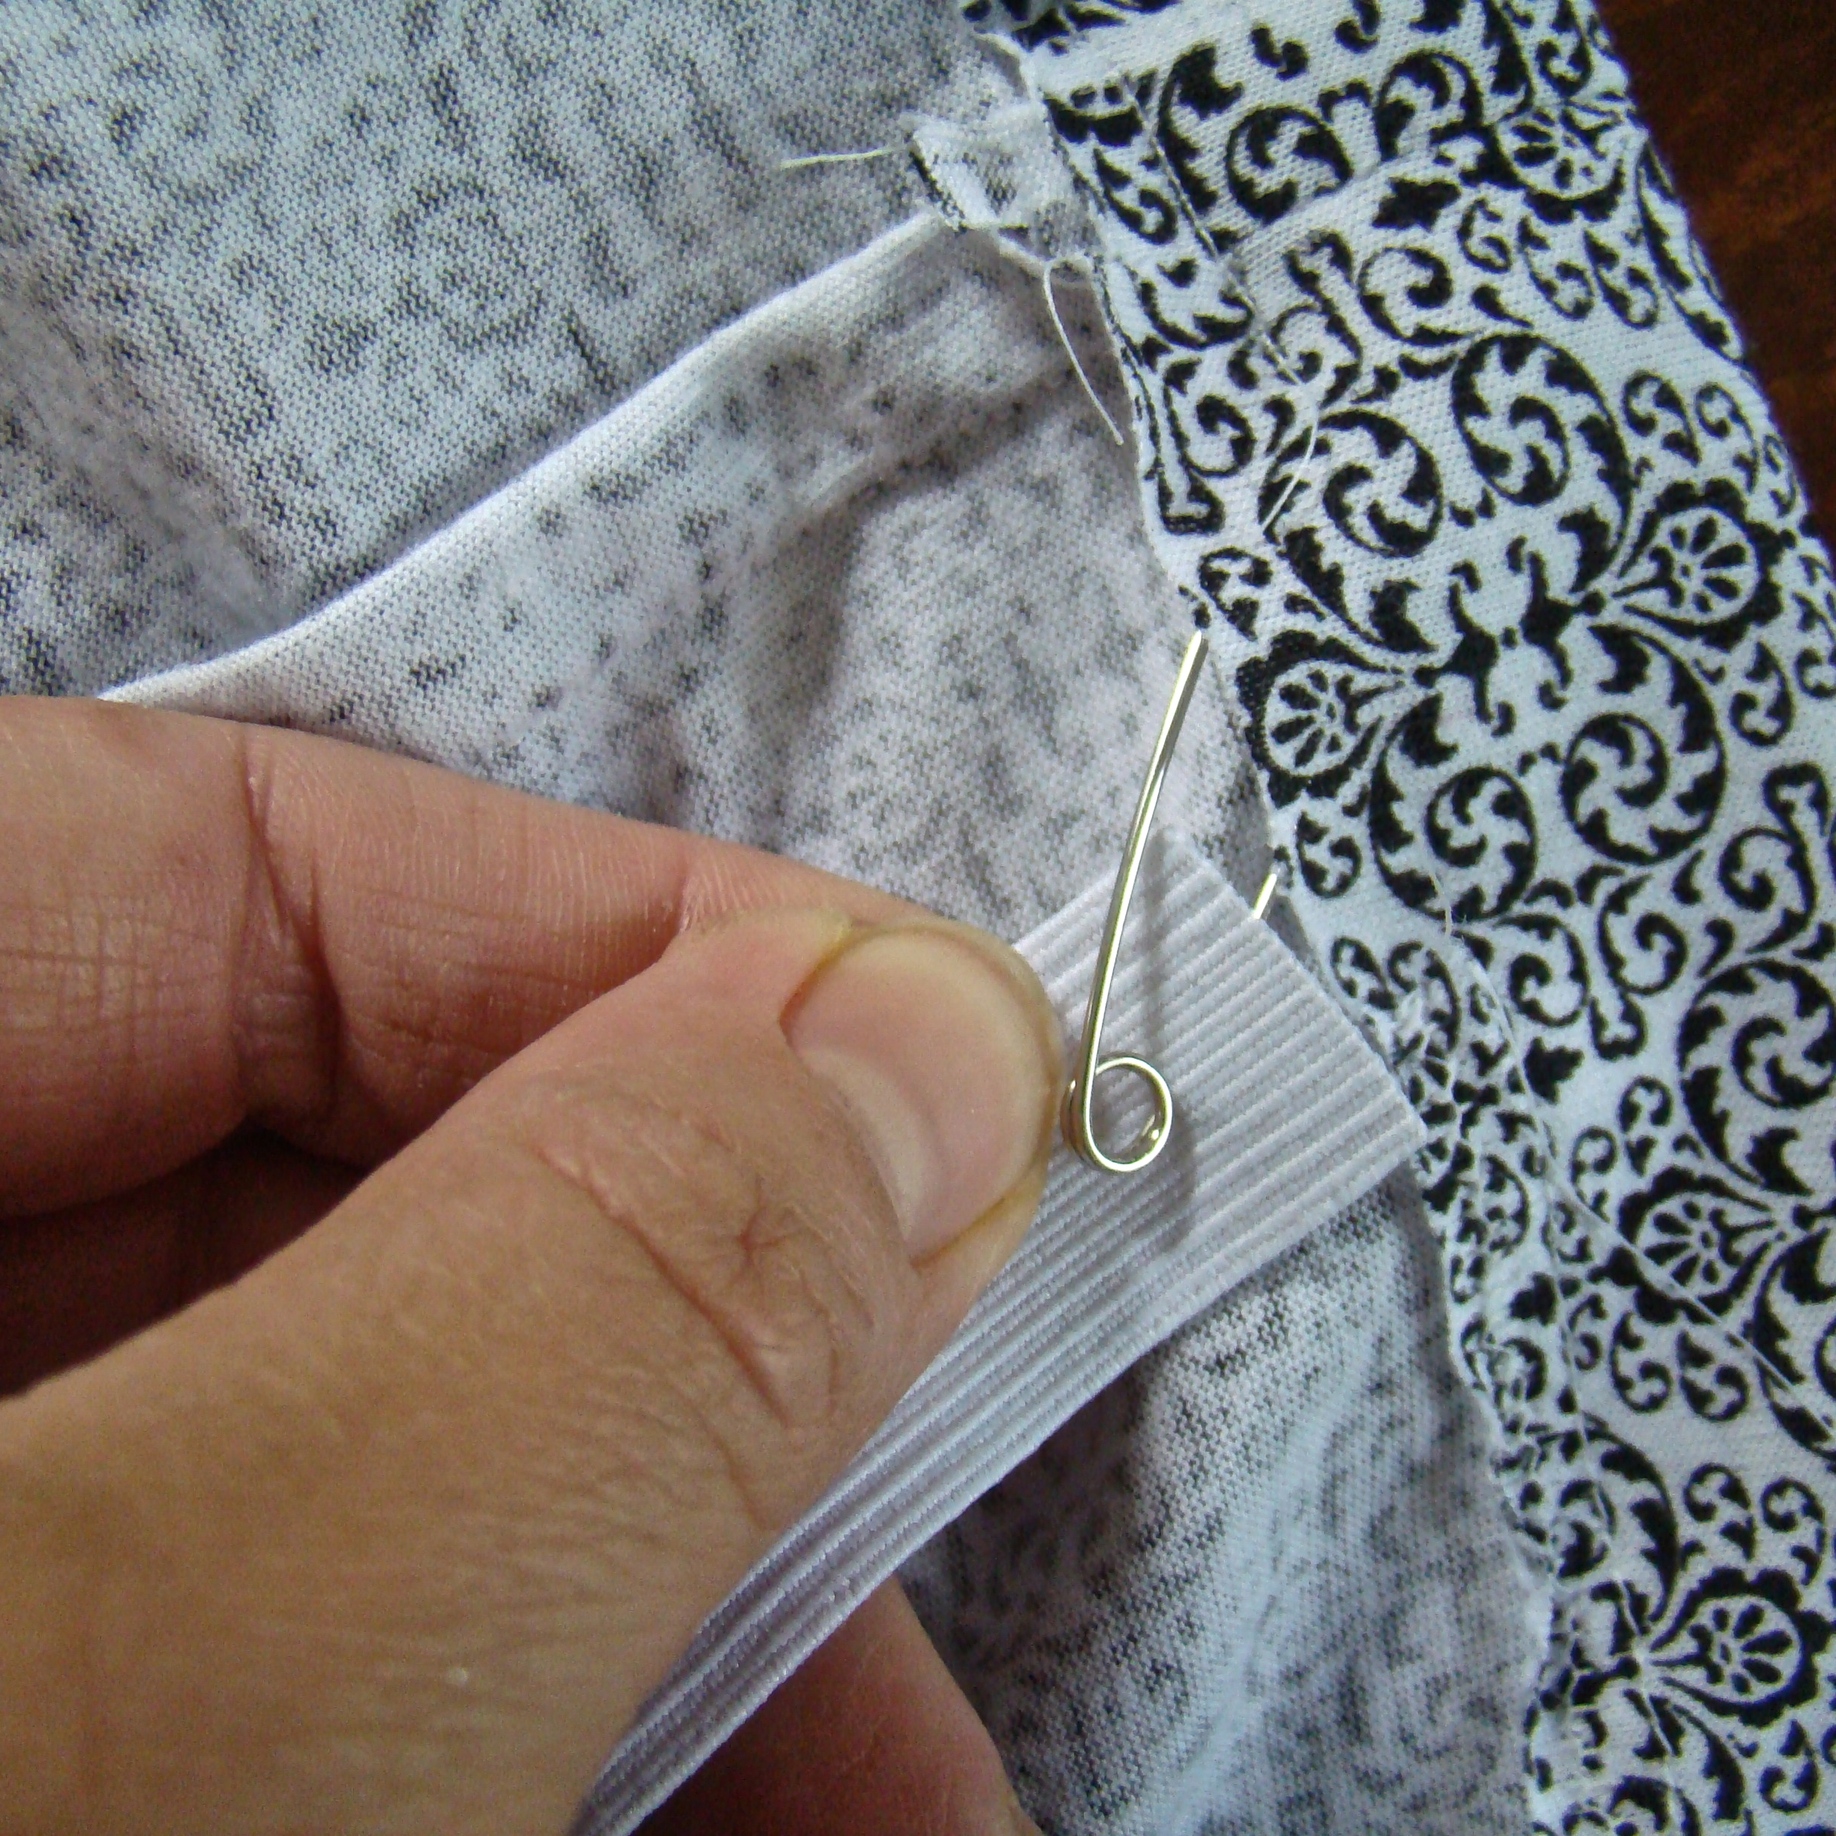
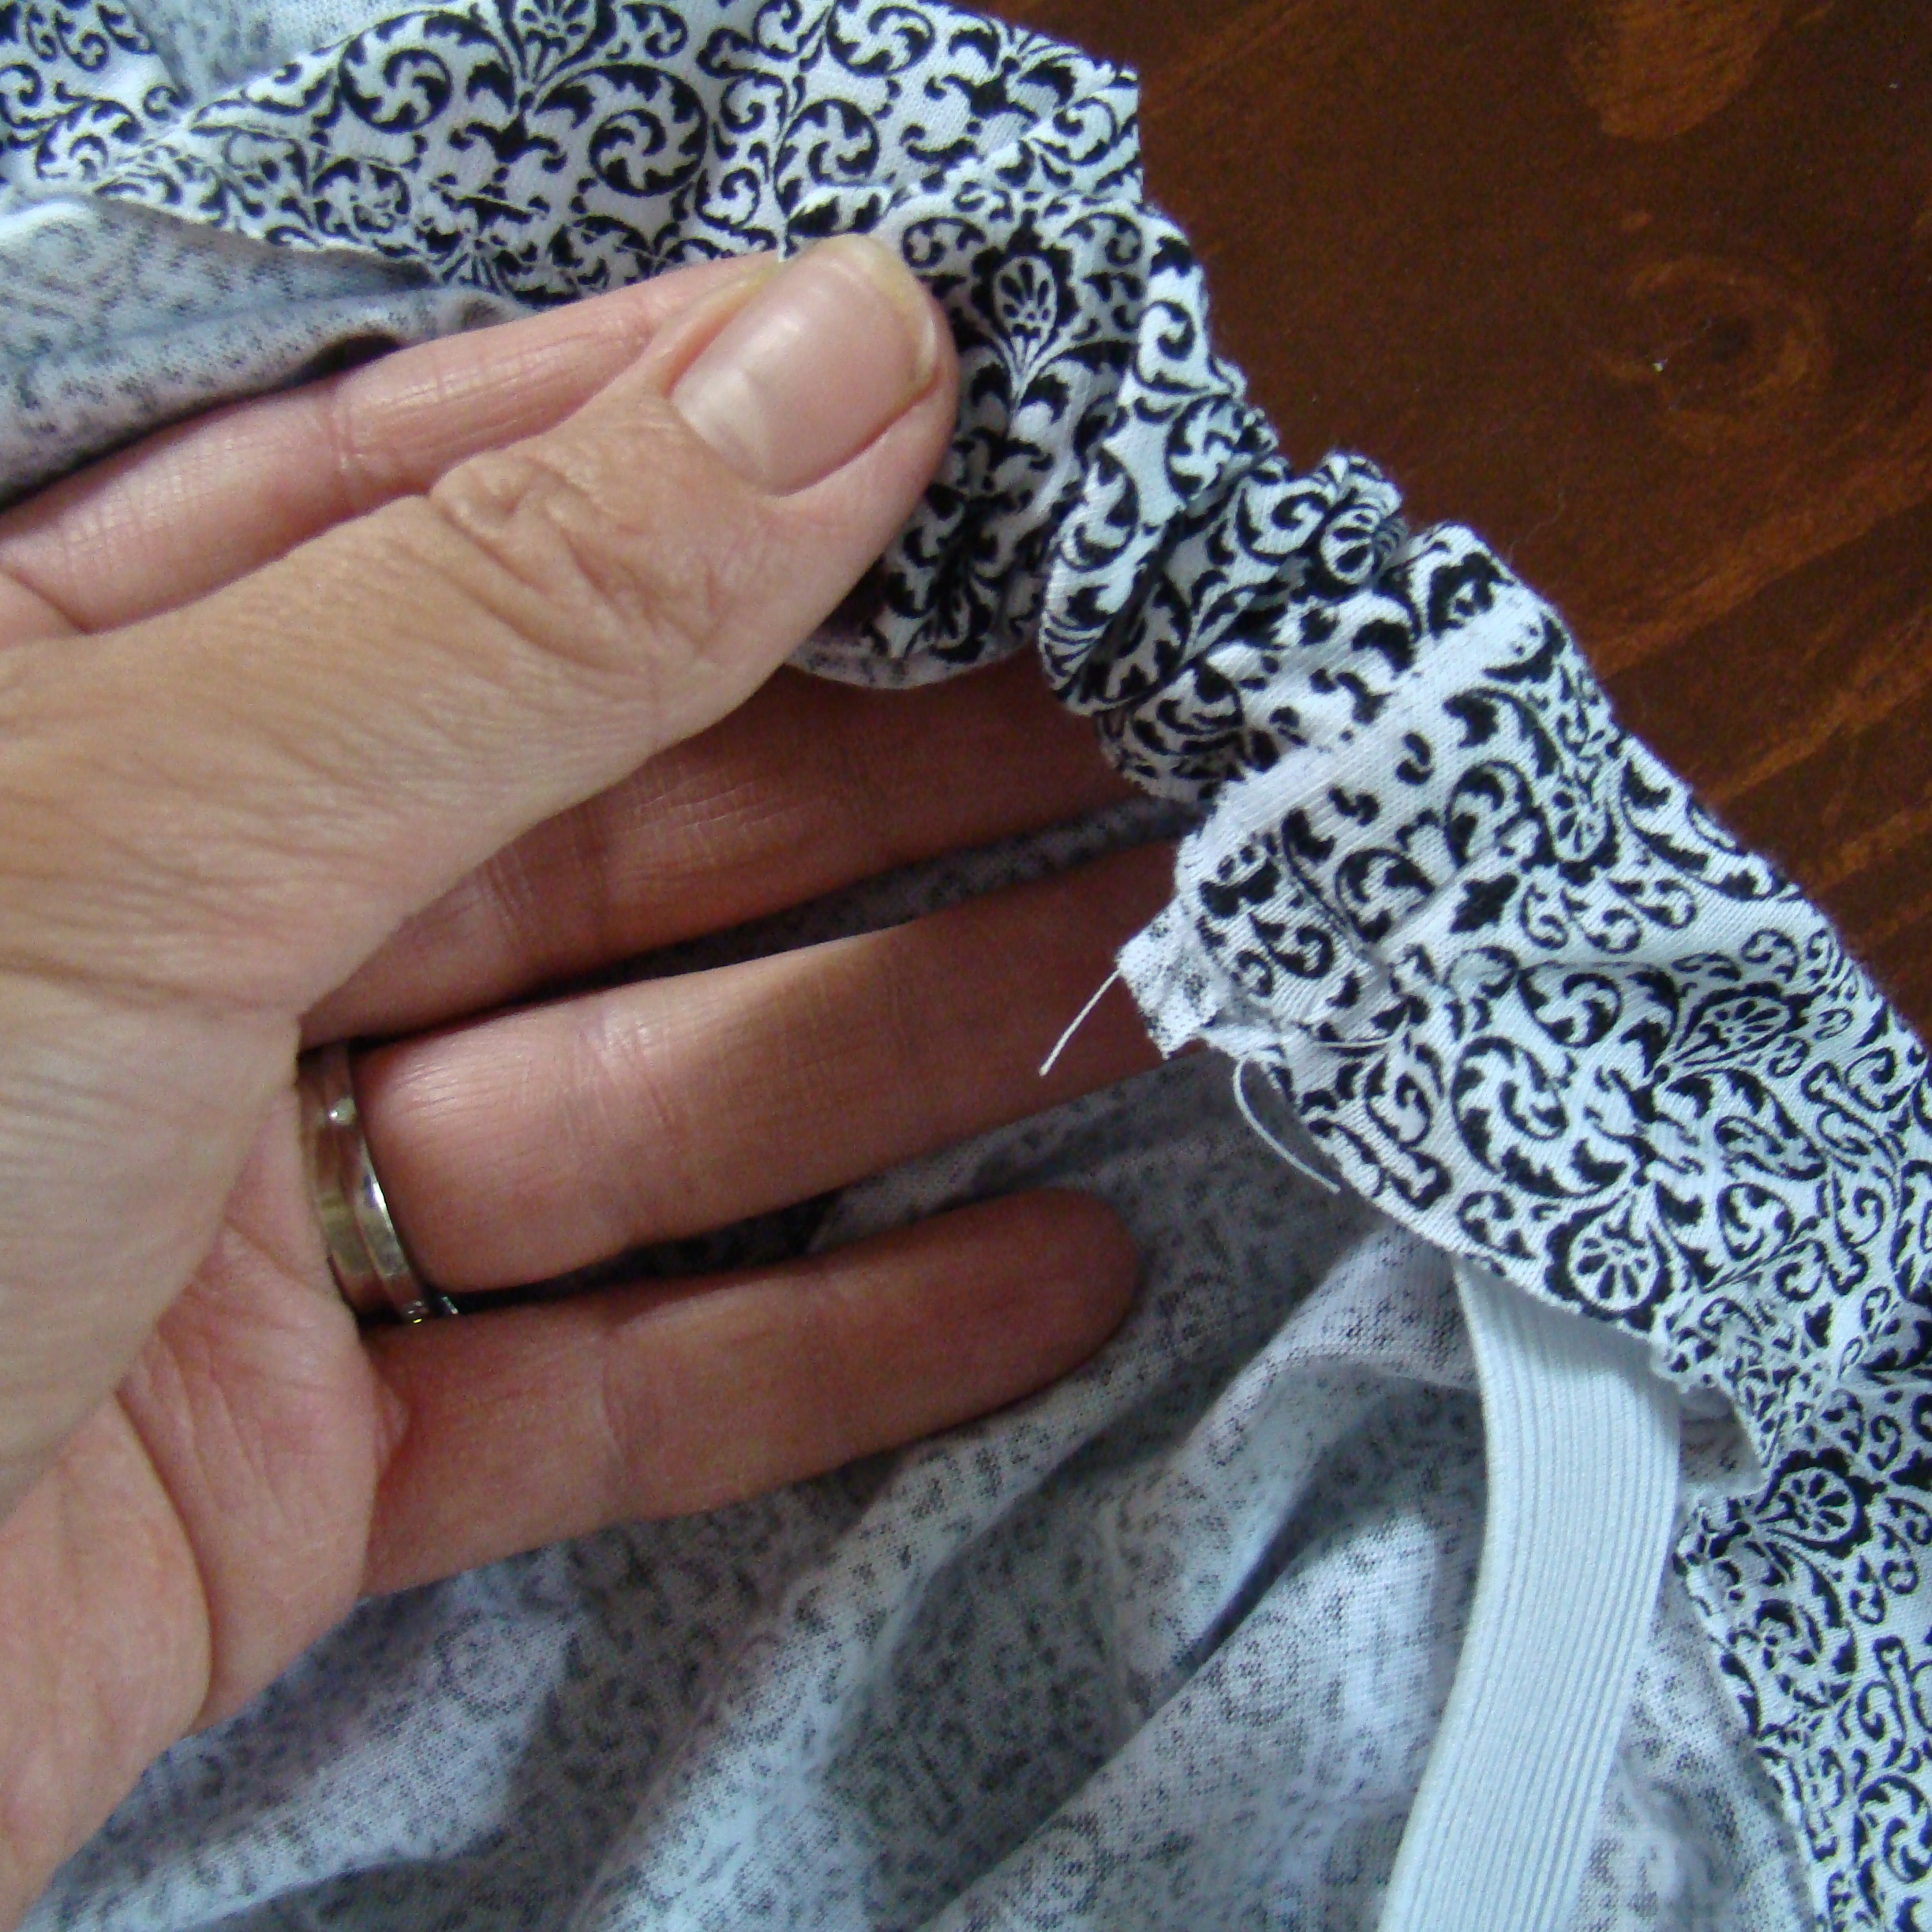

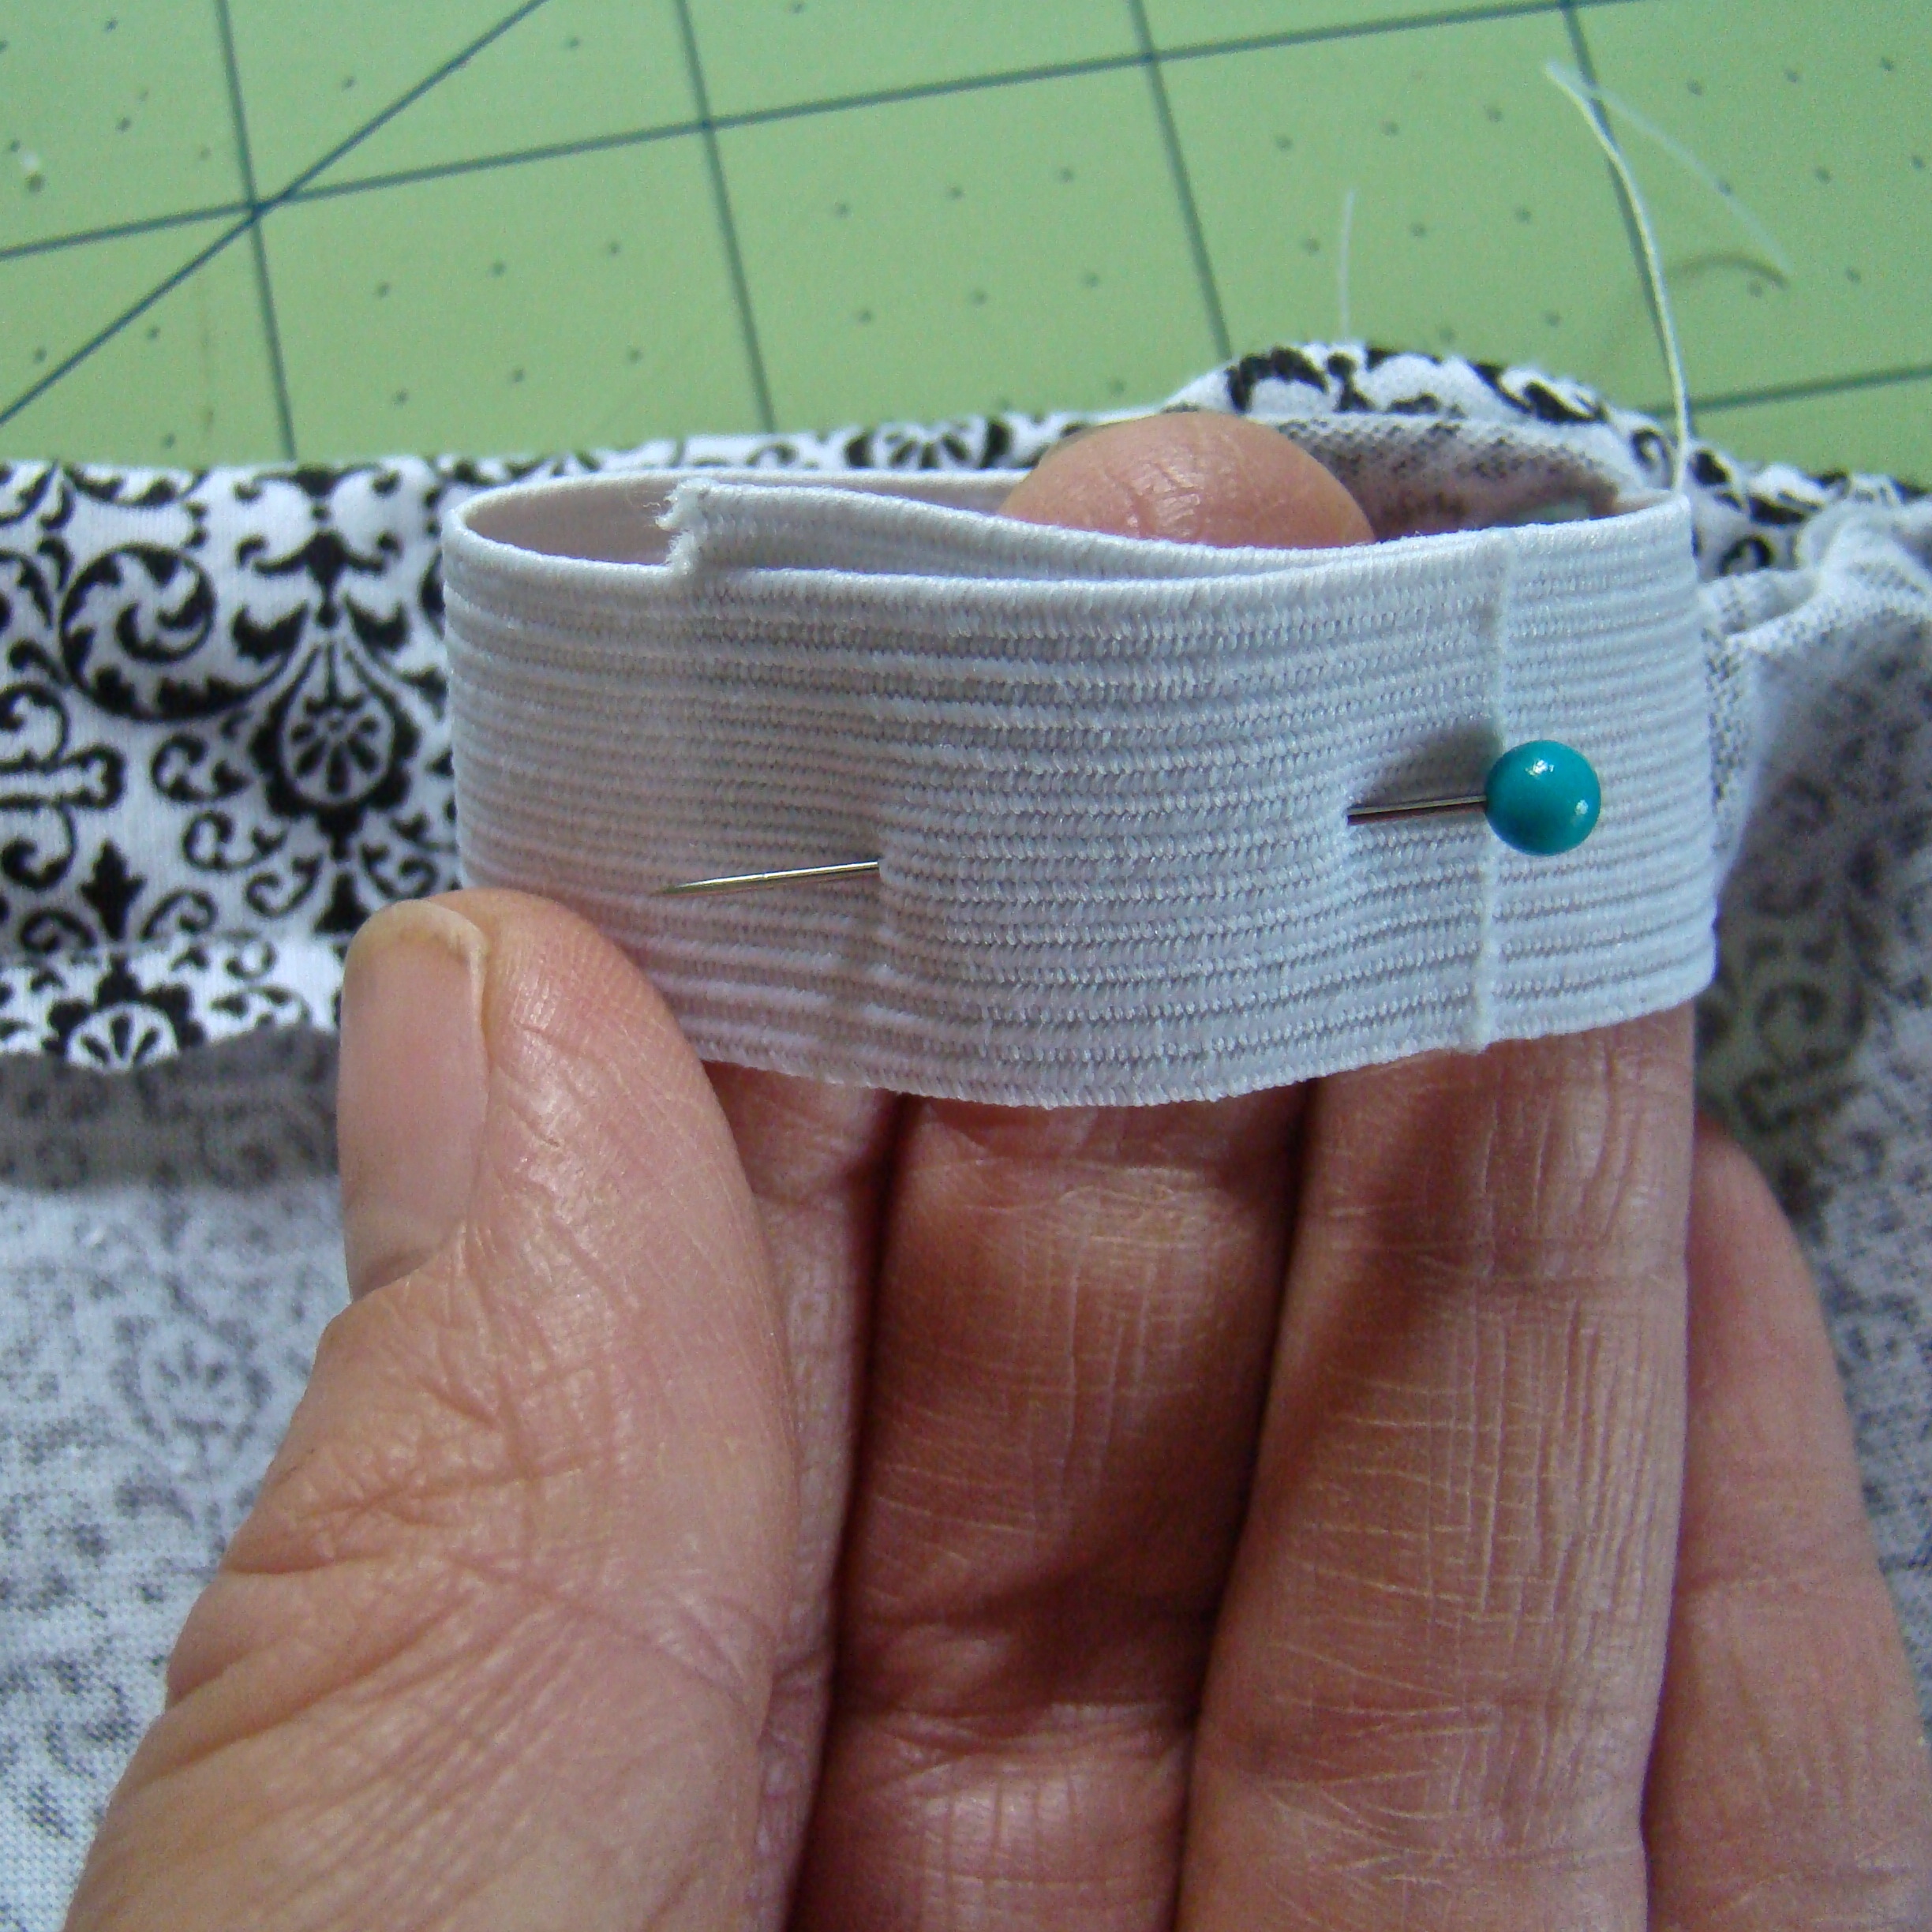
8. Overlap the ends of the elastic by an inch, pin, and sew the overlapped area together along the top and the bottom.
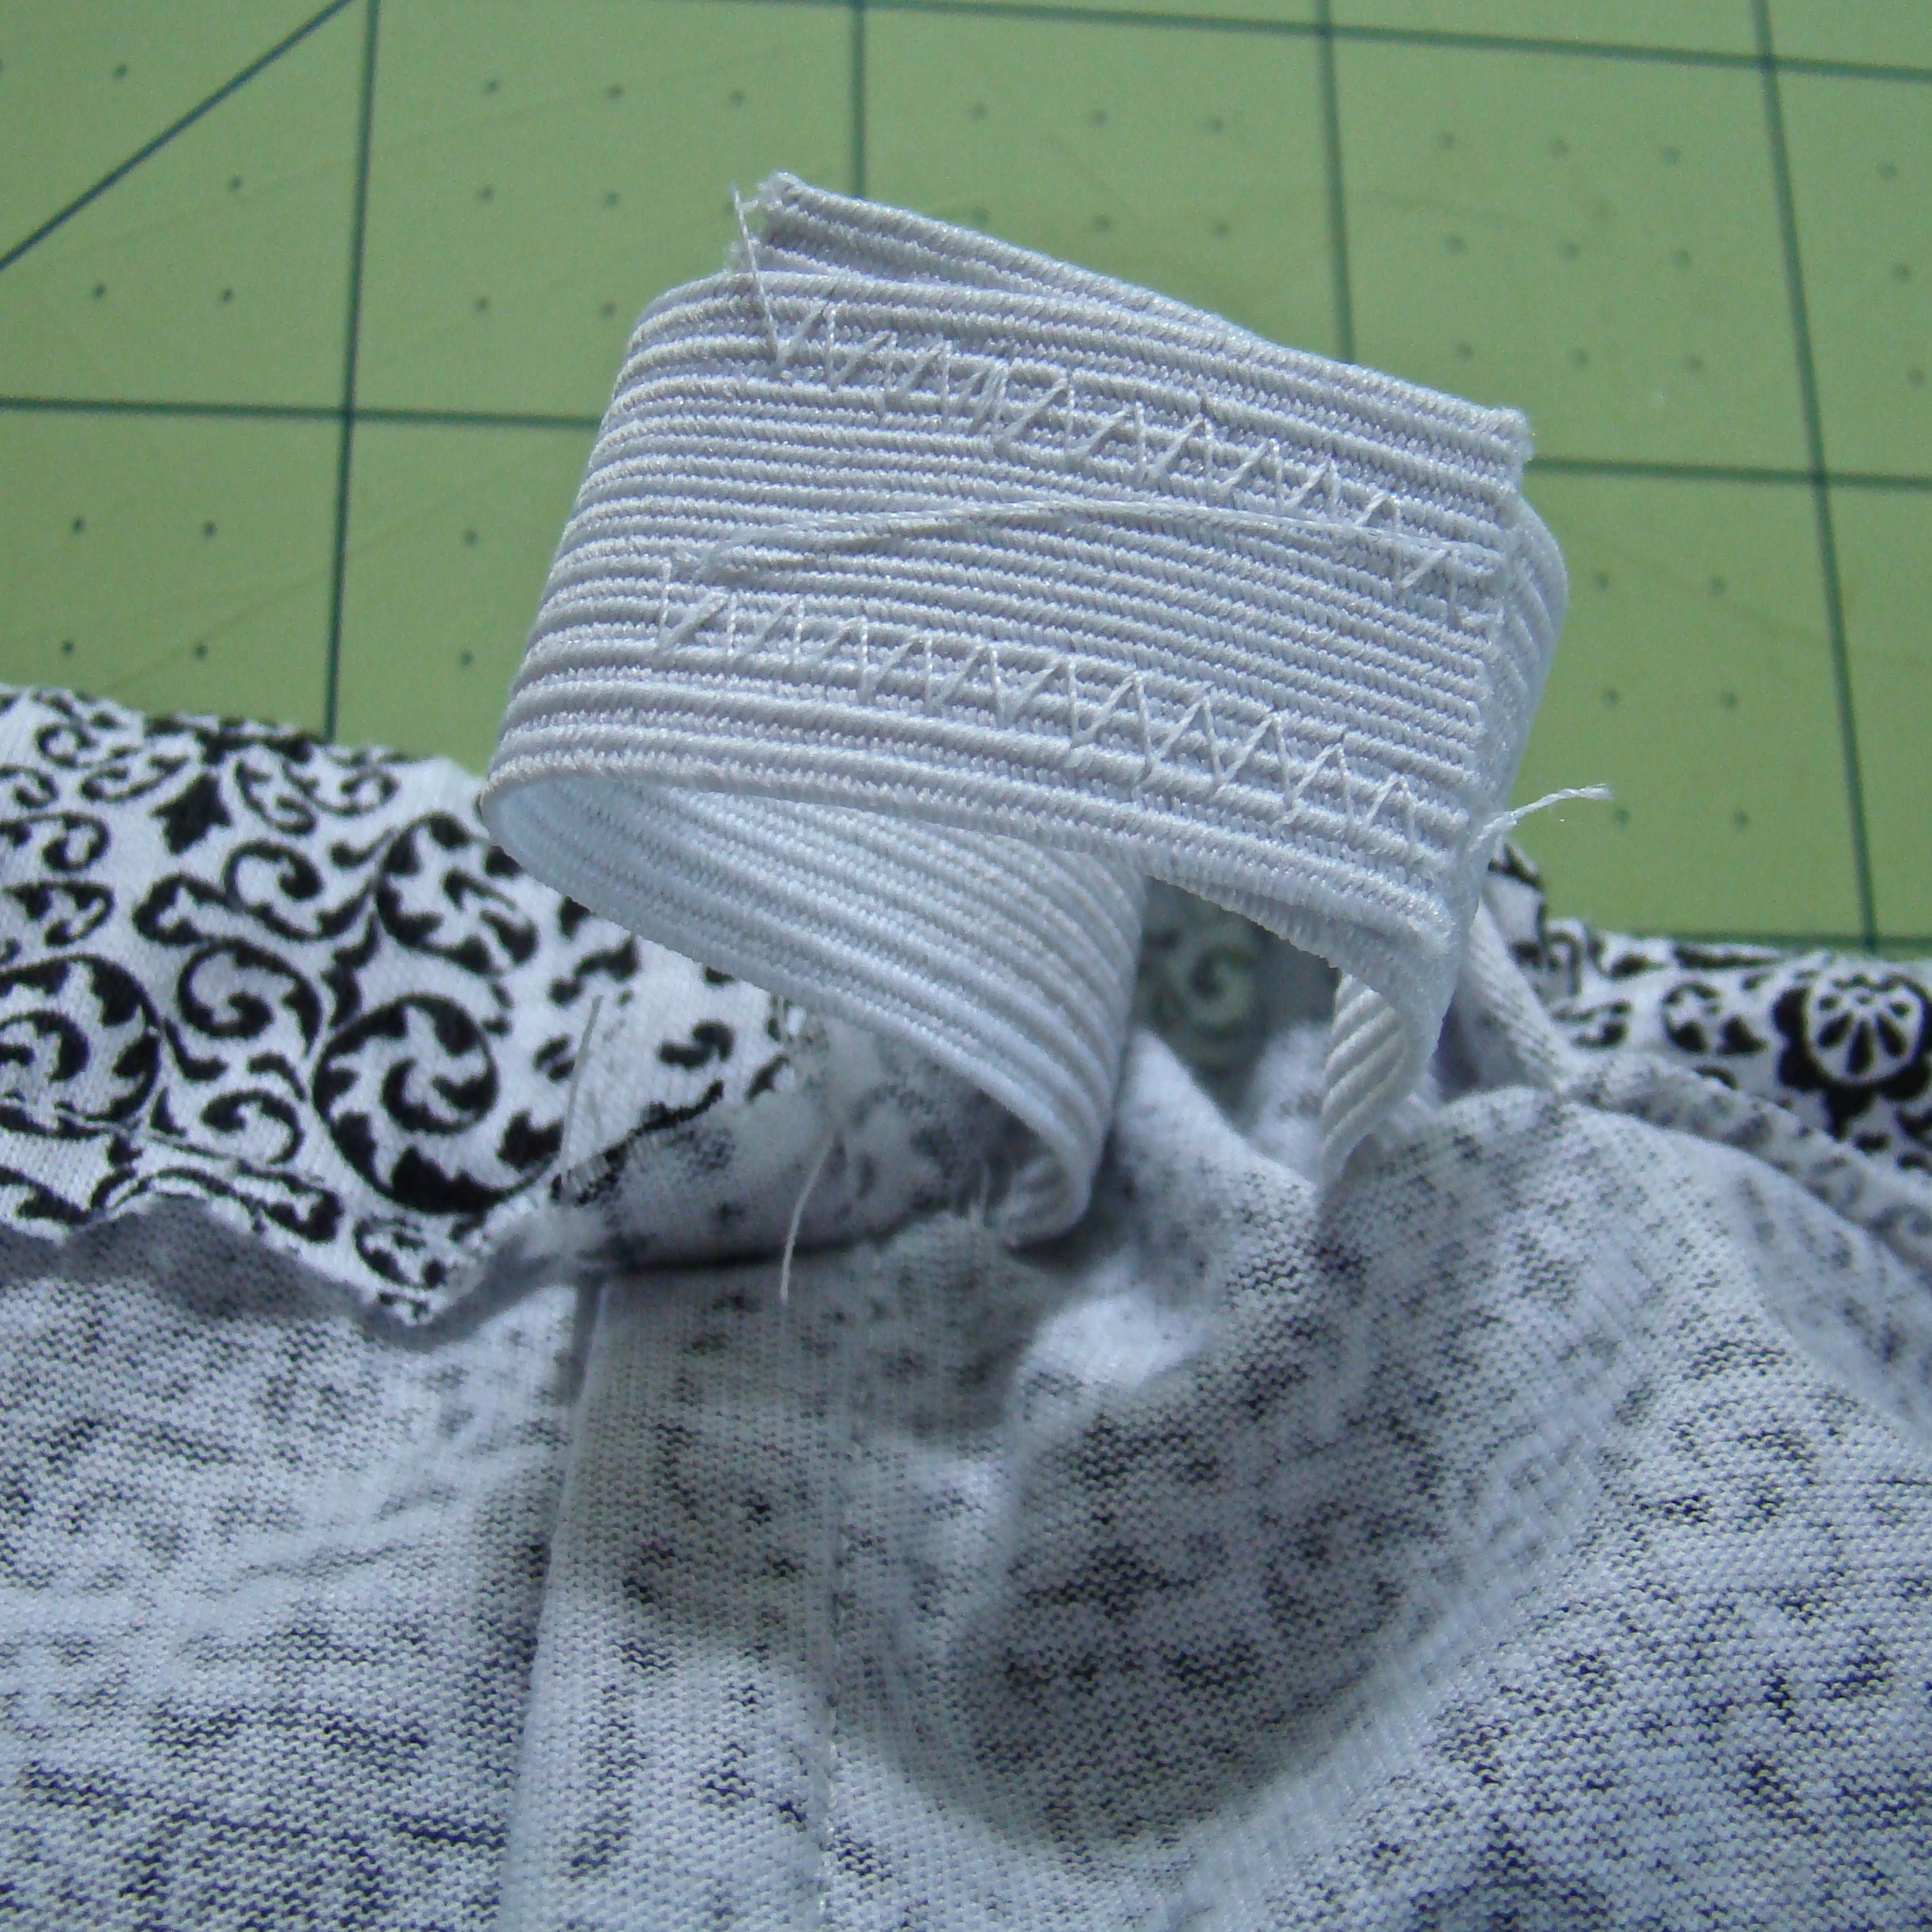
9. Push the elastic back into the casing and sew the casing closed. Finish that section with a zigzag stitch too (if you chose to do one).
10. Repeat steps 5-9 for the bottom of the nursing cover.
This is brilliant! My sister has a 2-month old and is still too timid to nurse in public. I told her she needs to get something different like a nursing shawl, this would be perfect!
It’s really so great for nursing in public. I even used mine sitting in the middle of a restaurant. Something I could never do with a normal cover!
Thanks for stopping by!
I love this idea! I wish I had one of these during my nursing days. My first time nursing, I was just using a blanket. I remember always asking someone (usually my husband) to sit next to me, while I nursed, so I could use them to cover up my side that would be exposed.
Yep. I remember that too. This cover is so much better!
I just love that picture of us with our tiny boys! I remember that birthday and you trying to nurse there well! 🙂
I love it too! It’s framed in my room. I looked for the picture we took of the boys next to each other on the blanket but couldn’t find it. What’s really crazy is that Owen wass about Molly’s age in that picture!!