This post is a part of the 31 Days to a Handmade Christmas series.
A good friend of mine recently welcomed her third sweet little girl into their family. I have yet to get to hold and cuddle with her, (the baby, not my friend), but I hope to soon.
So what do you get for a friend who is having a third daughter who already has most everything they need? Clothes are pretty much out. Diapers, cloths or disposable, are always a safe bet. But by the time you have more than a couple of children, you realize that babies need much less than you thought when you were expecting your first child.
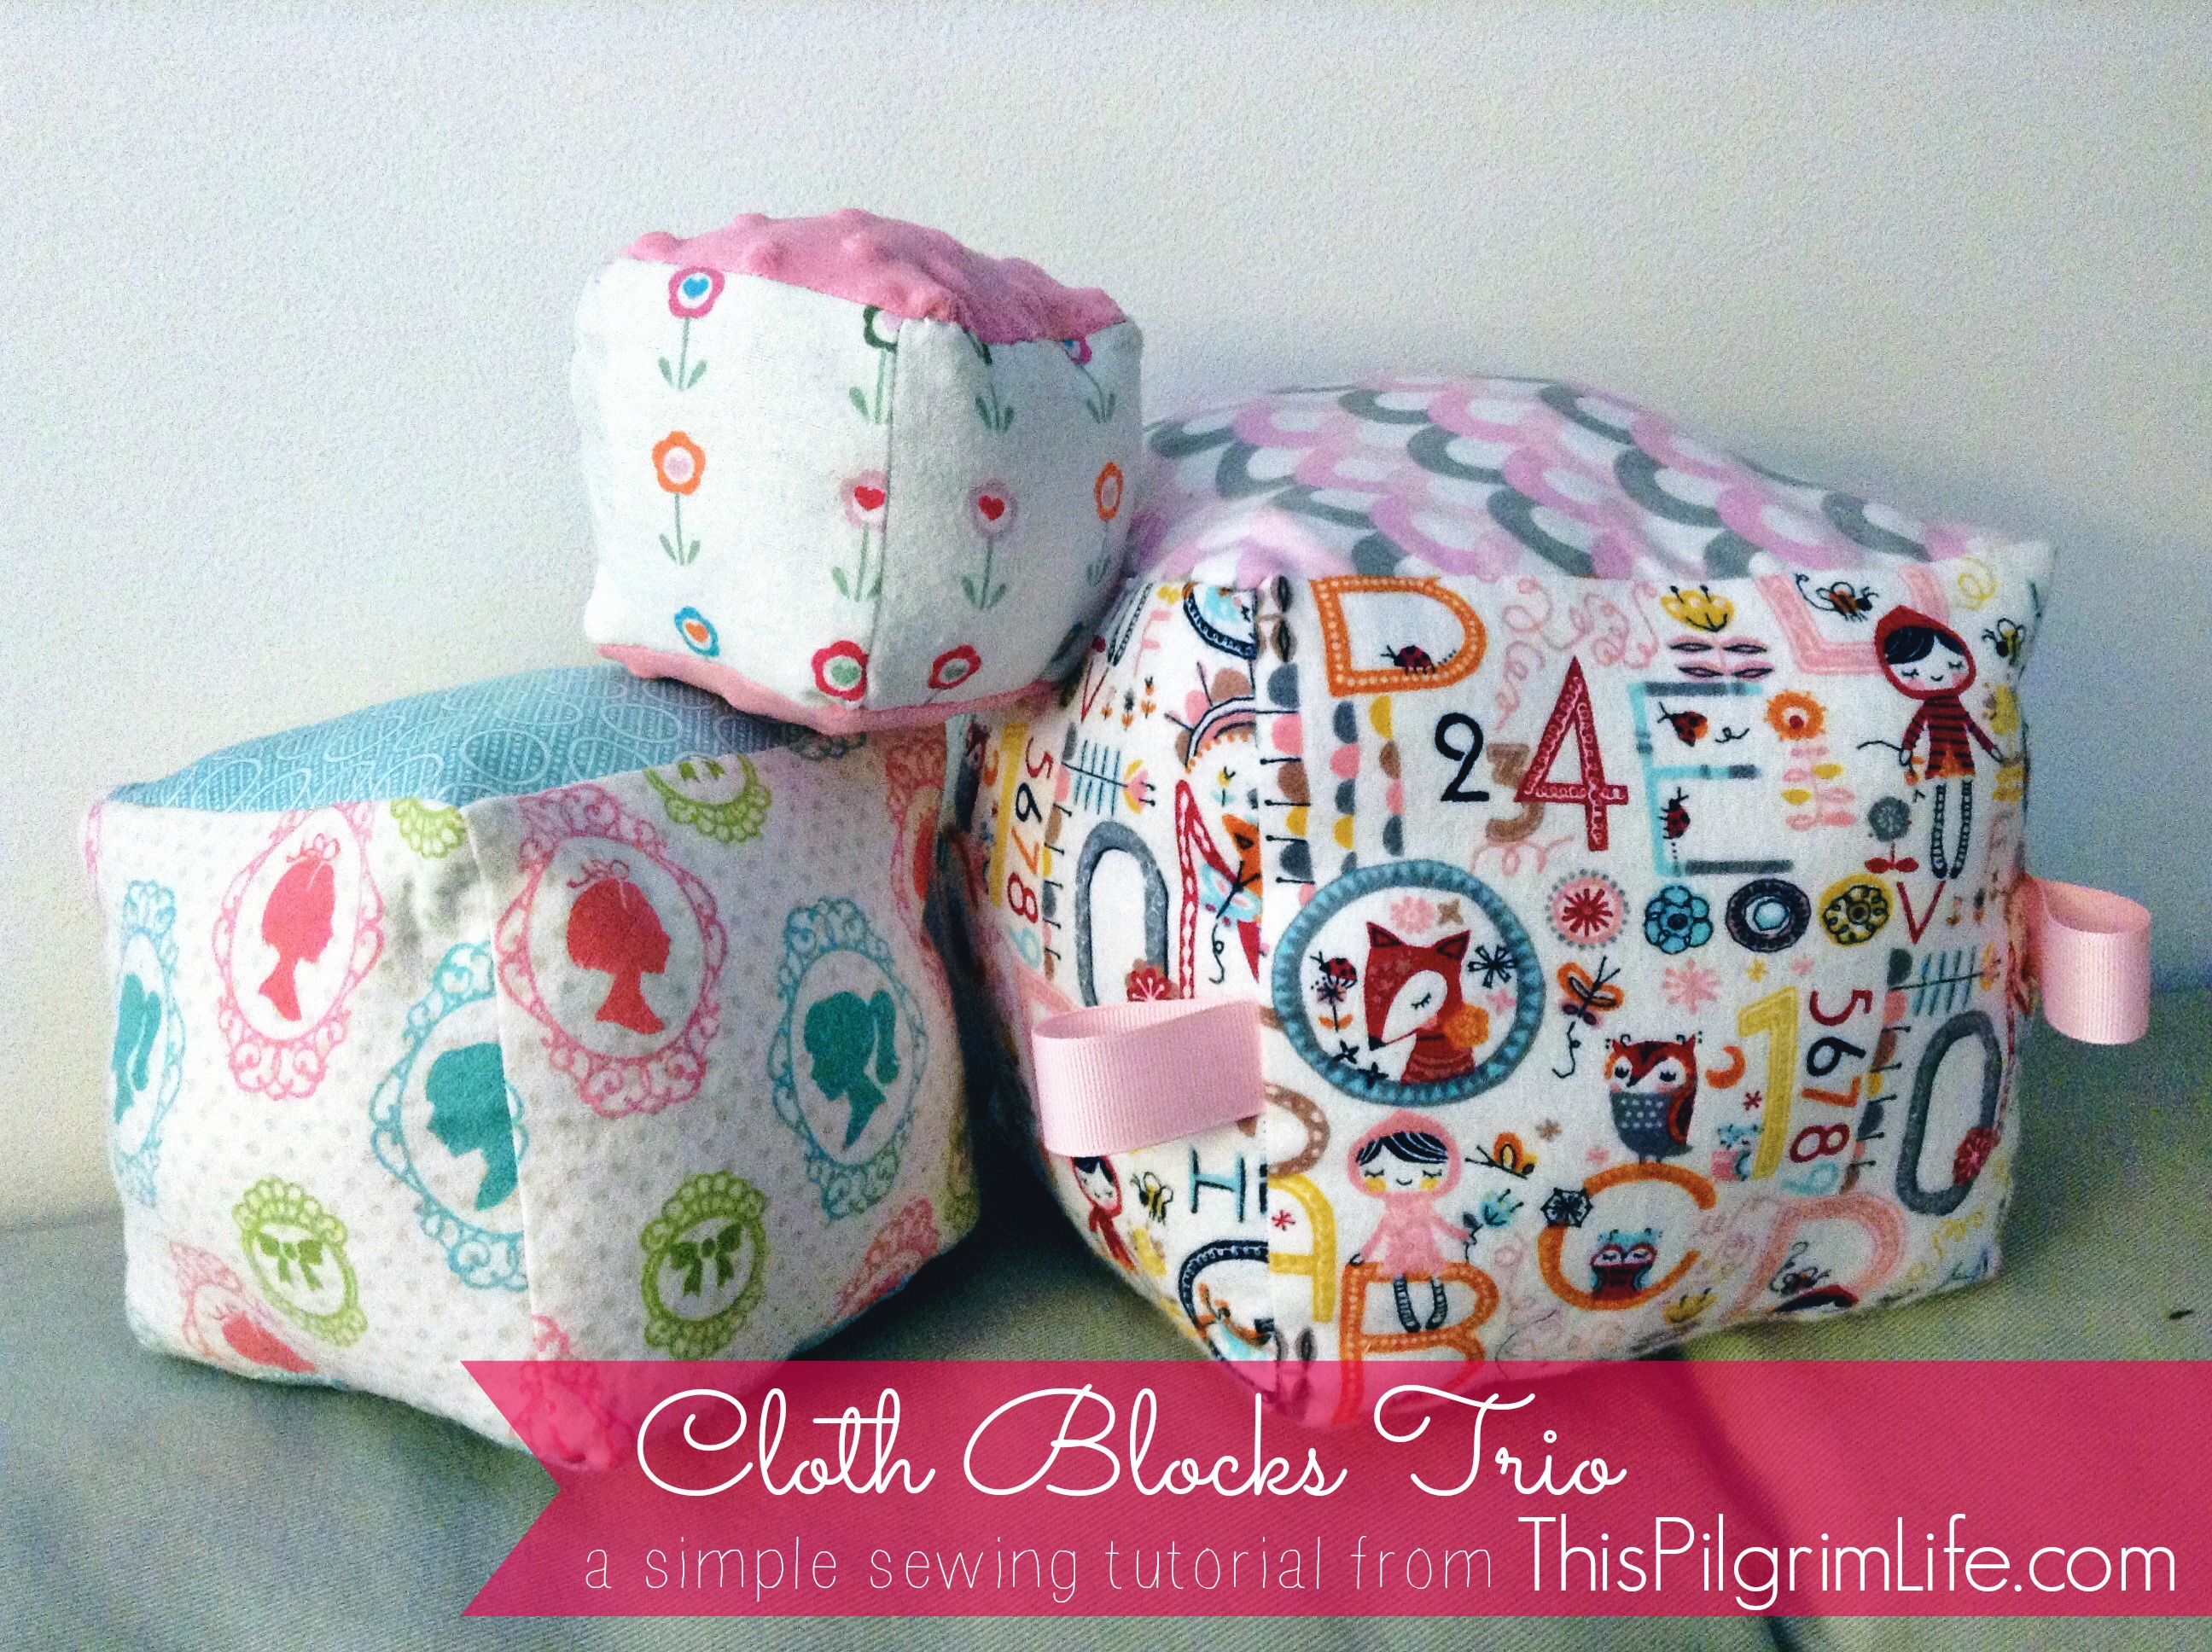
My friend asked for a mirror for the car and a nursing cover. I also made these blocks for her little one.
This quick sewing project is great for using up scraps you already have on hand. Or using receiving blankets or special onesies would give it a sentimental twist.
If you are a beginning sewer, this is a great starting project. Only four steps and a final product you can hold in your hands in less than an hour.
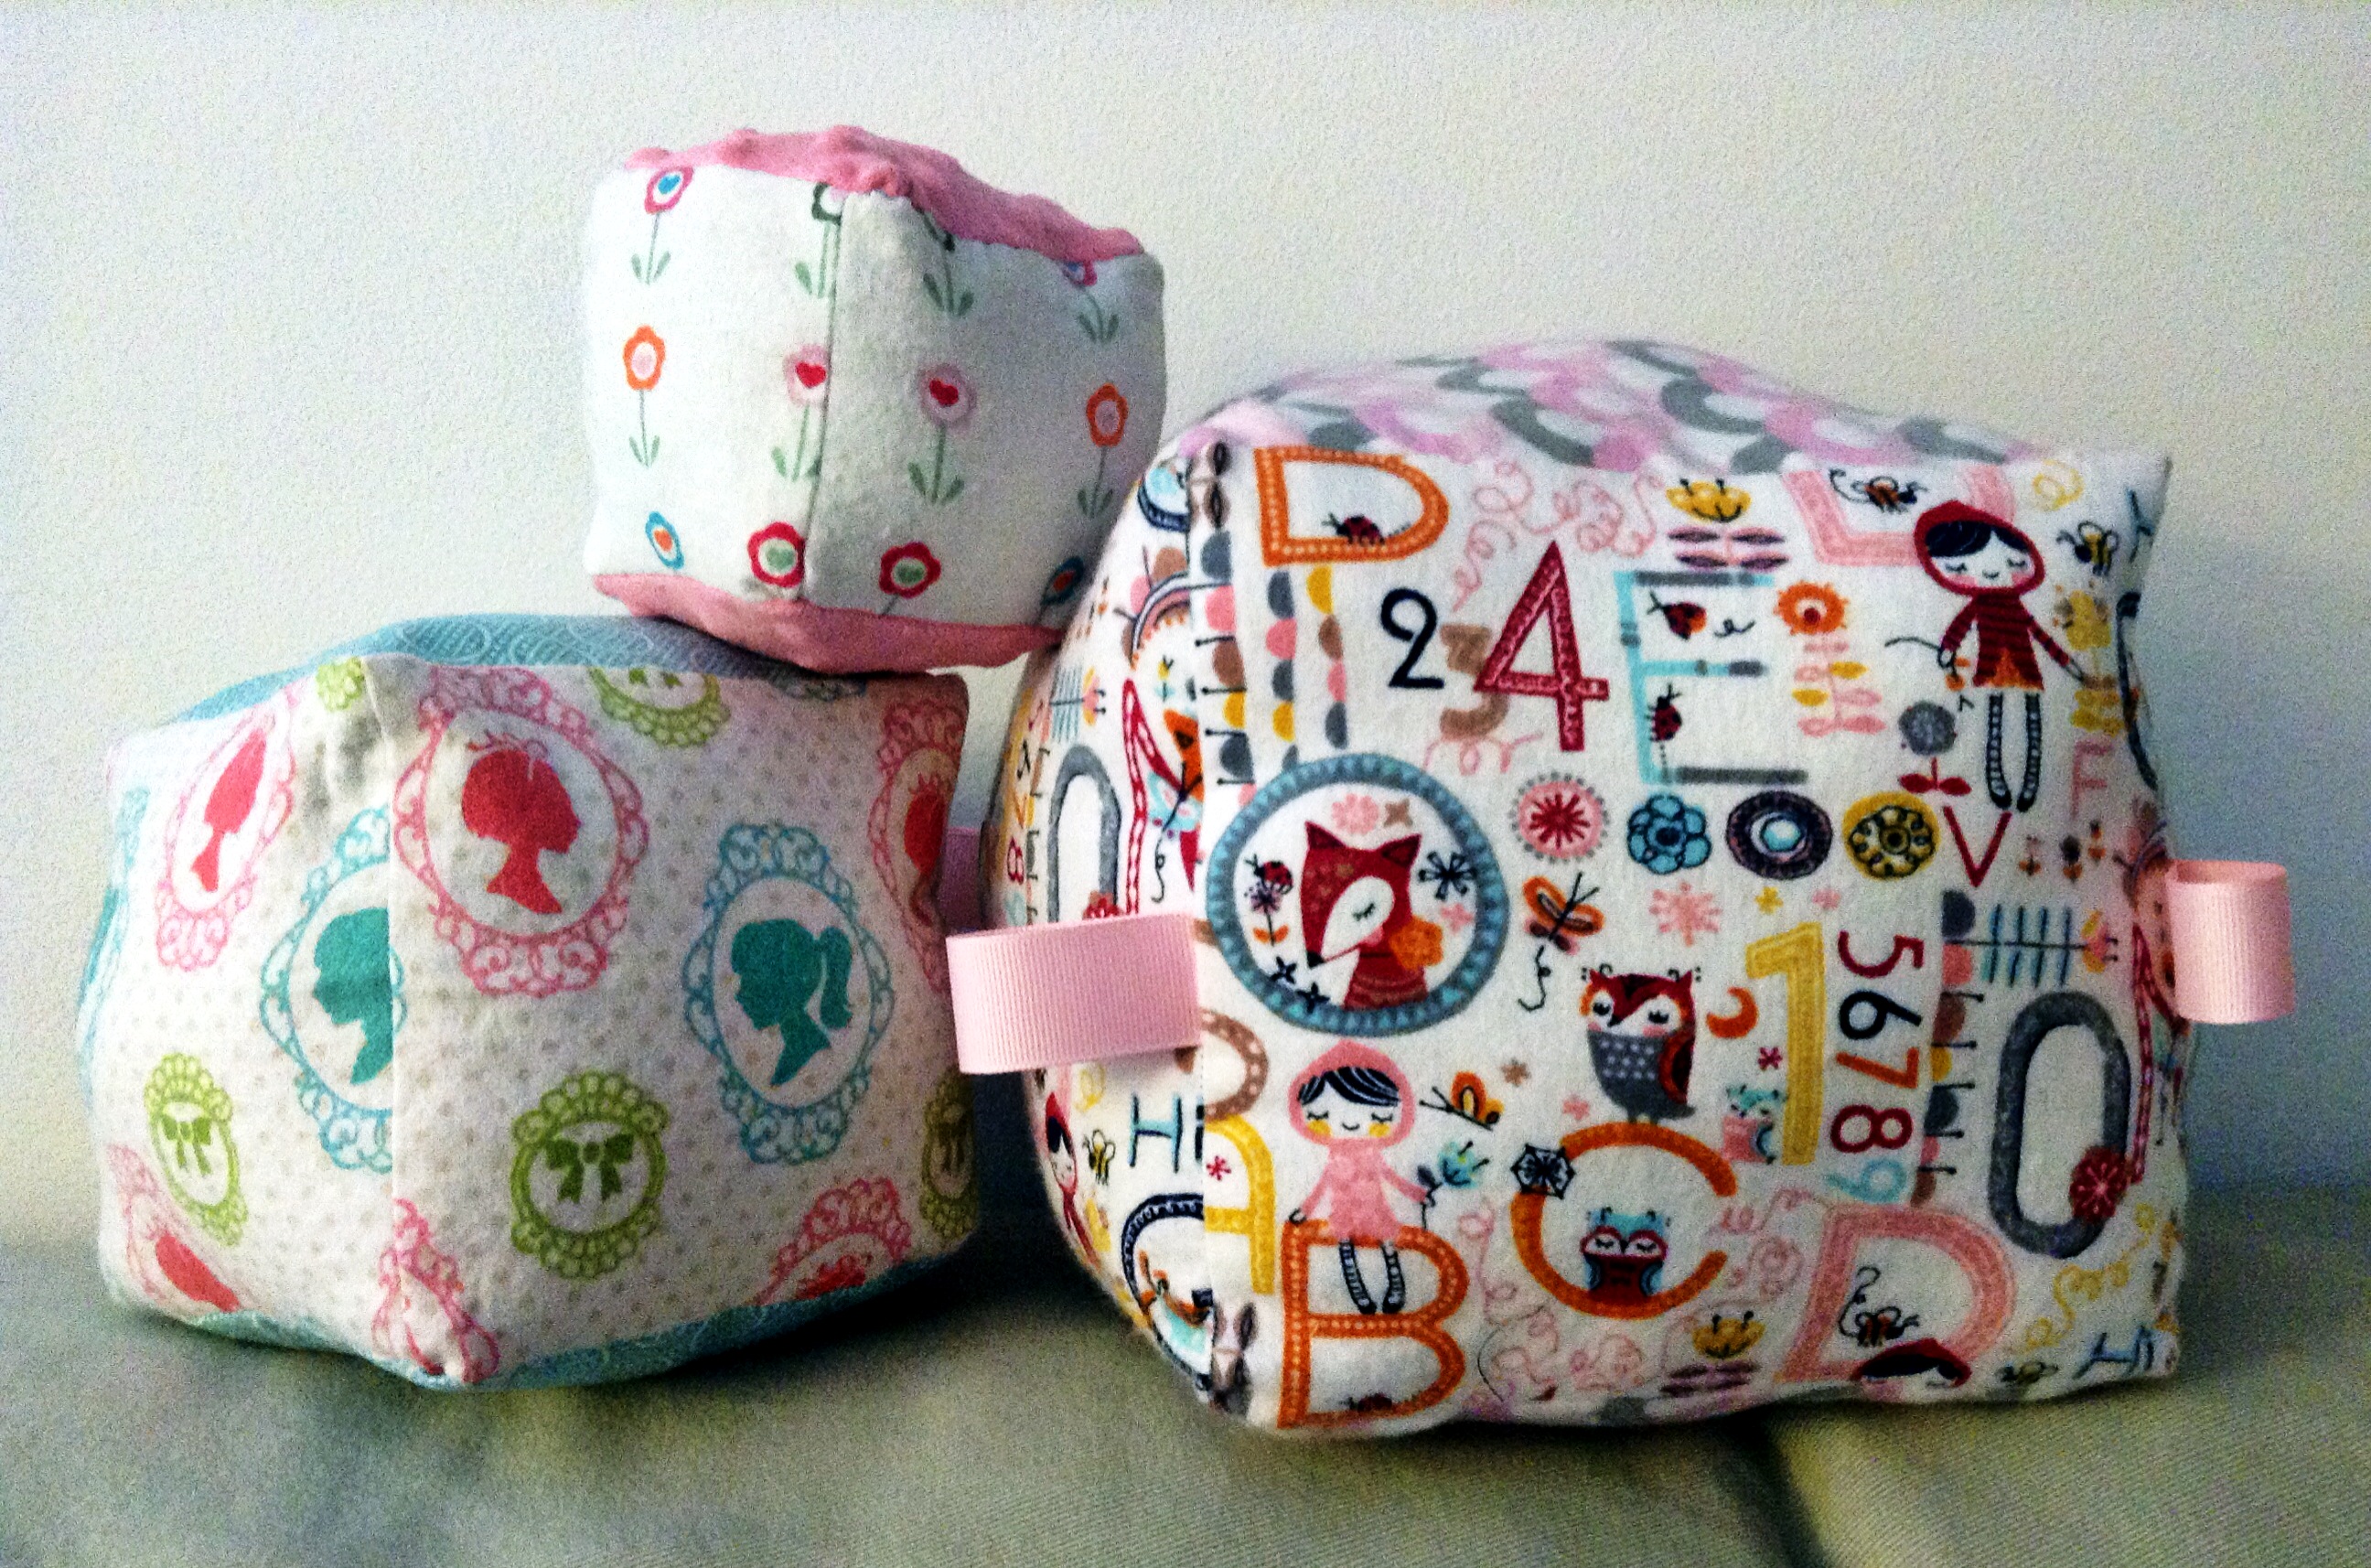
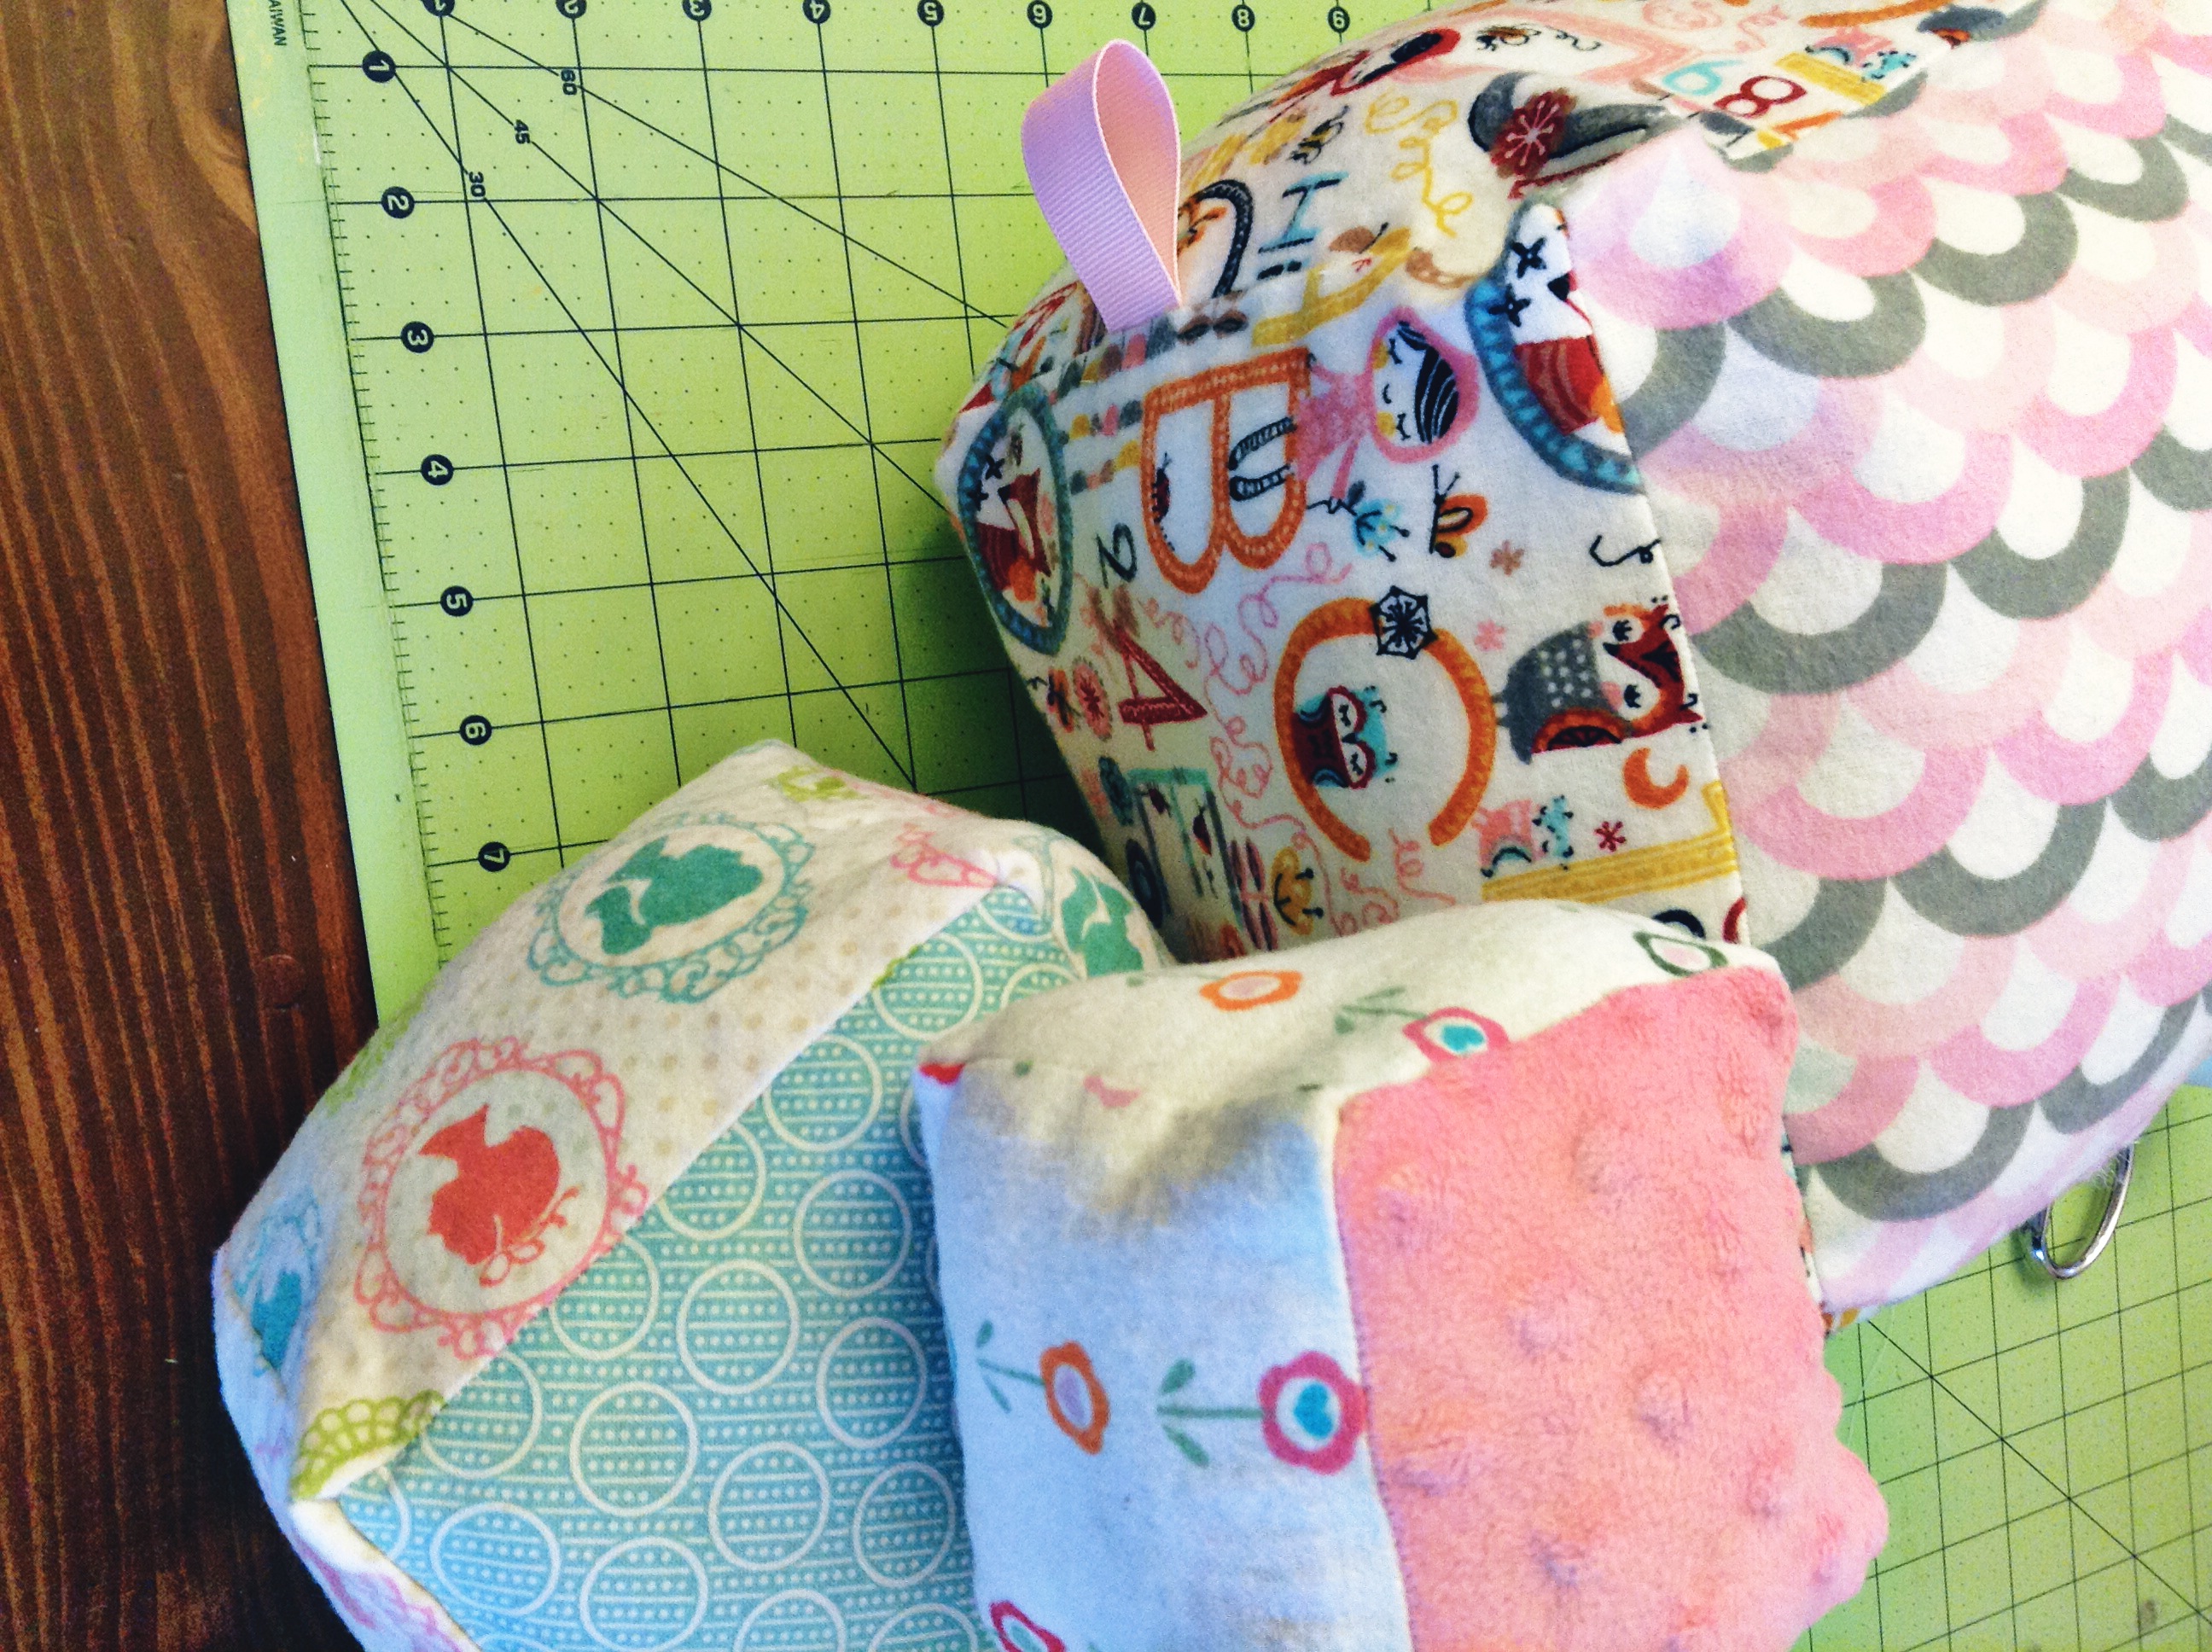
I made three different size blocks but you can make whatever variation you like. In the trio above, the smallest block has a couple of bells inside to make it jingle, and the largest block has ribbons to make it easier to grab onto. They were all made using some of my favorite girly fabric and I am planning on making my daughter some for Christmas too.
Do you have a favorite go-to baby shower gift?
Cloth Blocks Tutorial
Materials Needed:
- Soft cotton fabric (I used flannel and a soft minky)
- Ribbon for tags
- Small bell
- Stuffing
Instructions
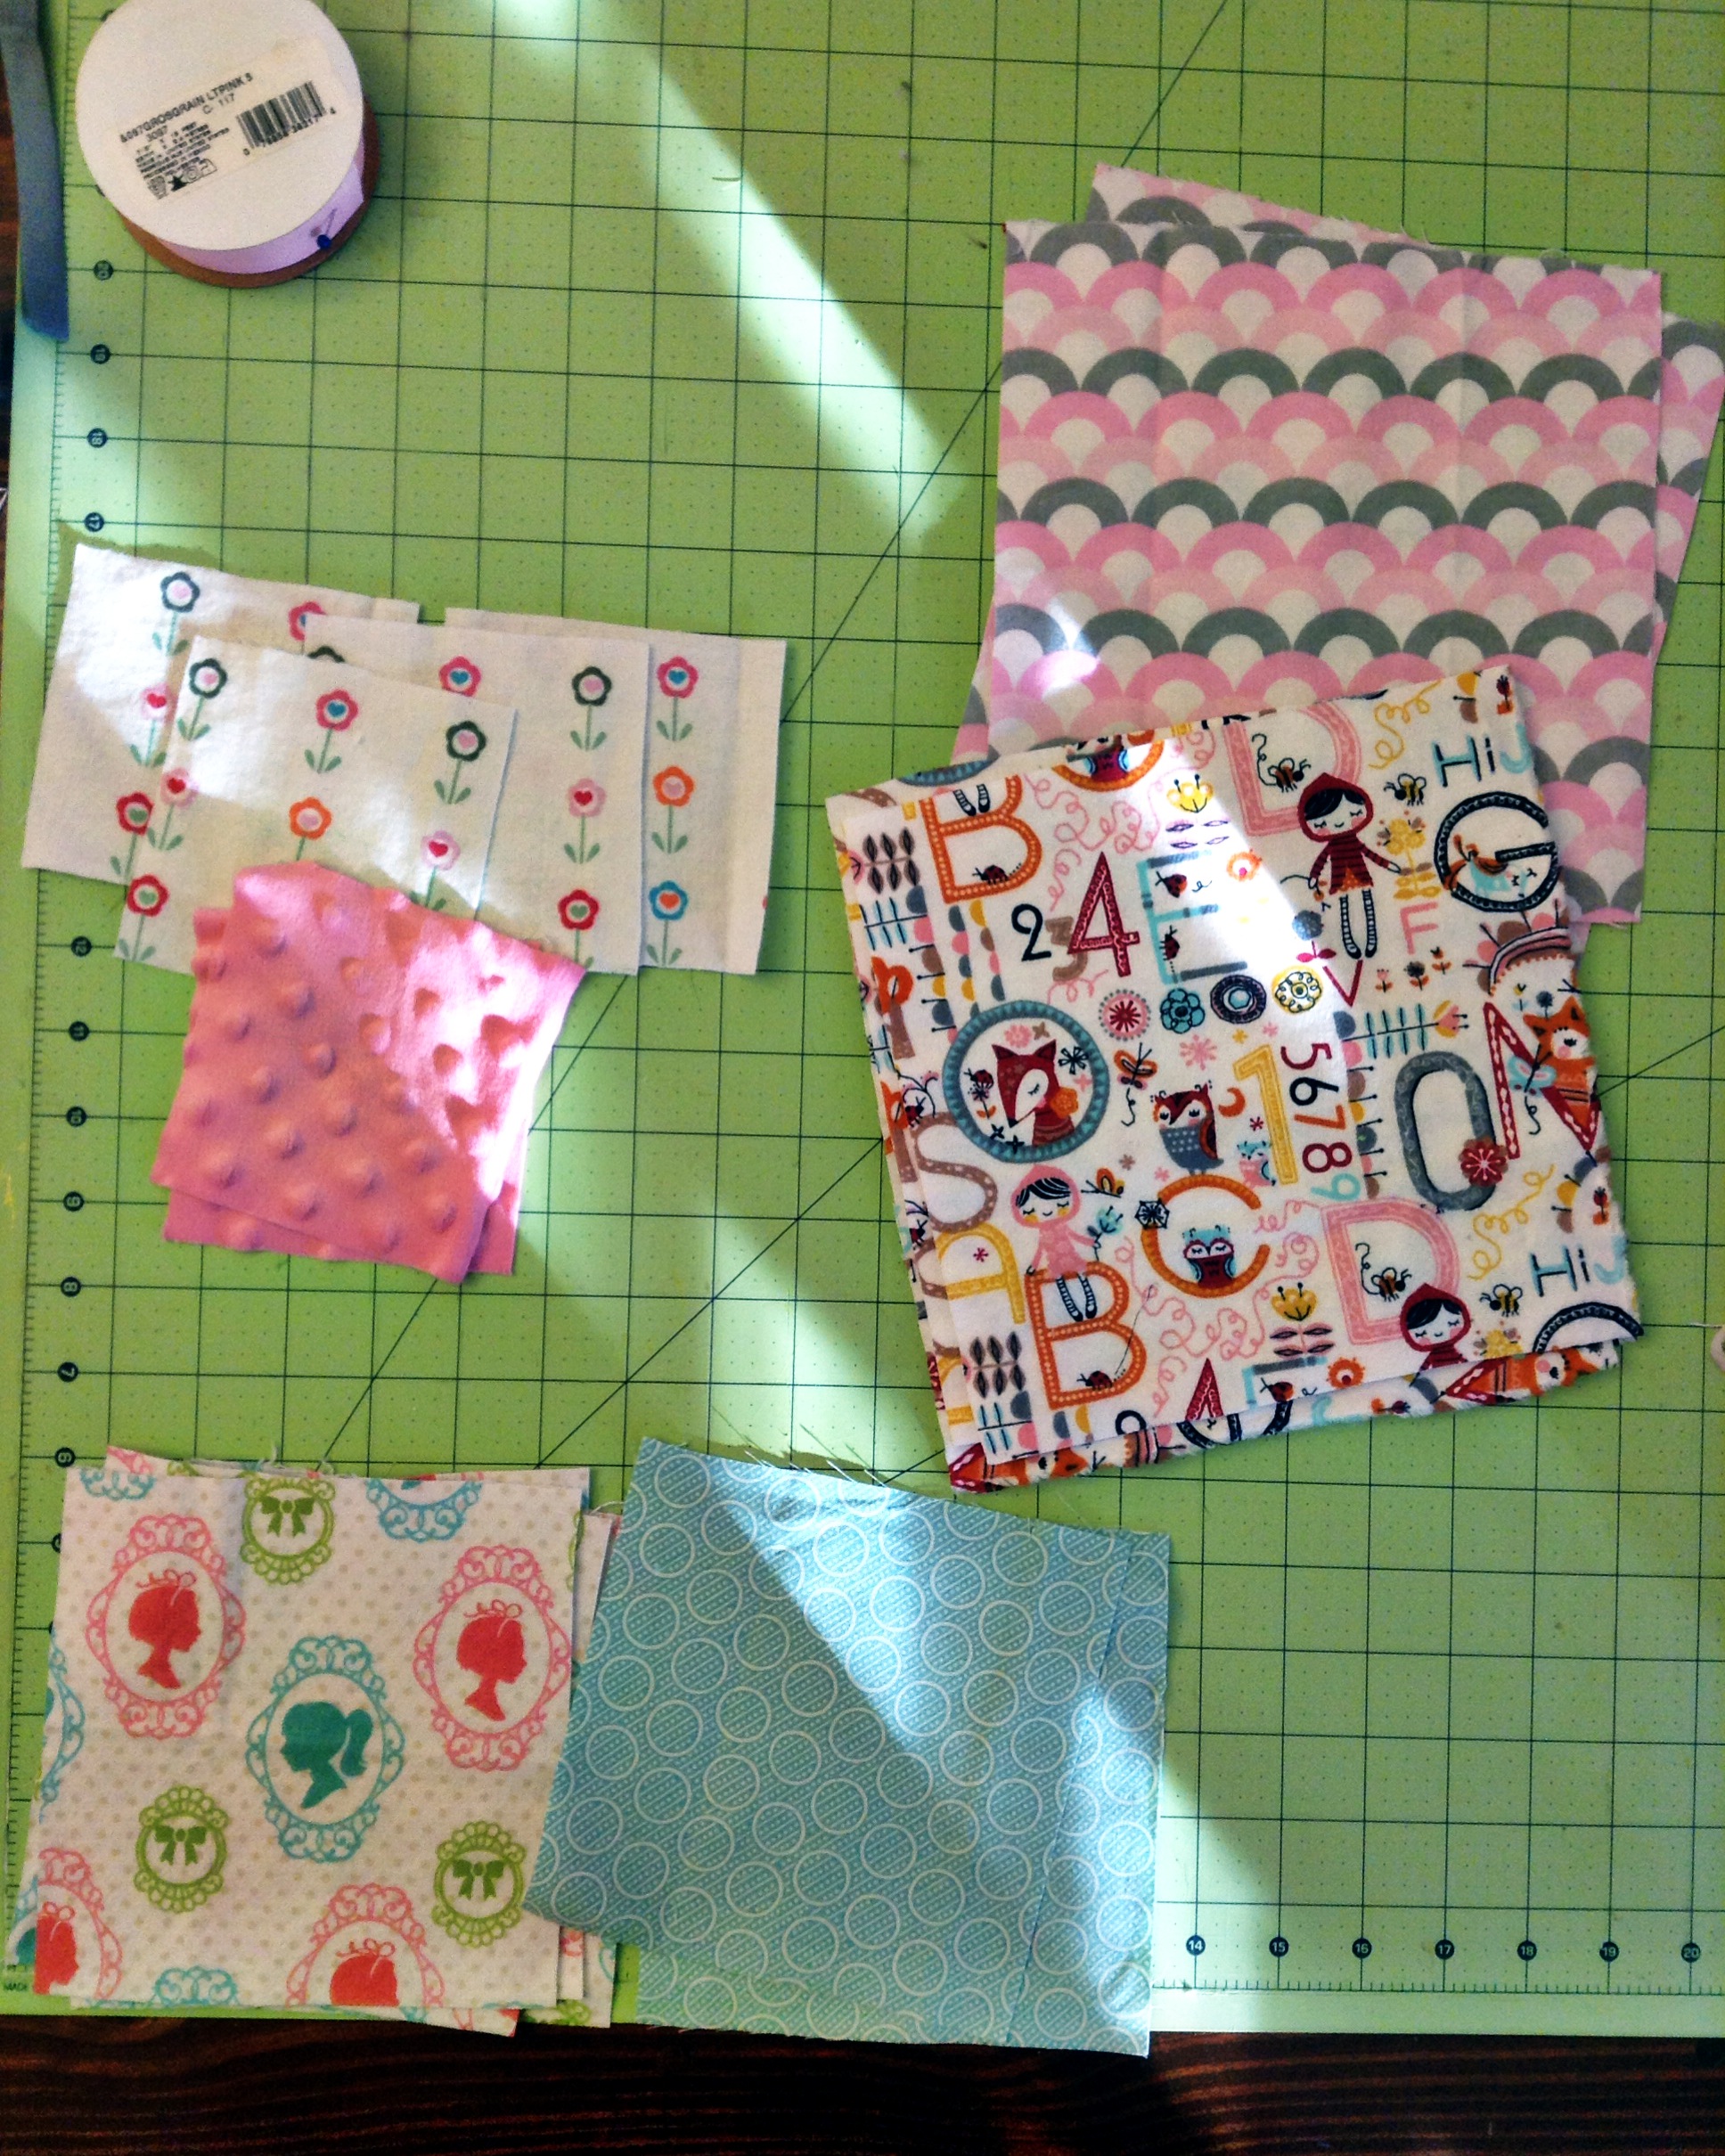
1. Cut 6 squares for each block. When choosing what size to cut, add an inch to the desired size of the block. (For a three-inch block, cut four inch squares).
I chose to use one fabric for the sides and a contrasting fabric for the top and bottom. (See picture below).
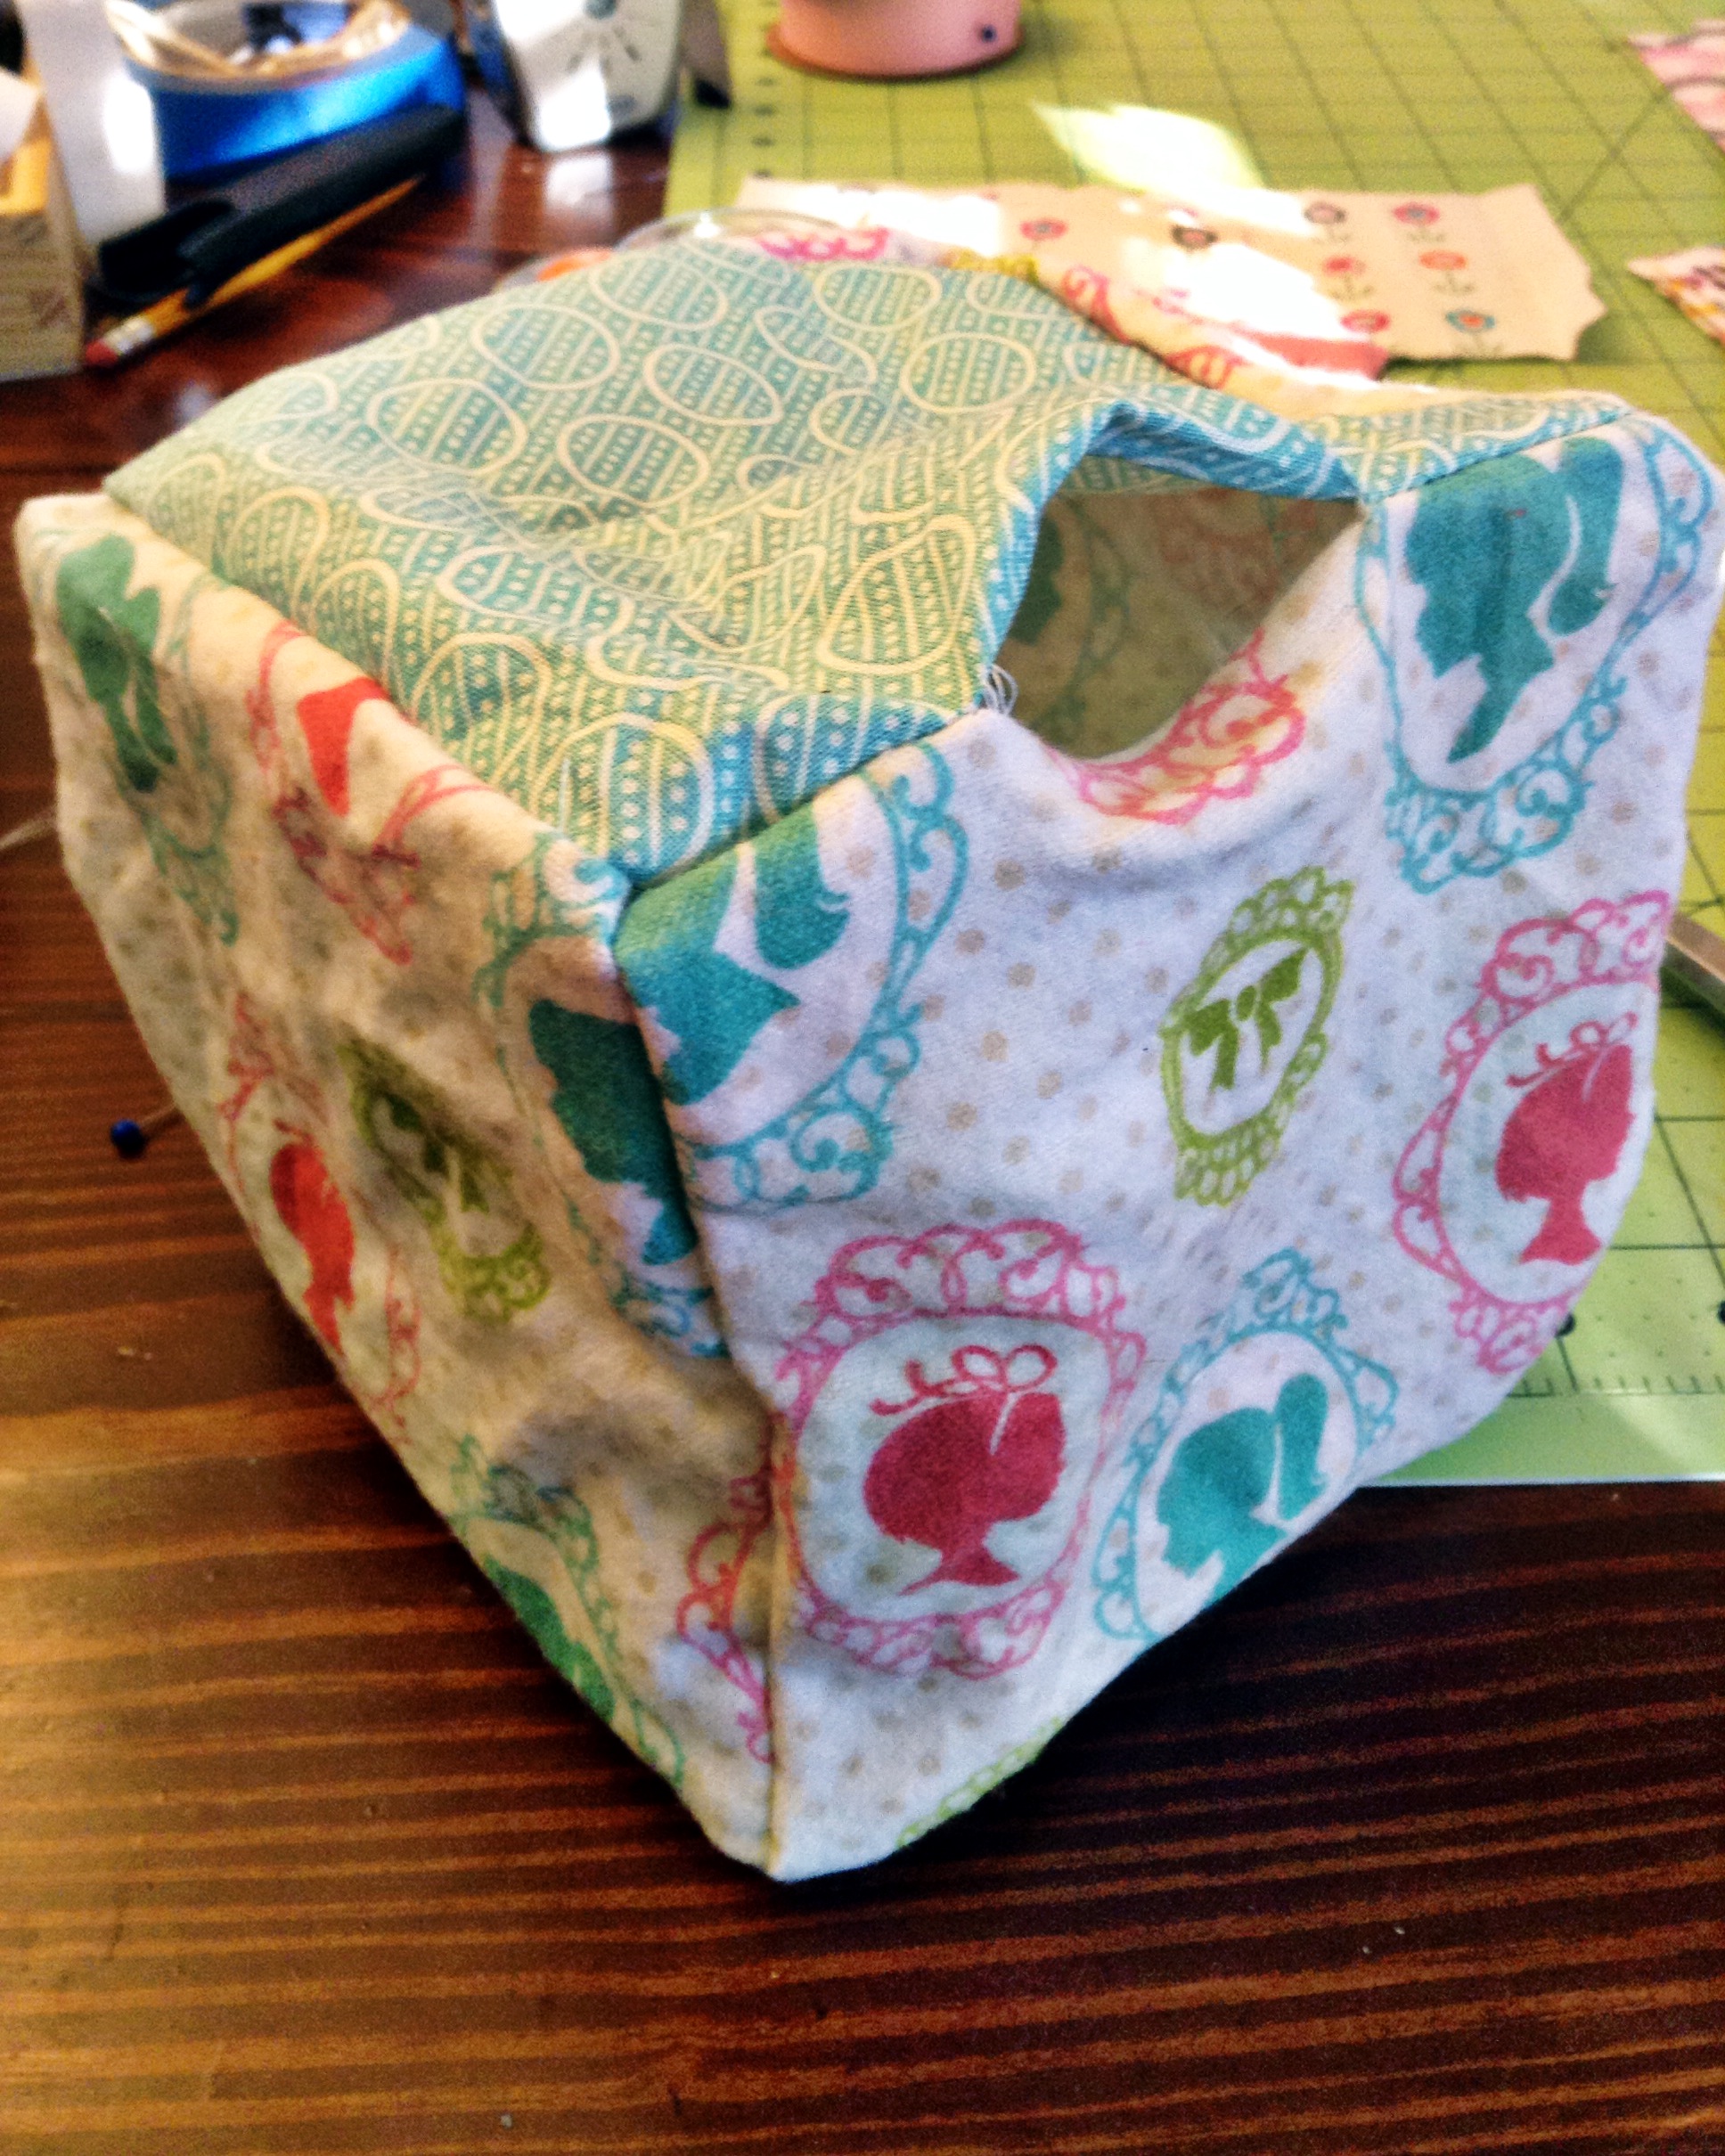
2. Take four of the squares and sew along the sides with a half-inch seam, connecting the last two sides to make a box. (See picture below).
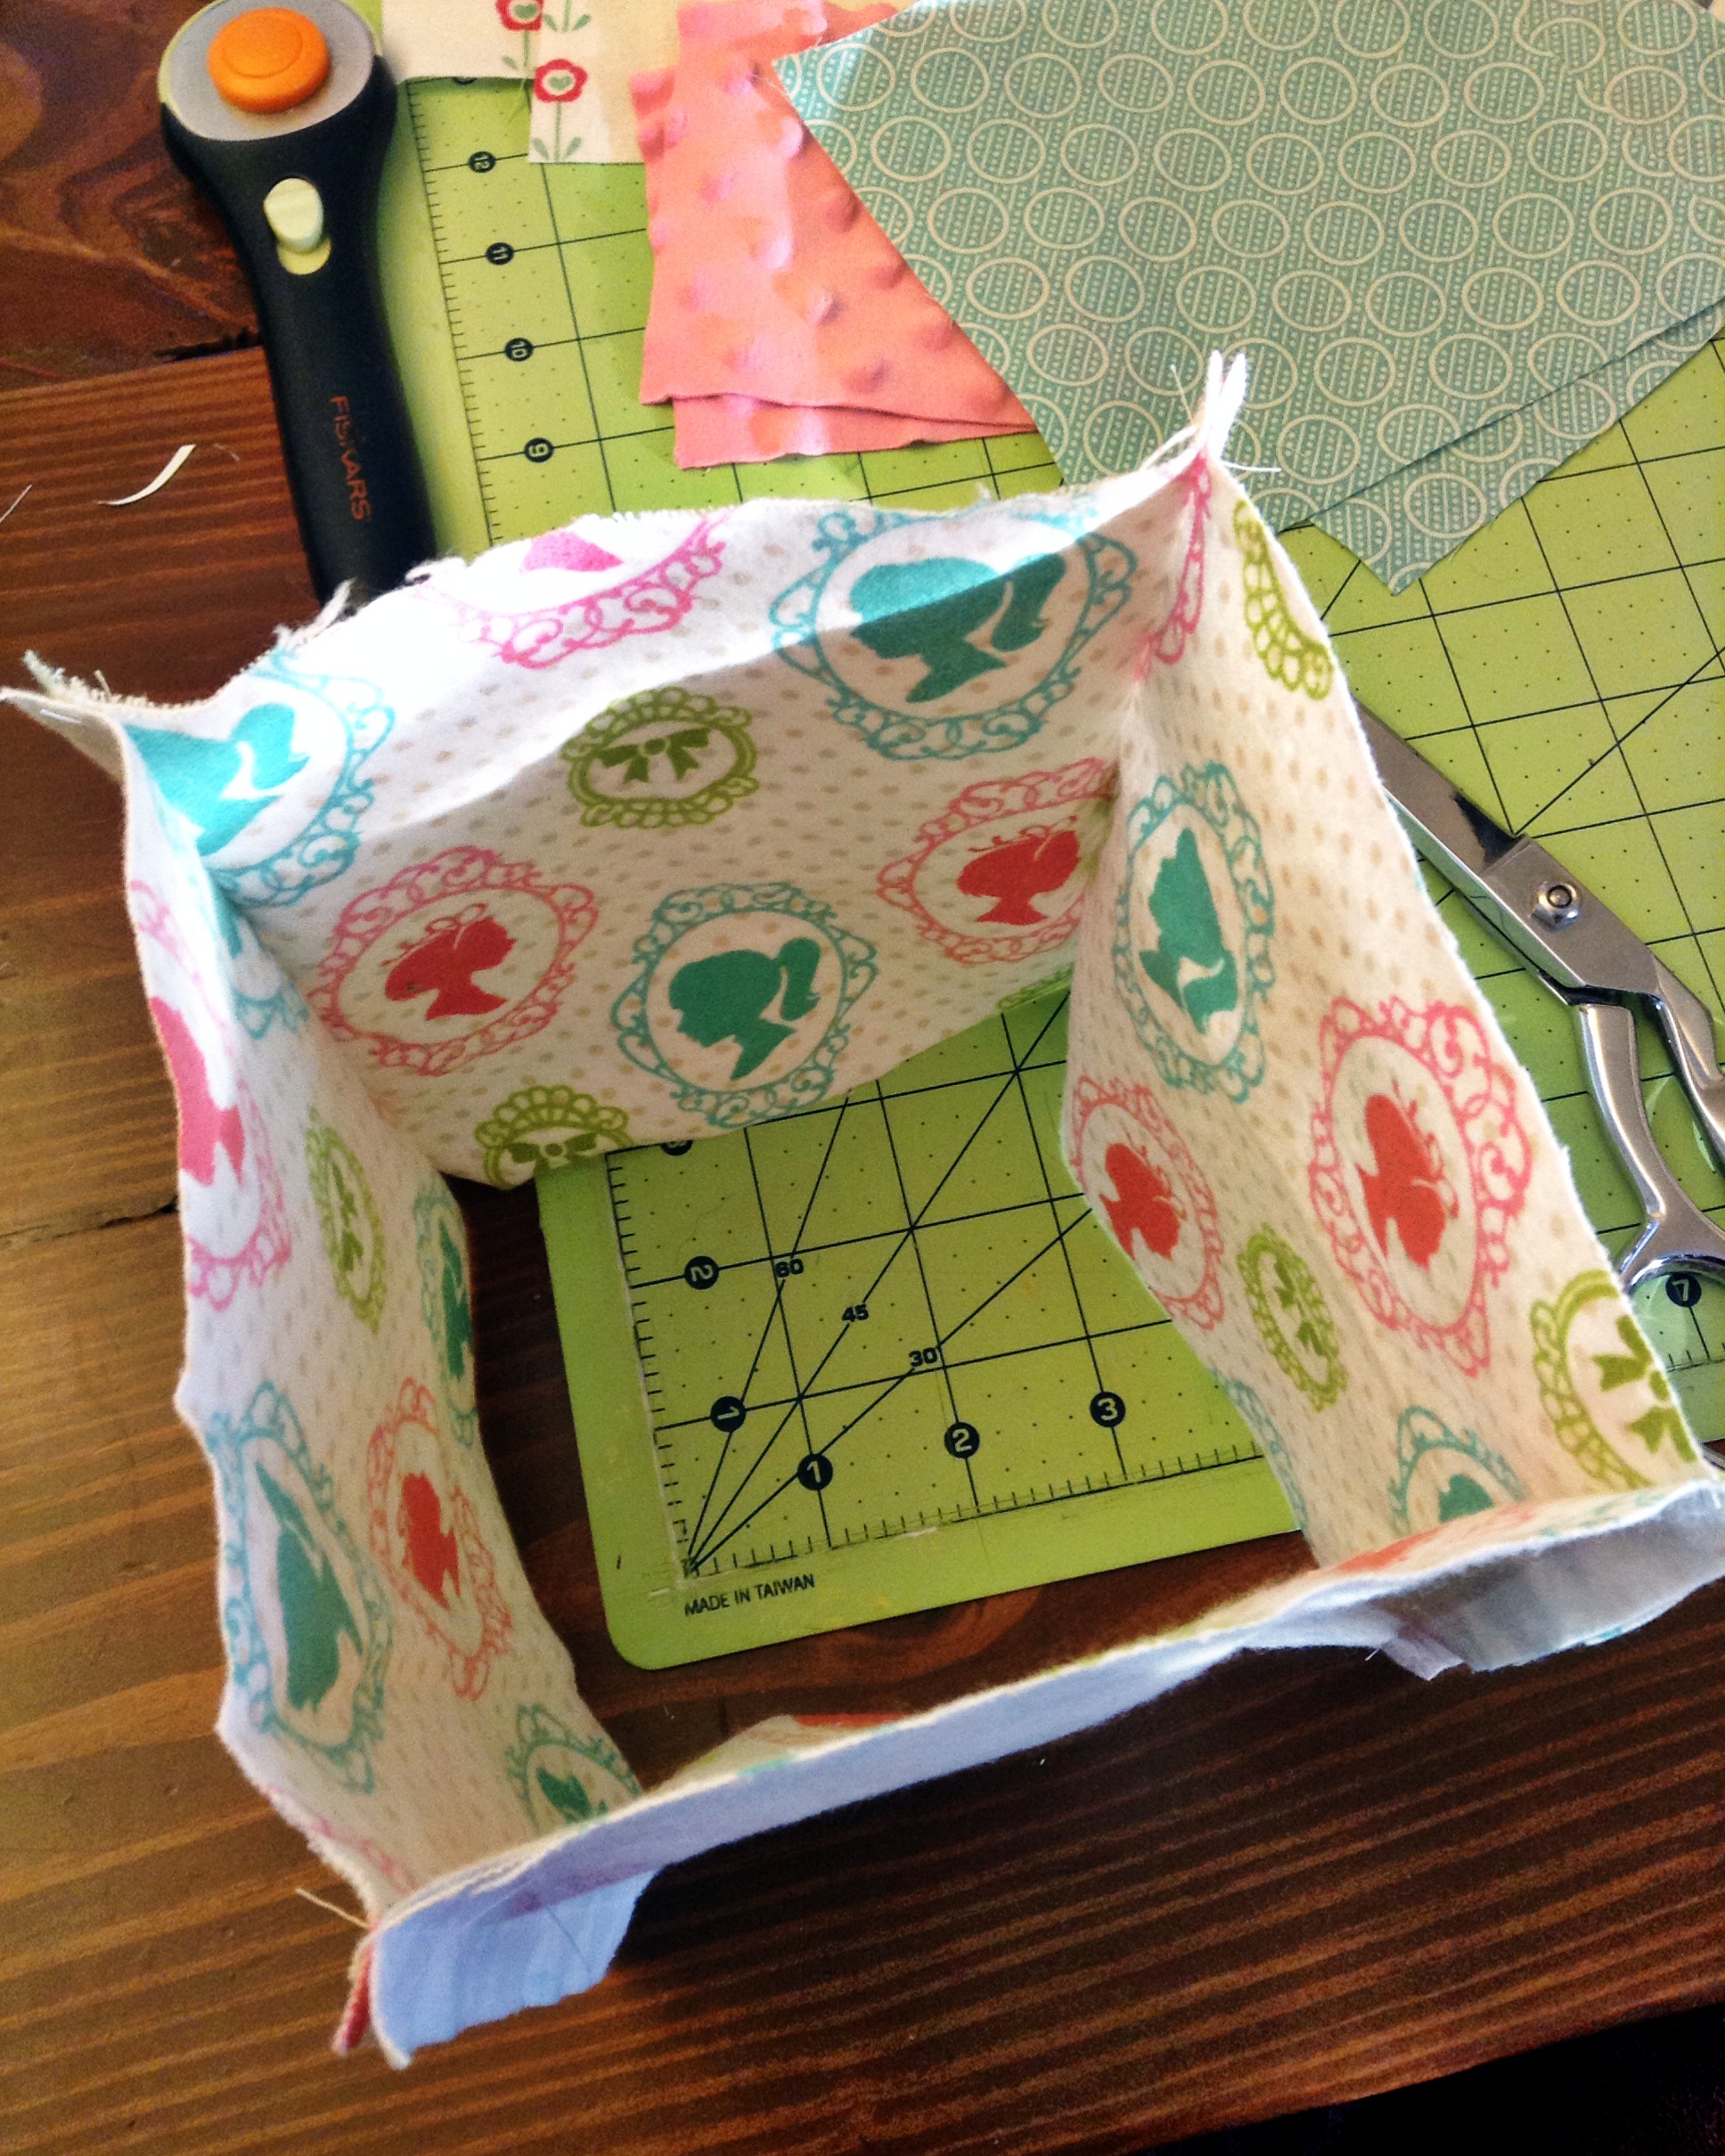
3. With the wrong sides still facing out, pin the top piece to the box, (wrong side facing out too). Sew around all four sides with a half-inch seam.
Repeat the step above to attach the bottom piece to the box, leaving a two-inch opening in the middle of one side for turning and stuffing.

4. Turn the block right side out. Push out the corners and the side seams. Fill with stuffing. Sew the opening closed with a blind stitch.
Variations:
- For a “jingle block”, add a bell or two when you stuff the block. If you leave the bell closer to the outside of the fabric, it will have a louder ring.
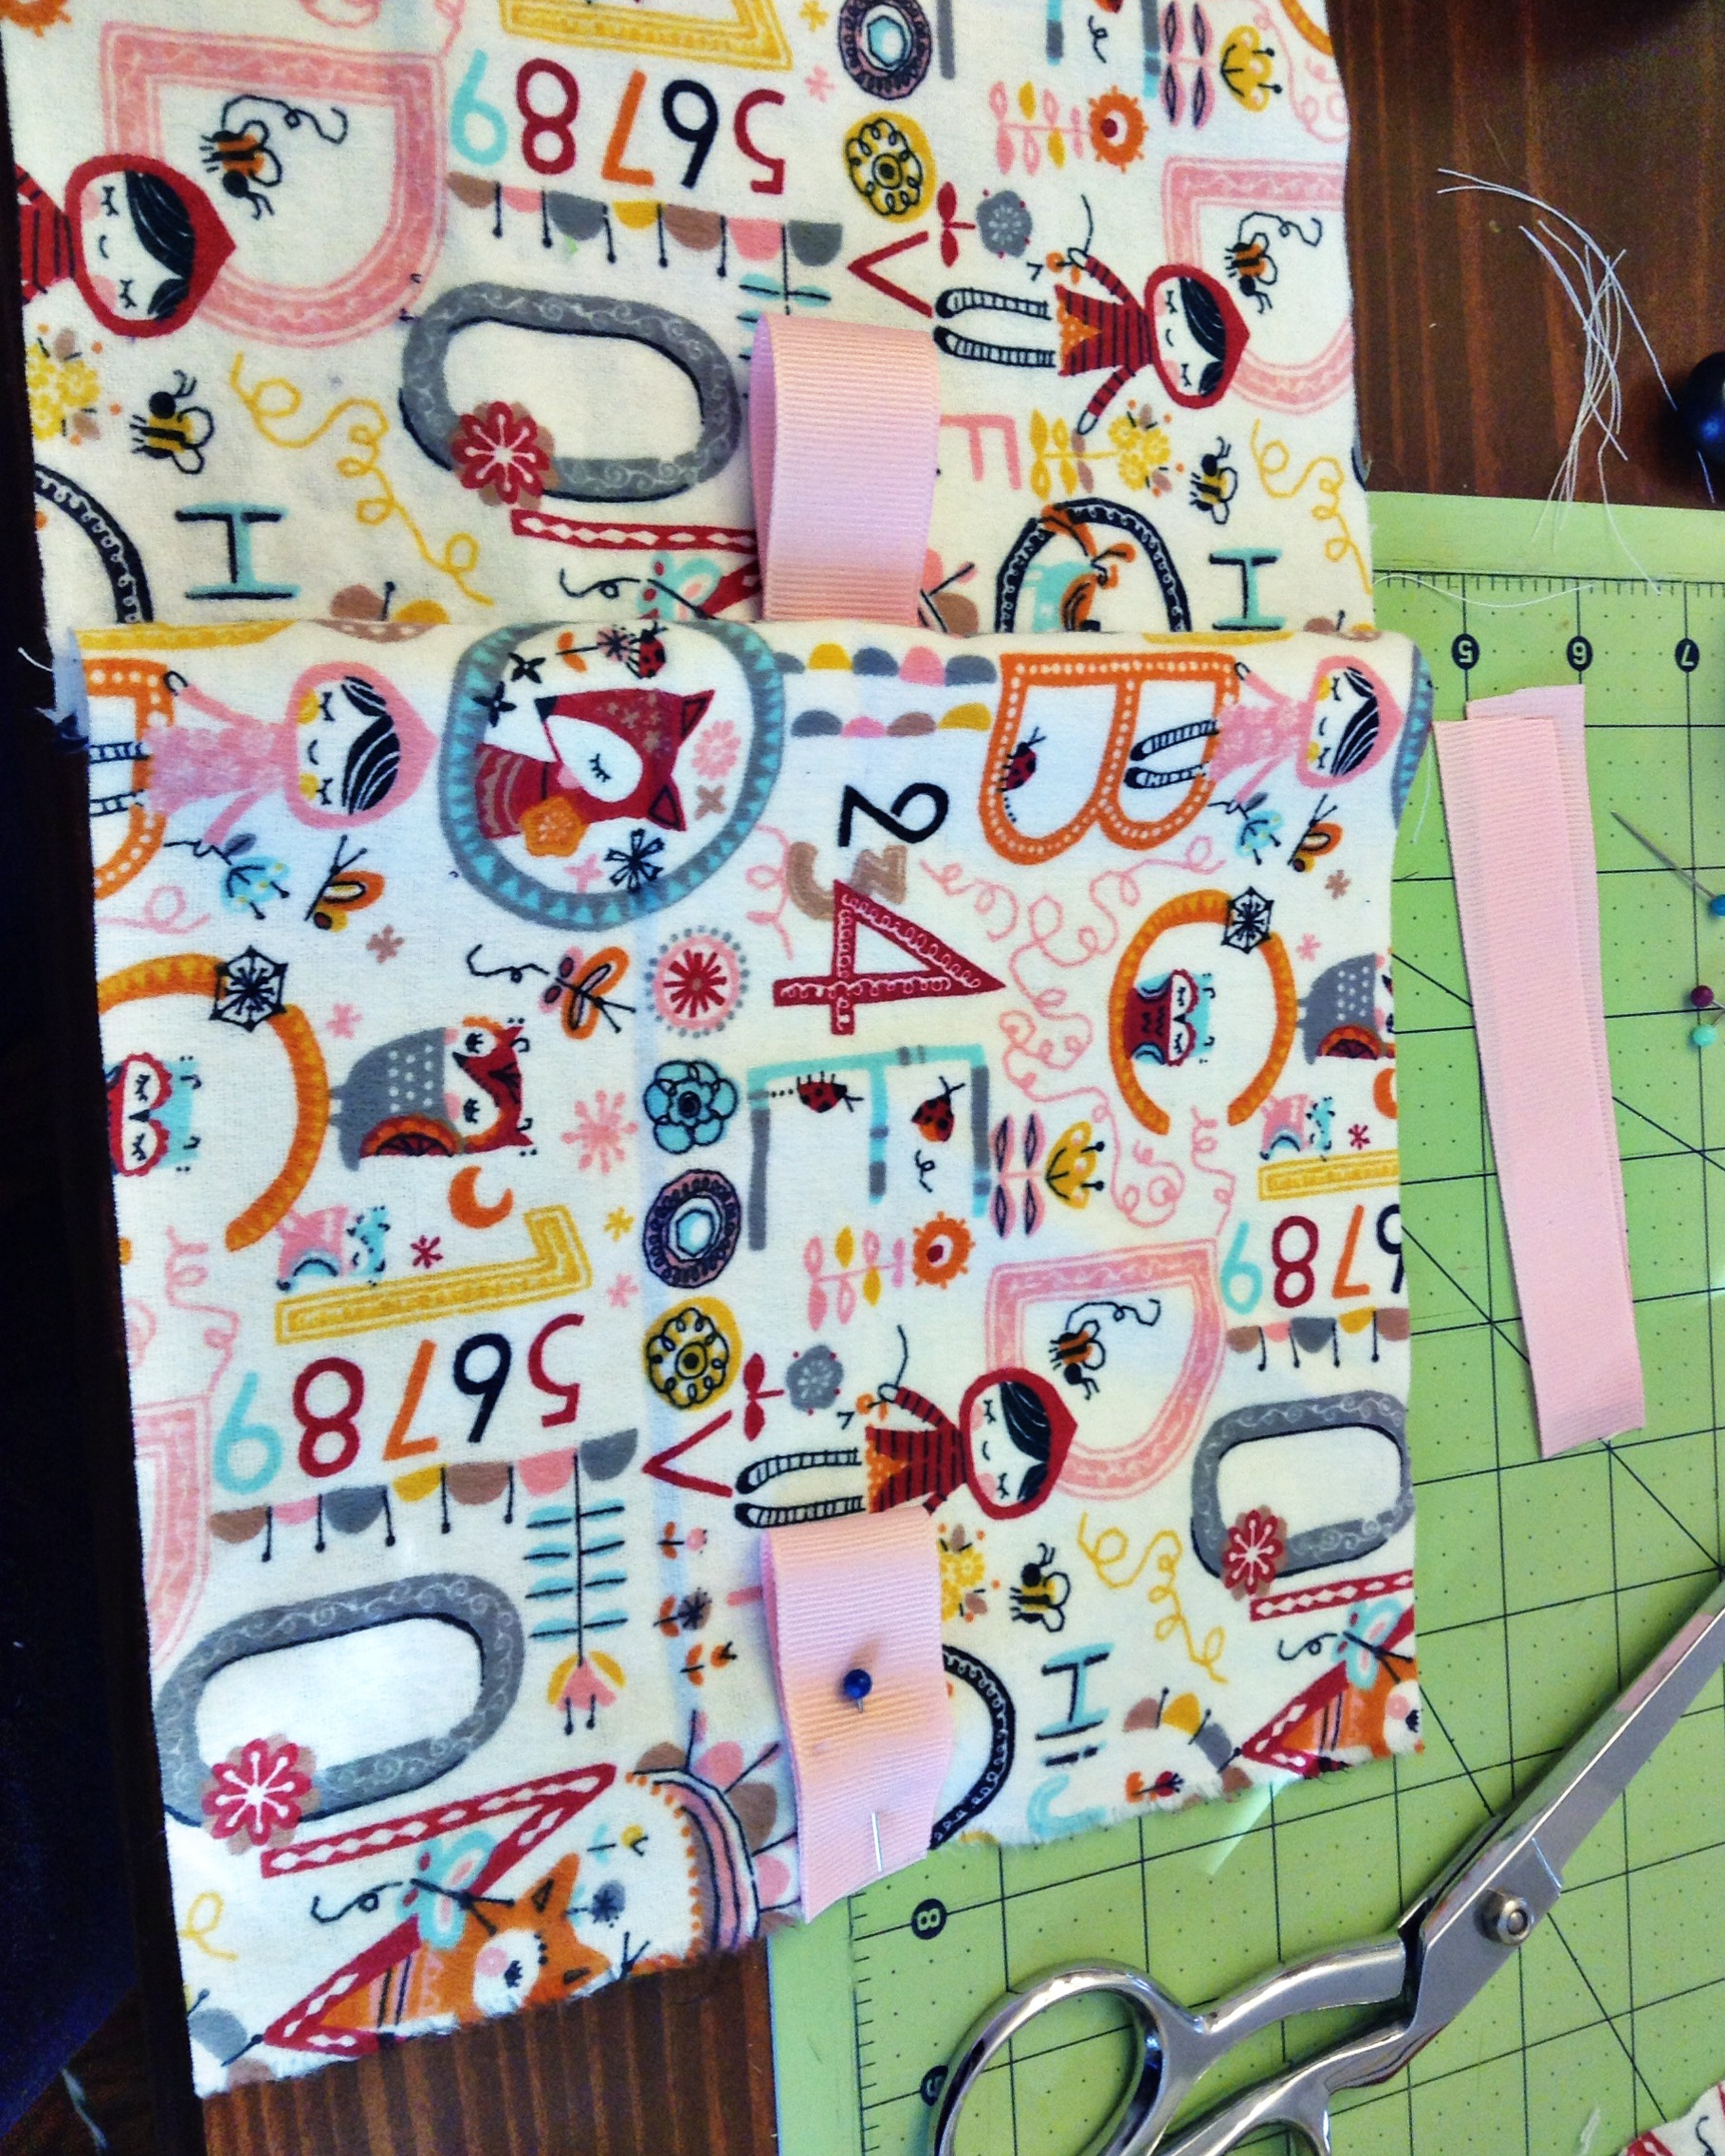
- For a tag block, cut 4 inch strips of ribbon. Fold the ribbon in half, and pin it in the middle of each side seam before you sew the seam. The folded edge should be pointed to the middle of the fabric piece.
These are so cute! Thanks so much for the tutorial. Pinning it.