This post is a part of the 31 Days to a Handmade Christmas series.
Yesterday I read an excellent article about one of my favorite aspects of homeschooling. Naturally occurring learning that happens in everyday life.
Nature walks, conversations that take place as we cook together, participating in hobbies with each other, books on current interests, and so on.
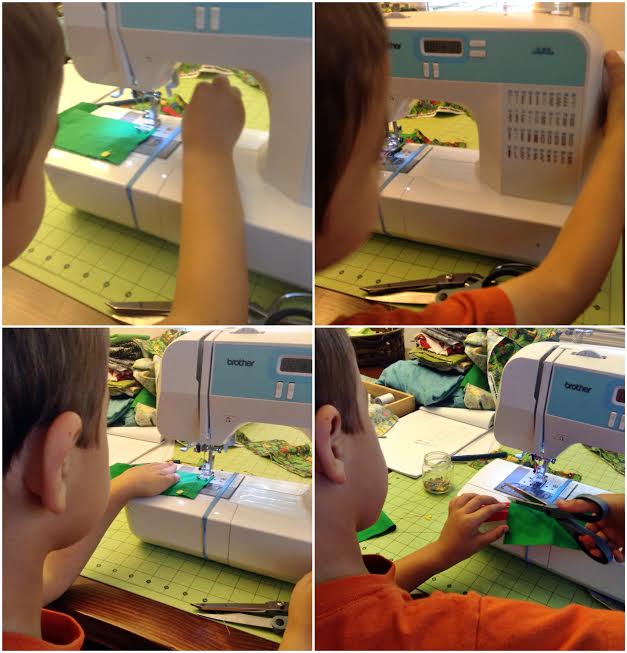
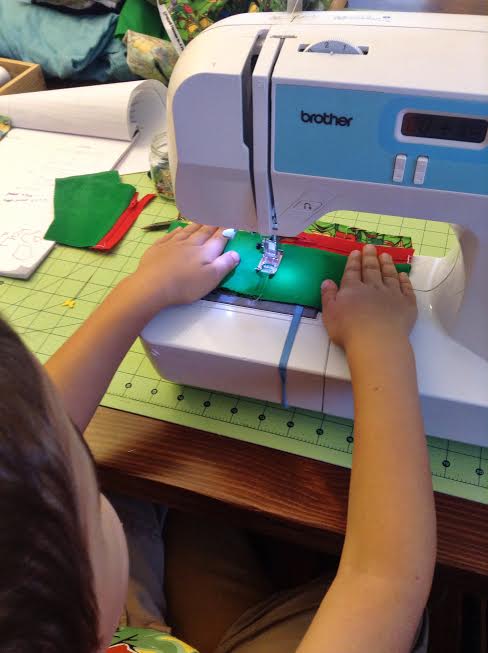
One of the highlights of last week’s everyday learning was teaching my oldest son, Jack, to use my sewing machine. (The iron is still off-limits!)
When we were at the fabric store last Monday, he found a Ninja Turtles remnant and asked me to help him make a wallet (one for him and one for his brother). He was very clear about the wallets also needing a zipper.
The process only took an hour, but was a fun time for both of us. He was so excited and proud of his work. And in that short time, he learned how to find the right numbers and measure on my cutting board, he practiced his cutting skills (I was amazed at how well he cut!), we talked about rectangles, and he sounded out words and practiced his writing.
 ‘pocket’ (we are working on writing in a straight line…)
This in addition to actually sewing on the machine! I was in charge of the foot pedal, but Jack controlled the presser foot, raised and lowered the needle, guided the fabric, and trimmed the thread. (He sat on my lap).
Want to get your kids involved in handmade gift giving?
This simple wallet tutorial involves very basic sewing and cutting, with simple instructions that young children can follow with a little help. I also included a few tips in [ ] specifically for helping a child learn to sew.
Give it a try and remember, it doesn’t have to be perfect to be time well spent and a gift worth giving!
And if you have any questions or if something is unclear, let me know in the comments! 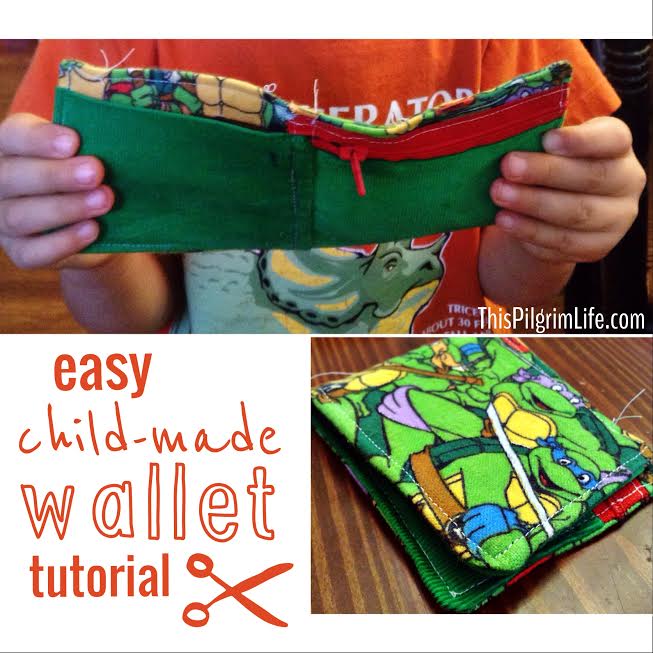
Child-Made Wallet Tutorial
Materials Needed:
- Two coordinating cotton prints (we used a flannel and a corduroy)
- Coordinating thread
- (Optional) coordinating 7″ zipper
Instructions:
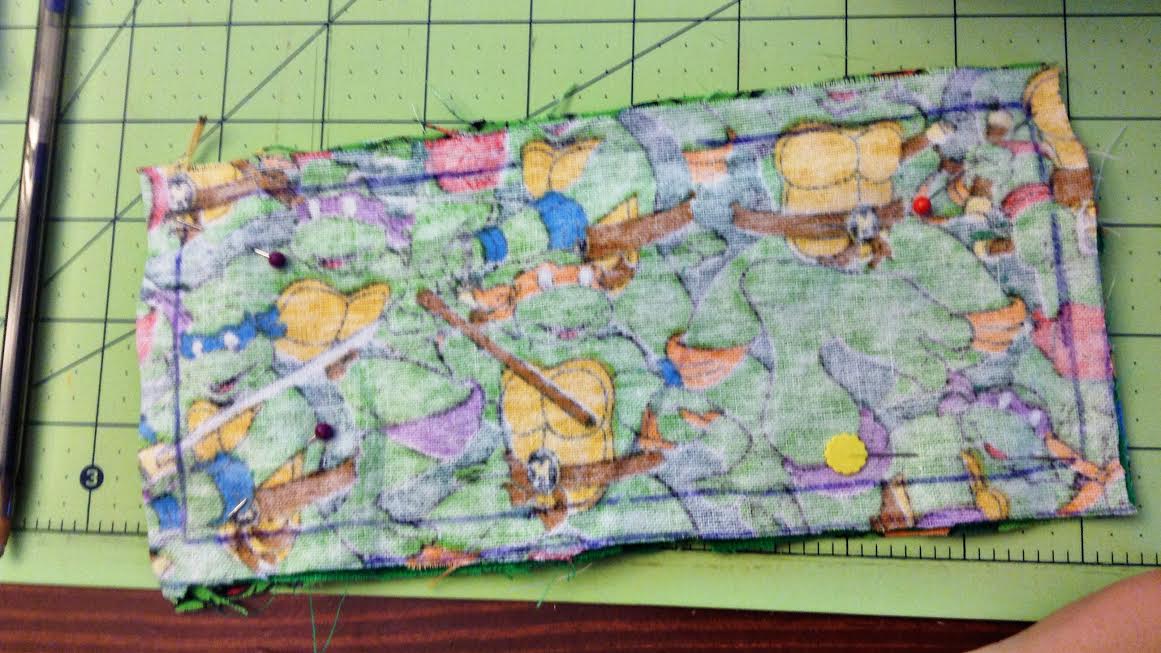
1. Measure and cut out the pieces. [Draw lines showing where to cut on the back of the material as a guide].
For the main wallet pieces: Cut two rectangles 4″ x 9″
For the simple pocket piece: Cut one rectangle 4.5″ x 6″
For the zipper pocket piece: Cut one rectangle 4.5″ x 3″
2. Make the simple pocket.
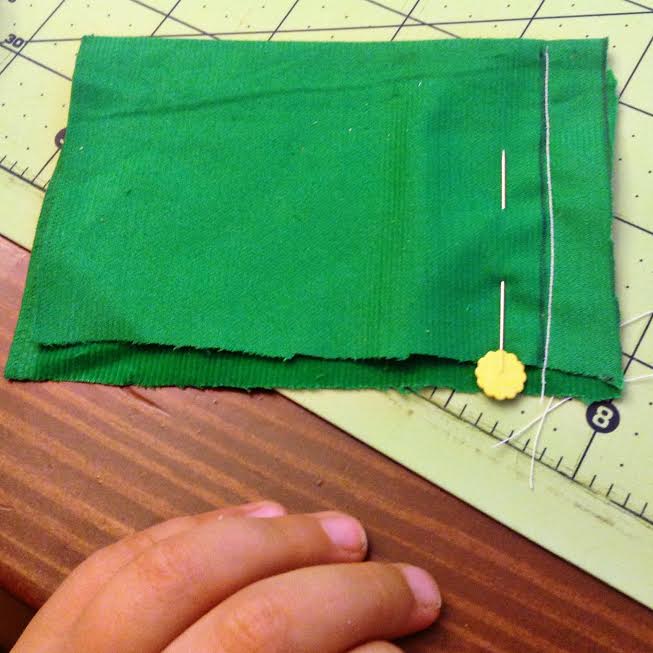
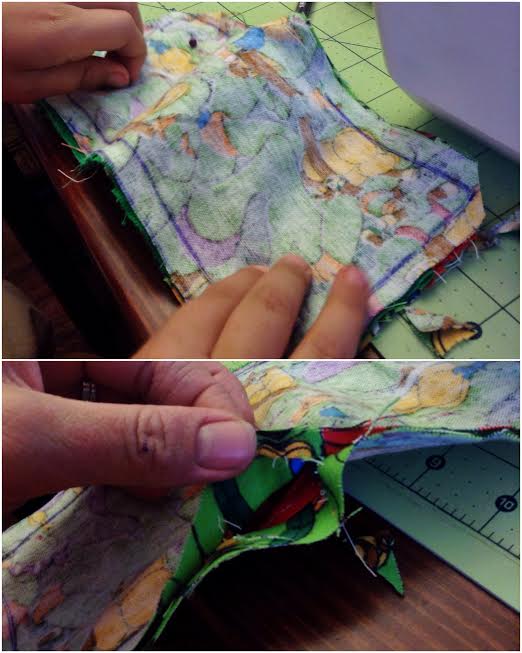
Take the simple pocket piece and fold it in half, right sides together, forming a 4.5″ x 3″ piece. Press (iron) the folded edge. Sew down the short edge to the right of the fold with a half-inch seam. (See picture below). [Draw a line to follow to make it easier to sew]. [Explain that the fabric doesn’t need to be pushed through the machine. It just needs to be guided as the machine feeds it along].
Turn the pocket right-side out. Set aside.
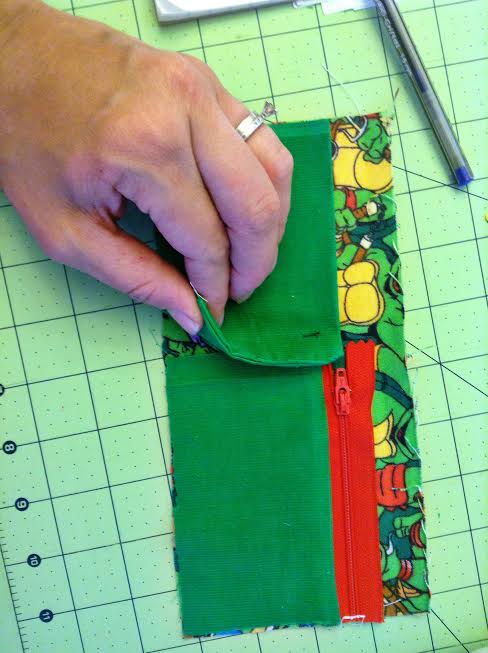
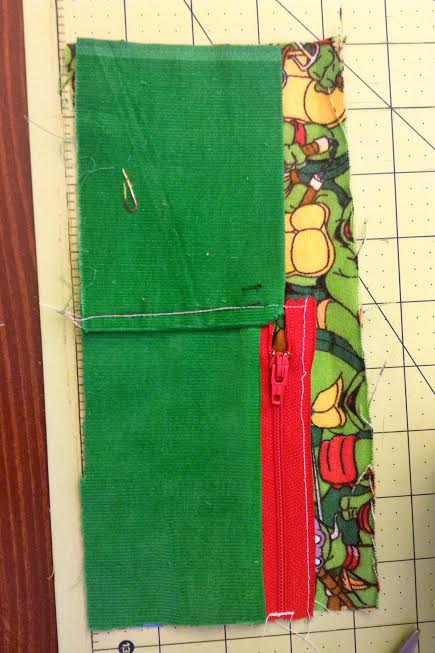
3. Make the zipper pocket.
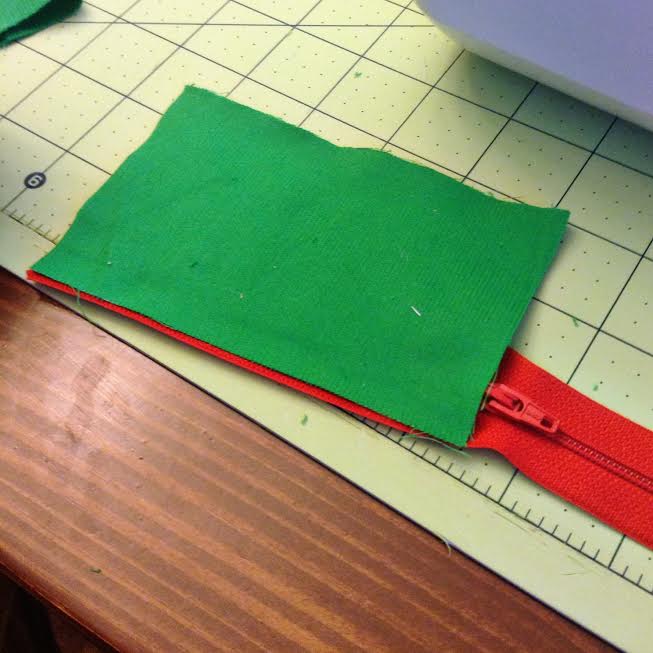
Lay the zipper out in front of you with the zipper pull to the left. Lay the second pocket piece right-side down so that the bottom edge of the fabric lines up with the bottom edge of the zipper. (See picture below). Pin in place. Pull the zipper to the end of the fabric so that it stays out of the way when you sew.
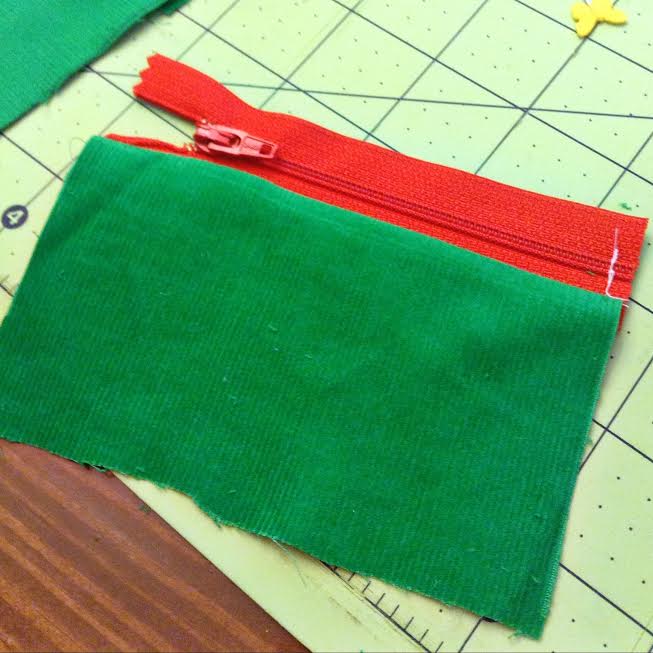
Sew along the edge of the zipper with a 3/8″ seam. Fold the fabric down so that the fabric is now right-side out and the zipper is along the top edge.
Trim the end of the zipper so that it is the same length as the fabric. Sew near the edge of the zipper back and forth a couple of times to make a new stopping point for the zipper. (See picture below).
4.Press (iron) the pockets.
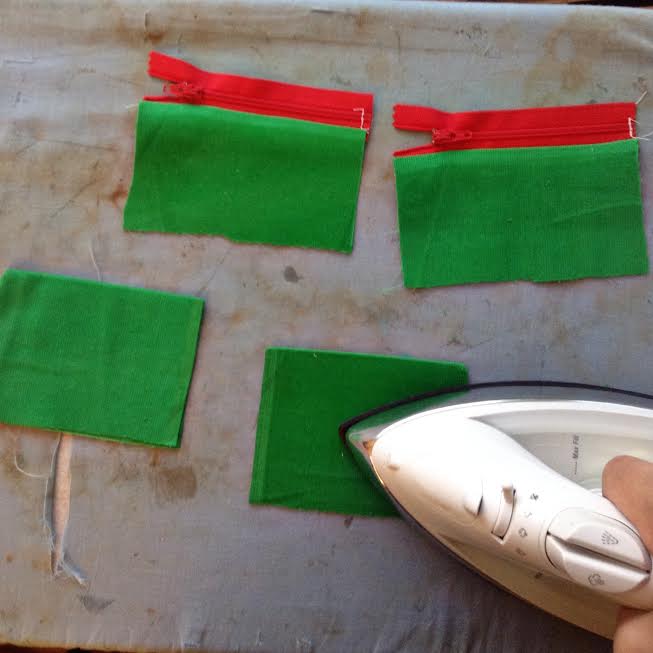 (we made two wallets, hence four pockets)
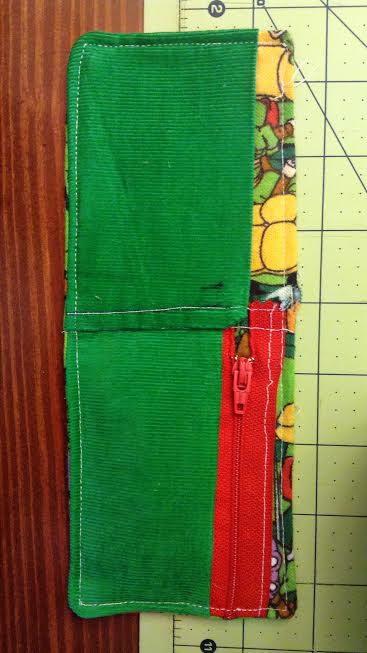
5. Attach the pockets.
Line the pockets up on one of the large wallet pieces. Place the simple pocket on the left and the zipper pocket on the right. Overlap the right edge of the simple pocket so that it is covering the raw edge of the zipper pocket. Pin in place. (See picture below). Sew a line down the middle of the wallet, attaching the two pockets. [Draw a line to follow to make it easier to sew].
6. Sew the wallet together.
Lay the wallet piece with the pockets right-side up in front of you. Place the second large wallet piece right-side down on top of the pocket piece. Line up the edges and pin in place. [Draw a line to follow to make it easier to sew].
Starting in the middle of the top edge, sew around the perimeter of the wallet with a half-inch seam. [Teach your child how to use the presser foot as a seam allowance guide]. Leave a two inch opening on the top edge for turning the wallet right-side out.
7. Finish the wallet.
Clip the corners. Turn the wallet right-side out. Press (iron) the edges flat. Topstitch (sew close to the edge) around the entire wallet.
Want more handmade gift ideas?
Subscribe to This Pilgrim Life (on the right sidebar) and follow along on Twitter and Facebook To keep up with all the ideas in 31 Days to a Handmade Christmas.
You can also find a list of all the handmade gifts on the series page.
[…] Child-Made Wallet (kids can make this simple wallet for their friends or younger siblings!) […]