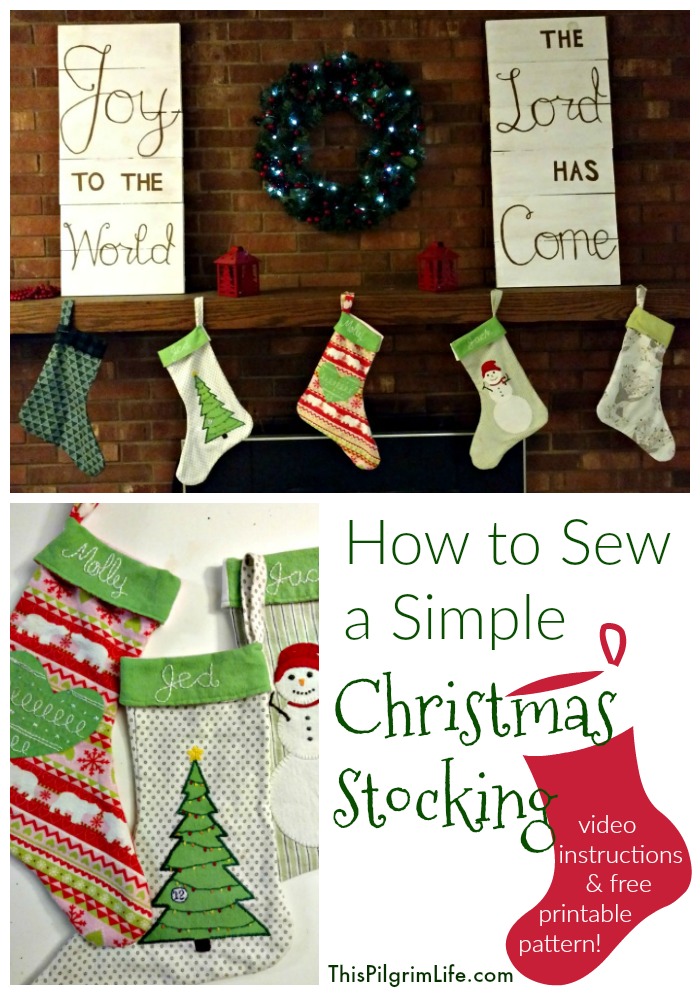
Make and personalize simple Christmas stockings to hang and fill in your home!

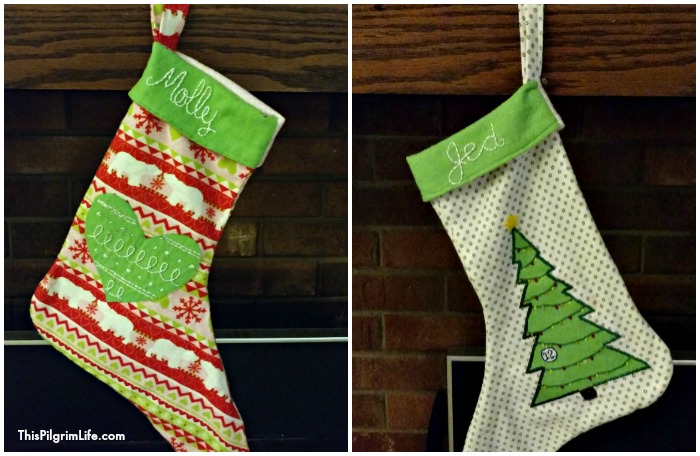
Over the years, I have made Christmas stockings for our family. The stockings are simple and made using the same shape and pattern. Each one is embellished with a Christmas themed picture and the family member’s name.
Stockings are one of my favorite parts of Christmas. I love filling them and I especially love to watch my children unpack them and see their excitement as each treat is pulled out and discovered.
My own stocking was made over thirty years ago by my mother and it still hangs on my mantle today. I love that I have been able to carry on the handmade stocking tradition with my children, even if their stockings are a little simpler than mine.
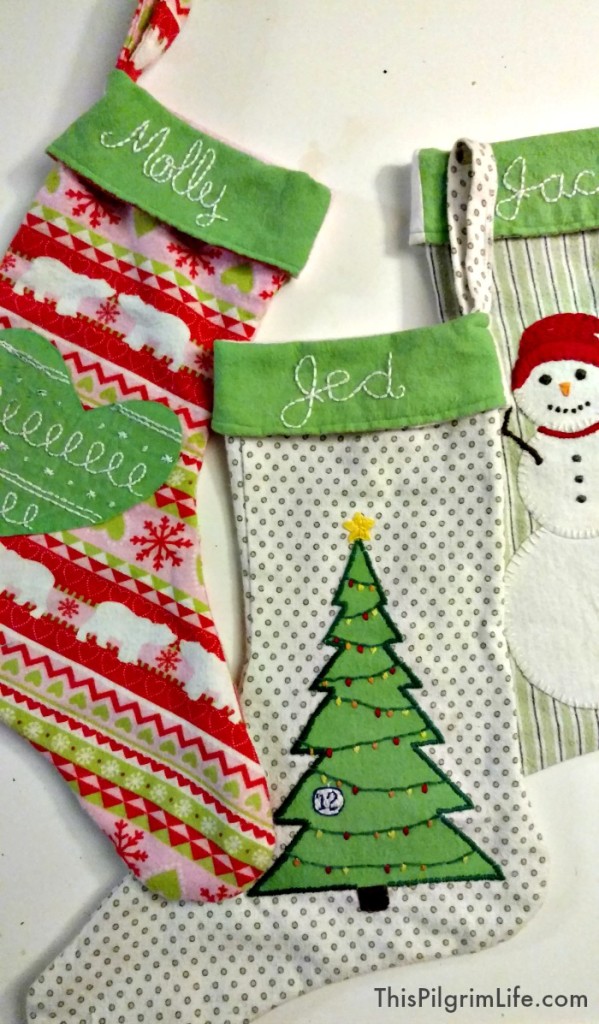
Our stocking are made with soft felt– in part because it is inexpensive and can be found in so many fun prints, and in part because early on I was repurposing my sons’ receiving blankets they no longer needed.
You can use felt, cotton prints, or a mix of both. The only other material you will need is extra flannel or felt for the pictures on the front and embroidery thread.
Below you will find step-by-step instructions, and a link to a video I made showing each step in the process. I recommend watching the video if the written steps seem at all confusing. You will also find a PDF pattern you can open and print.
How to Sew A Simple Christmas Stocking
Watch the video with full step-by-step instructions!
Step 1: Print & Cut Out Pattern
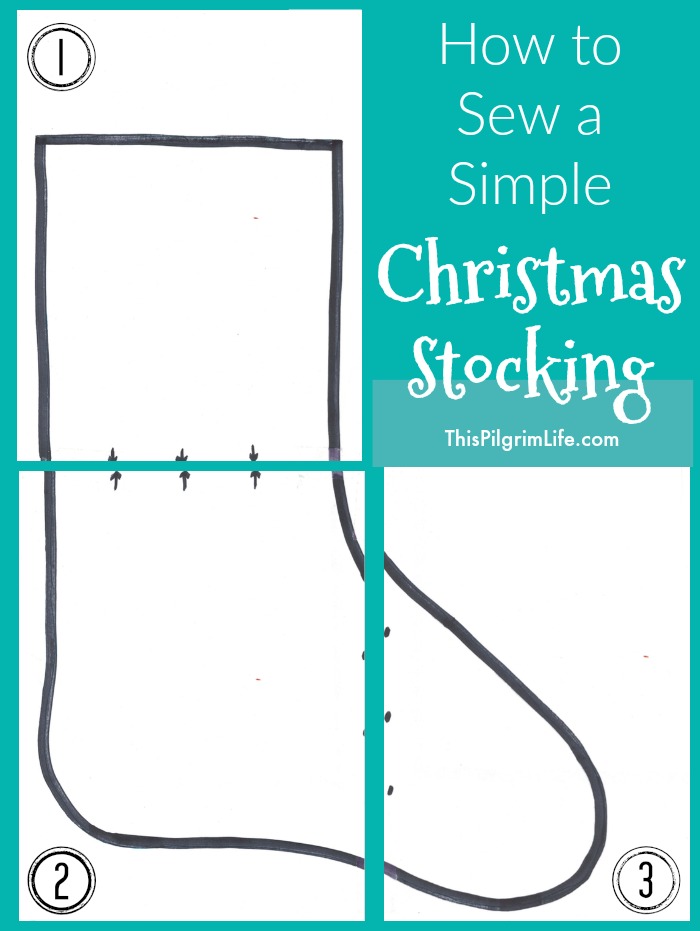
Click on the picture above or its caption to print the three pattern pieces. Put them together as pictured, matching the arrows and dots. Tape the pieces together, then cut out the stocking.
Step 2: Cut out Stocking Pieces
Lay the stocking pattern on top of your fabric. You will need two pieces for the inner stocking and two for the outer stocking. TIP: Fold your fabric so that the wrong sides are together and cut the stocking pieces out two at a time to be sure you have two stocking pieces facing opposite directions.
Step 3: Sew Inner & Outer Stockings*
Place the inner stocking pieces right sides together and sew around the edges with a half-inch seam, leaving the top edge open. Trim the seam allowance.
Place the outer stocking pieces right sides together and sew around the edges with a three-eighths inch seam, leaving the top edge open. Clip the curves. Turn the stocking right side out and press.
Insert the inner stocking into the outer stocking, matching the toe and side seams together.
Step 4: Finish Top & Embroider Name (Optional)
Fold the top edges of the stocking down so that you have a three inch border with the inner stocking on the outside. Embroider the name on the front of the border or leave it plain.
Fold in the bottom edge of the inner and outer pieces of the border a quarter-inch and press. Sew around the bottom edge to finish the seam.
Step 5: Make & Attach Hanging Loop
Cut out a piece of fabric 2.5″ by 10″. Fold the short ends in towards the wrong side a quarter-inch and press. Fold the long edges in towards the middle about a half-inch and press. Fold the strip of fabric in half lengthwise so that the raw edges are all concealed and press.
Sew down the short sides and the long side of the strip of fabric close to the edge to close the seam.
Fold the hanging loop in half, tuck the ends into the side of the stocking and sew across the short sides to attach the loop to the stocking.
*If you are adding a picture to the front of your stocking, you will want to sew it on before you sew the stocking pieces together.

Sharing is caring! Help support this blog by pinning and sharing. Thank you!
[…] Need/want new stockings? I have a simple tutorial to make your own. […]